Do you have a question about the Panasonic PT-EW630U and is the answer not in the manual?
General guidelines for safe projector handling and servicing.
Procedure to check leakage current for electrical safety.
Warnings regarding UV radiation and lamp handling.
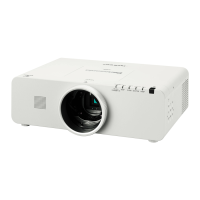
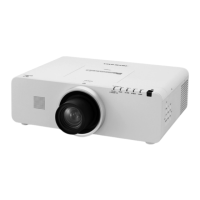
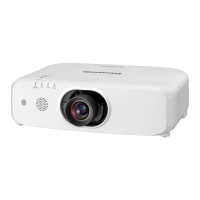
Lists projector model numbers.
Electrical power requirements and consumption details.
Details about the LCD panel size, display method, and pixels.
Details of the projector's input and output terminals.
Physical dimensions of the projector.
Details about the main fuse and its replacement procedure.
Information on the thermal fuse and its function.
Explanation of mechanical switches for air filter and lamp cover.
Details on temperature and wind sensors monitoring projector conditions.
Detection circuits for power failure and fan operation errors.
Steps for cleaning and replacing the air filter unit.
Information on the lamp unit, checking runtime, and replacement.
Step-by-step instructions for replacing the lamp unit.
Procedures for accessing internal components for quick service.
Instructions for removing and installing the projection lens.
General cleaning instructions for the projector.
Explains security functions like Key Lock and PIN Code Lock.
Steps to reset security functions to factory defaults.
Shows screw types and dimensions used in disassembly.
Procedure to remove the lamp and prism covers.
Steps to remove the projector's top cabinet assembly.
Procedure to remove the fan and main/AV boards.
Procedure for removing the optical unit assembly.
Procedure to remove the power box and thermal switch.
Instructions for rearranging cables after part replacement.
Precautions for handling sensitive LCD panel and polarized glasses.
Steps for removing the LCD panel/prism assembly.
How to check the type of LCD panel assembly (R-type or L-Type).
Steps for removing the polarized glass assembly.
Procedure for removing the PBS and integrator lens assembly.
Steps for removing the condenser lens assembly.
Exploded view of the mirror (B) assembly.
Diagram showing the arrangement of optical parts within the unit.
Steps to follow after replacing the main board.
Procedures for transferring serial number and model number data.
Setting color shading and gamma correction data.
Overview of adjustments needed after replacing parts.
Adjustments related to optical components.
Adjustments related to electrical components.
Instructions on how to enter and operate the service menu.
Fine adjustments to factory-set circuits; caution advised.
Adjusting fan voltage levels using service mode.
Checking and setting the LCD panel type for optimal performance.
Auto-calibration procedure for PC input signals.
Diagrams showing test points and locations on main and power boards.
Table of adjustment items, ranges, and initial values.
Block diagram showing major components and their interconnections.
Diagnosing issues when the projector has no power or indicators blink.
Troubleshooting issues related to fan control.
Troubleshooting issues related to lamp control.
Troubleshooting steps when the projector displays no picture.
Diagnosing and resolving issues with motor controls for focus, zoom, etc.
Troubleshooting issues related to bus control and data communication.
Troubleshooting issues with LED indicators and remote control signals.
Explains the status indicated by ON/STANDBY, LAMP, and TEMP indicators.
How to interpret and act on indicator status during operation.
Diagnosing and resolving internal temperature issues indicated by lights.
Troubleshooting power issues indicated by indicator status.
Troubleshooting air filter issues based on indicator status.
Troubleshooting lamp issues indicated by indicator status.
Troubleshooting shutter issues indicated by indicator status.
Explains the power failure detection lines and error information table.
Table listing error codes, information, and failure areas.
Block diagram illustrating power failure detection paths.
Explains the error history log and how to access it.
Procedure to reset the error log entries.
Procedure for diagnosing power failures using RS-232C serial port.
Information on connecting to the projector via RS-232C interface.
Pinout details for the D-Sub 9-pin serial connector.
Describes the basic command format for serial control.
Explains the command format including sub-commands.
List of available commands for controlling the projector via computer.
Detailed pinout information for control ports.
Pin descriptions for the FPGA (XC3S50A) and IC5201.
Pin function details for the IIC Bus D/A Converter.
Block diagram of the FA5502M IC for power factor control.
Block diagram of the IP00C783 IC for keystone correction.
Block diagram of BA6287 IC for motor drive control.
Block diagram of BA6920 IC for lens shift motor drive.
Block diagram of BA7078 IC for sync separation.
Block diagram of CXA7010 IC for sample and hold.
Block diagram of ISL51002 IC for analog-to-digital conversion.
Block diagram of M62393 IC for digital-to-analog conversion.
Block diagram of NJW1156 IC for audio selection.
Block diagram of THS7347 IC for 3-channel analog switching.
Block diagram of PW392 IC for video scaling.
Block diagram of STR-A6079 IC for power switching.
Block diagram of LIS331 IC for G-sensor functionality.
Block diagram of TB6608 IC for iris driver control.
Block diagram of MB95F353EPFT IC as a sub CPU.
Block diagram of SSC9512S IC for power switching.
Block diagram of IP00C783 IC for keystone correction.
Illustrations of projector parts for identification.
List of projector parts with their corresponding part numbers.
Safety notice for components identified by a warning symbol.
Exploded view of the projector's cabinet top assembly.
Exploded view of the projector's cabinet bottom assembly.
Exploded view of the main board and A/V assembly.
Exploded view of the projector's filter box assembly.
Exploded view of the projector's power box assembly.
Exploded view of projection lens, optical unit, and iris assembly.
Exploded view of the LCD panel and prism assembly.
Exploded view of the polarized glasses assembly.
Exploded view of the PBS and integrator lens assembly.
Exploded view of the condenser lens assembly.
Exploded view of the relay lens (In) assembly.
Exploded view of the mirror (B) assembly.
Diagram showing the arrangement of optical parts within the unit.
Shows the locations of various labels on the projector.
Diagrams illustrating the projector's packing materials.
Images of included accessories such as remote control and cables.
List of packing materials for shipping and protection.
List of labels and their descriptions.
List of included accessories for the projector.
List of parts related to the projector cabinet.
List of screws used for assembly and disassembly.
List of optical components of the projector.
List of optical parts, including LCD panel and polarized glass.
Explains how to read capacitor and resistor descriptions.
List of capacitors with their specifications.
List of resistors with their specifications.
List of assembled circuit boards and their part numbers.
List of individual circuit boards and their part numbers.
Electrical parts list for Group 0.
Electrical parts list for Group 430.
Continues the list of electrical parts.
Continues the list of electrical parts.
Continues the list of electrical parts.
Continues the list of electrical parts.
Continues the list of electrical parts.
Continues the list of electrical parts.
Continues the list of electrical parts.
Continues the list of electrical parts.
Continues the list of electrical parts.
Continues the list of electrical parts.
Continues the list of electrical parts.
Continues the list of electrical parts.
Continues the list of electrical parts.
Continues the list of electrical parts.
Continues the list of electrical parts.
Continues the list of electrical parts.
Continues the list of electrical parts.
Continues the list of electrical parts.
Continues the list of electrical parts.
Continues the list of electrical parts.
Continues the list of electrical parts.
Continues the list of electrical parts.
Continues the list of electrical parts.
Continues the list of electrical parts.
Continues the list of electrical parts.
High-level overview of the schematic diagrams available.
Overview of circuit board diagrams.
Safety notice for components identified by a warning symbol.
Explains HOT and COLD indications in schematic diagrams.
General precautions for handling schematic diagrams and circuits.
Illustrations of common diode, transistor, FET, and IC pin configurations.
Key to signal color coding used in the schematic diagrams.
Cautionary notes regarding component replacement and circuit safety.
Schematic diagram of the projector's power supply circuits.
Schematic diagram of the main circuit board.
Block diagram of the HDMI receiver IC (IC8001).
Schematic diagram of the main circuit board (continued).
Schematic diagram of the main circuit board (continued).
Schematic diagram of the main circuit board (continued).
Schematic diagram of the main circuit board (continued).
Schematic diagram of the main circuit board (continued).
Schematic diagram of the main circuit board (continued).
Safety precautions for servicing printed wiring boards.
Printed wiring board layout for the A/V section (Side A).
Printed wiring board layout for the ID connect section (Side A).
Printed wiring board layout for the filter switch section (Side A).
Printed wiring board layout for the RC & LED section (Side A).
Printed wiring board layout for the main board (Side A).
Printed wiring board layout for the main board (Side B).
Printed wiring board layout for the sensor C section (Side A).
Printed wiring board layout for the sensor A section (Side A).
| Matrix size | 0.75 \ |
|---|---|
| Projection distance | - m |
| Projection technology | LCD |
| Contrast ratio (typical) | 5000:1 |
| Screen size compatibility | 40 - 400 \ |
| Projector native resolution | WXGA (1280x800) |
| Keystone correction, horizontal | ±40 ° |
| Power LED | Yes |
| RS-232 ports | 1 |
| Connectivity technology | Wired |
| Focus | Auto/Manual |
| Focal length range | 26.9 - 45.4 mm |
| Aperture range (F-F) | 1.7 - 2.3 |
| Lamp type | UHM |
| Lamp power | 330 W |
| Light source type | Lamp |
| Service life of light source | 3000 h |
| Service life of light source (economic mode) | 4000 h |
| Full HD | No |
| Analog signal format system | NTSC, NTSC 4.43, PAL 60, PAL M, PAL N, SECAM |
| RMS rated power | 10 W |
| Serial interface type | RS-232 |
| USB 2.0 ports quantity | 0 |
| Component video (YPbPr/YCbCr) in | 3 |
| Ethernet LAN data rates | 10, 100 Mbit/s |
| HDCP | - |
| Noise level | 37 dB |
| Noise level (economic mode) | 31 dB |
| Product color | White |
| Power source | AC |
| AC input voltage | 100 - 240 V |
| AC input frequency | 50 - 60 Hz |
| Power consumption (standby) | 11 W |
| Power consumption (typical) | 490 W |
| Storage temperature (T-T) | 0 - 40 °C |
| Operating relative humidity (H-H) | 20 - 80 % |
| Depth | 434 mm |
|---|---|
| Width | 489.5 mm |
| Height | 164 mm |
| Weight | 10300 g |