
V
vsharpSep 23, 2025
What to do if there is condensation inside the CD changer of my Panasonic Stereo System?
- KKevin BrownSep 23, 2025
Wait for 60 minutes before using the CD player.
What to do if there is condensation inside the CD changer of my Panasonic Stereo System?
Wait for 60 minutes before using the CD player.
What to do if there is no sound when a source is being played on my Panasonic SC-AK17?
If there is no sound when a source is being played, it is possible that the (+) and (–) wires of the speaker cords are shorted. To resolve this, switch the system to standby mode, then reconnect the speaker cords ensuring they are not shorted. After doing so, switch the system back on.
What to do if my Panasonic Stereo System cannot be operated with the remote control?
If the system cannot be operated with the remote control, check the batteries. They may be installed with reversed polarity. Re-insert the batteries in the correct polarity.
How to fix reversed left and right sounds on my Panasonic Stereo System?
If the left and right sounds are reversed, the left and right connections to the speaker may be reversed. Connect the speaker cords correctly.
What to do if, when listening to the external unit, the left and right sounds are reversed on my Panasonic SC-AK17?
If, when listening to the external unit, the left and right sounds are reversed, the left and right connections to the external unit may be reversed. Connect the external unit’s cord correctly.
What to do if the disc is scratched on my Panasonic Stereo System?
If the disc is scratched, replace the disc with a new one.
What to do if there is no operation when pressing buttons during system standby mode on my Panasonic Stereo System?
If there is no operation when [DISC 1] – [DISC 5] / [TAPE] / [CD] / [TUNER] / [AUX] is pressed during system standby mode, there may have been a power failure or the power cord was disconnected from the household AC outlet during disc changing operation or when the disc tray is opened. Press [f/I] to switch on the system. The tray will open. Take out CD from the tray if there is any, then press [c OPEN/CLOSE 1] to close the tray. The system will restore normal operation.
What to do if the disc is dirty on my Panasonic Stereo System?
If the disc is dirty, wipe the disc with a soft cloth.
What to do if the sound is low, intermittent, poor quality, noisy, scratchy, or unsteady on my Panasonic Stereo System?
If the sound is low, intermittent, of poor quality, noisy, scratchy, or unsteady, the heads may be dirty. Clean the heads.
What to do if the picture on the TV disappears or stripes appear on the screen when using my Panasonic SC-AK17?
If the picture on the TV disappears or stripes appear on the screen, the location and orientation of the antenna may be incorrect. If you are using an indoor antenna, change to an outdoor antenna.
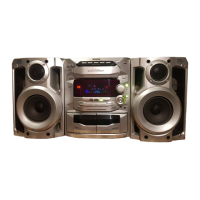
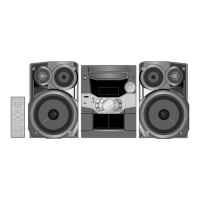
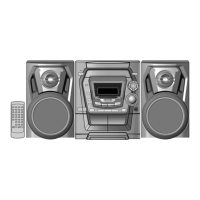
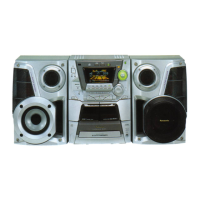
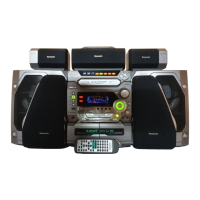
Provides instructions for operating the CD stereo system.
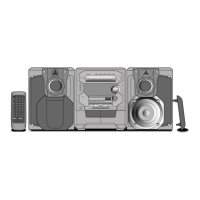
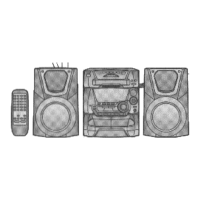
Lists and identifies all accessories included with the system.
Advice on where to place the unit to avoid damage and ensure optimal performance.
Guidance on electrical safety, power sources, and handling foreign materials.
Instructions for self-repair limitations and contacting service centers.
Step-by-step instructions for safely replacing the fuse in the AC power plug.
Guidance on inserting and managing batteries for the remote control unit.
Tips for proper operation and preventing damage to the remote control and system.
Recommendations for positioning speakers for optimal sound and ventilation.
Instructions for connecting supplied accessories like antennas and power cord.
Details on connecting optional antennas and external audio devices.
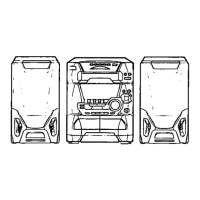
Identification and function of controls on the main unit's top and front.
Identification and function of controls on the center console section of the main unit.
Further identification of controls on the main unit's front panel.
Detailed breakdown of buttons and their functions on the remote control.
Instructions to disable the display demonstration mode for power saving.
Explanation and activation of the power-saving economy mode.
Procedure for setting the 24-hour clock on the system.
How to start playback automatically from standby for various sources.
Automatic and manual methods for saving favorite radio stations.
Steps for manual tuning, auto-tuning, and adjusting volume for radio.
Procedure for inserting CDs into the player and understanding disc indicators.
Guidelines to avoid damaging the unit or CDs during playback.
How to play CDs sequentially and control playback with pause and skipping.
Using direct access, repeat, and random play functions for CDs.
Creating and managing custom playback sequences for CDs, including cancellation.
Using the CD Manager function to select specific tracks or discs for playback.
Steps for tape playback, type compatibility, stopping, and changing decks.
Using tape controls for fast forward, rewind, and locating program segments.
Explanation of the Dolby B NR system for reducing tape hiss.
Tape types for recording and initial setup for recording from tape.
How sound settings affect recording and procedures for erasing recorded sound.
Steps for recording radio, including stopping, reverse, and specific points.
Using the Beat Proof function to minimize noise during AM radio recording.
Steps for setting up, starting, and controlling CD to tape recording.
How to record specific programmed tracks from a CD onto tape.
Using CD Manager for recording specific tracks or discs onto tape.
Procedures for setting up, starting, and controlling tape-to-tape copying.
Using preset sound quality and sound field modes like HEAVY, CLEAR, DISCO.
Activating and adjusting the super woofer and V.BASS for enhanced bass.
Using the AI equalizer to fine-tune sound quality with subtle settings.
Activating the 3D AI equalizer for enhanced spatial sound effects.
Customizing sound quality using the manual equalizer controls.
Configuring the system to play music or other sources at a set time.
Programming the system to record radio broadcasts or external sources.
Managing and checking settings for the play and record timers.
Setting the system to turn off automatically and operating the sleep timer.
Instructions for using external units via AUX and recording from them.
Guidelines for headphone use, display modes, and volume muting.
Guidelines for proper handling, cleaning, and storing of CDs.
Instructions for selecting, using, and protecting cassette tapes from damage.
Solutions for common issues related to sound, reception, and broadcast playback.
Resolving specific issues like interference, tape/CD problems, and performing maintenance.
| RMS power output | 100 W per channel (6 Ω) |
|---|---|
| 1 kHz continuous power output | 74 W per channel (6 Ω) |
| Input sensitivity (AUX) | 250 mV |
| FM frequency range | 87.50 – 108.00 MHz |
|---|---|
| FM sensitivity (S/N 26dB) | 1.5 µV |
| AM frequency range | 522 – 1629 kHz |
| Speaker type | 3 way speaker system |
|---|---|
| Super Woofer | 14 cm cone type |
| Dimensions (WxHxD) | 220 x 330 x 279 mm |
| Power supply | AC 230-240 V, 50 Hz |
|---|---|
| Power consumption | 145 W |
| Dimensions (WxHxD) | 270 x 331 x 340 mm |
| RMS power output (UK) | 30 W per channel (6 Ω) |
|---|---|
| RMS power output (Others) | 45 W per channel (6 Ω) |
| 1 kHz continuous power output (Others) | 35 W per channel (6 Ω) |
| FM frequency range | 87.50 – 108.00 MHz |
|---|---|
| FM sensitivity (S/N 26dB) | 1.5 µV |
| AM frequency range | 522 – 1629 kHz |
| Speaker type | 2 way speaker system |
|---|---|
| Woofer | 12 cm cone type |
| Dimensions (WxHxD) | 210 x 330 x 250 mm |
| Power supply | AC 230-240 V, 50 Hz |
|---|---|
| Power consumption | 120 W |
| Dimensions (WxHxD) | 270 x 331 x 316 mm |