EasyManua.ls Logo

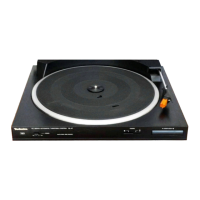
Panasonic Technics SL-1300

Panasonic Technics SL-1300
8 pages
To Next Page IconTo Next Page
To Previous Page IconTo Previous Page
Loading...
@
AC
POWER
PLUG
Never
connect
the
AC
power
plug
until
assembly
has
been
completed!
center
of
the
arm
lift
bar.
Pushing
down
on
this
curved
bar
will
make
the
screw
accessible.
Clockwise
rotation
...Arm
height
lowers.
Counterclockwise
rotation...Arm
height
raises.
@
STROBO
ILLUMINATOR/PILOT
LAMP
@
ANTI-SKATING
FORCE
CONTROL
This
dual-function
illuminator
is
lit
only
when
the
player
is
“on”
and
the
turntable
platter
is
rotating.
VARIABLE
PITCH
CONTROLS
Turn
this
knob
clockwise
or
counterclockwise,
as
necessary,
to
reduce
or
increase
the
rotational
speed
of
the
turntable.
Clockwise
rotation
..
This
increase
the
speed
of
the
turntable
(+
direction)
platter.
Rotate
clockwise
if
the
strobo
dots
seem
to
be
“falling
back”;
i.e.,
seem
to
be
moving
counterclockwise.
When
the
dots
appear
to
be
stationary,
turntable
speed
is
accurate.
Counterclockwise
rotation
.
This
decreases
the
speed
of
theturn-
(=
direction)
table
platter.
Rotate
counterclockwise
it
the
dots
seem
to
be
“running
ahead”:
j.e.,
seem
to
be
moving
clockwise,
until
they
appear
stationary.
Each
of
the
two
turntable
speeds
(33-1/3
and
46
r.p.m.)
can
be
adjusted
within
a
range
of
10%
SPEED
ADJUSTMENT
SCREWS
If,
for
any
reason,
the
adjustment
cannot
be
successfully
made
by
the
variable
pitch
controls,
turn
these
screws
clockwise
or
counterclockwise
with
a
(—),
tip
screw
driver.
Clockwise
The
rotation
of
the
turntable
platter
will
be
slowed
down.
Counterclockwise...
The
rotation
will
be
speeded
up.
After
the
adjustment
has
been
made,
the
speed
will
not
change
and
re-adjustment
will
not
be
necessary.
@
TURNTABLE
PLATTER
The
turntable
platter
of
this
set
also
works
as
part
of
the
rotor
of
the
motor.
Never
remove
the
turntable
platter
unnecessarily.
Never
stick
dust
or
iron
filings
to
adhere
to
the
magnet
rotor.
@
STROBO
DOTS
These
strobo
dots,
set
on
the
tapered
rim
of
the
turntable
platter
to
make
strobo
reading
easier,
are
divided
into
four
and
45
r.p.m.)
at
50
Hz
and
60
Hz
AC
as
follows
45
r.p.m.
at
0
Hz
93-1/3
r.p.m.
at
50
Hz
45
r.p.m.
at
60
Hz
33-1/3
r.p.m.
at
60
Hz
@
TONEARM
RETURN
ADJUSTMENT
SCREW
In
some
cases,
the
tonearm
will
tend
to
return
to
its
rest
position
before
the
record
has
finished
playing.
In
other
cases,
it
will
to
return
to
the
rest
position
even
after
the
record
has
finished
Rotation
of
this
screw
in
the
proper
direction
will
correct
either
condition.
Clockwise
rotation
...The
tonearm
will
return
to
rest
lat
Counterclockwise
rotation...The
tonearm
will
return
to
rest
ear-
STYLUS
SET-DOWN
ADJUSTMENT
SCREW
To
be
adjusted
if
the
tonearm
fails
to
set
down
at
the
right
start-
ing
point
at
the
beginning
of
the
record.
For
access
to
the
screw,
a
rubber
cap
above
it
must
be
removed.
Clockwise
rotation
...This
will
move
the
set-down
point
out-
ward,
away
from
the
record
center.
Counterclockwise
rotation...This
will
move
the
set-down
point
inward
toward
the
record
center.
®
ARM
LIFT
ADJUSTMENT
SCREW
When
the
tonearm
is
removed
from
the
record
surface
via
the
tonearm
lift,
the
space
between
the
stylus
tip
and
the
record
surface
should
be
between
5
and
10
mm
(between
3/16”
and
25/64"),
If
this
height
needs
adjustment,
turn
the
screw
along
the
KNOB
Turn
this
knob
to
the
same
number
as
the
stylus
pressure
ring
indicates.
Skating
force
is
the
frictional
force
caused
by
contact
between
the
tip
of
the
stylus
and
the
record
groove,
and
is
applied
to
the
stylus
as
a
side
pressure
depending
upon
the
relationship
of
the
geometrical
position
of
the
tonearm.
This
force
results
in
an
unbalance
of
the
contact
pressure
be-
tween
the
stylus
tip
and
each
groove
wall
of
the
record,
an
increase
of
distortion,
a
decrease
of
separation
characteristics
and
abnormal
wear
of
the
stylus
tip
and
the
record
grooves.
For
this
reason,
it
is
necessary
to
compensate
this
skating
force.
This
anti-skating
force
mechanism
performs
this
compensation
function.
The
quantity
of
anti-skating
force
is
in
proportion
to
the
stylus
pressure
and,
therefore,
it
should
be
adjusted
according
to
the
stylus
pressure.
ARM
CLAMP
Be
sure
to
release
the
arm
clamp
before
operating
the
start/
stop
lever.
@
CUEING
LEVER
Move
this
lever
downward
or
upward,
then
the
tonearm
will
descend
or
ascend
on
the
record
surtac
Downward
movement...
The
tonearm
will
descend
slowly
on
the
record
surface
and
resume
playing
in
the
same
groove.
The
tonearm
will
raise
from
the
record
surface
and
interrupt
playing.
MEMO-REPEAT
KNOB
Set
this
knob
to
the
desired
number
of
times
you
want.
(R)
is
continuous
play.
@
RECORD
SIZE
SELECTOR
Set
this
knob
to
the
diameter
of
the
record
to
be
played.
@
START/STOP
LEVER
Pull
this
lever
for
automatic
start
and
stop
functions,
NOTE
If
the
MEMO-REPEAT
knob
is
set
to
the
other
positions
than
(0),
then
the
unit
will
not
shut
off
and
will
continue
playing
until
the
times
which
you
set.
2
BEFORE
USING
@
CHECK
THE
PARTS
Player
unit
i
e
Turntable
platter
F
:
Turntable
sheet
Dust
cover.
45
r.p.m.
adaptor
Special
oi
(~)
tip
screw
driver
Screws
(for
cartridge)
(long).
Screws
(for
cartridge)
(short)
Auxiliary
weight
@
REMOVE
THE
TRANSIT
SCREWS
Remove
the
two
screws
for
transformer
and
place
them
in
the
screwing
holes
for
future
use,
as
when
the
player
must
again
be
transported.
@
APPLY
TWO
OR
THREE
DROPS
OF
OIL
TO
THE
MOTOR
SHAFT
To
lubricate,
open
the
tip
of
the
vessel
with
a
needle,
and
apply
two
or
three
drops
of
oil
to
the
motor
shatt.
(See
Fig.
1)
@
REMOVE
THE
PROTECTING
COVER
OF
THE
ROTOR
OF
THE
TURNTABLE
PLATTER
NoTE
NEVER
CONNECT
THE
AC
POWER
PLUG
UNTIL
THE
ASSEMBLY
HAS
BEEN
MADE!
Upward
movement,

Related product manuals