11
TIPS: 1) Only TIF format can be saved as 48bit color depth.
2) Click the folder icon to choose the location for
saving your scanned images on your computer or
memory card (if you have inserted a memory card in
the scanner).
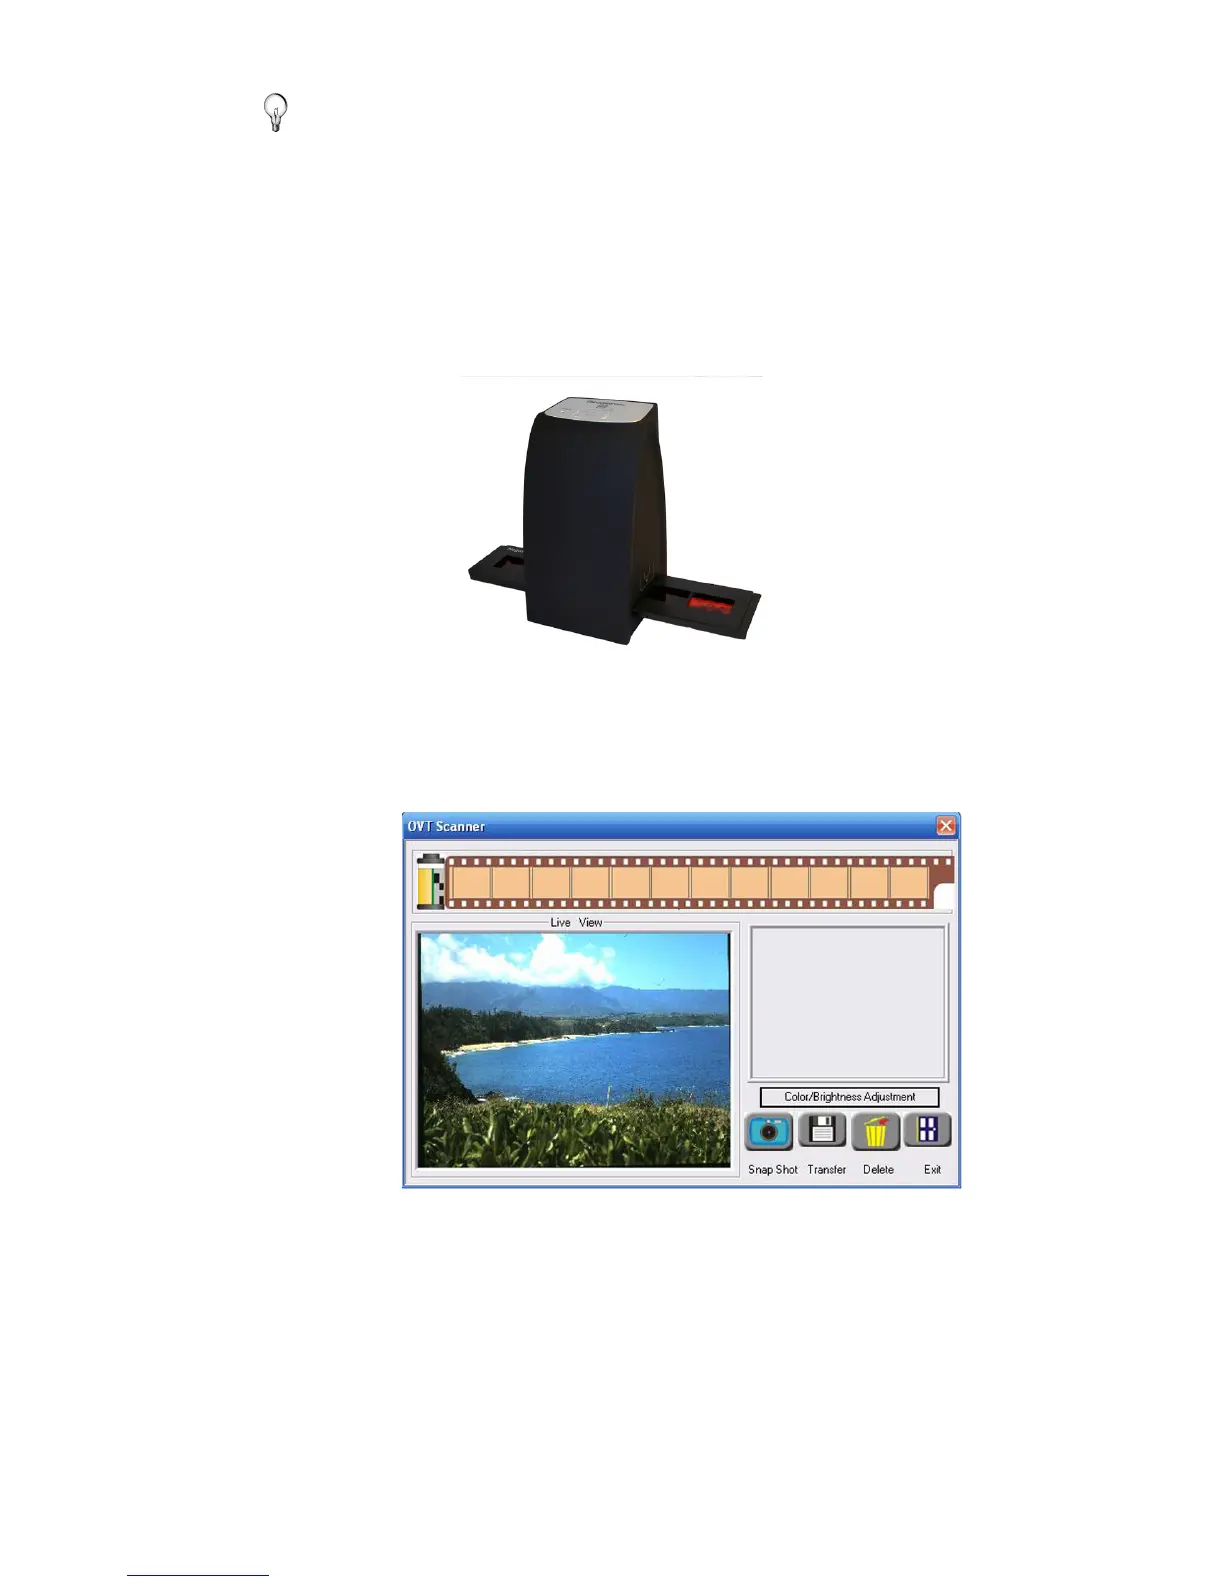
6. Insert the negative or slide tray into the scanner slot from the
right side of the scanner.
7. Wait until the colors are stabilized, (click
Color/Brightness
Adjustment
to change colors if desired), and then click
Snap Shot or press the SCAN button on the scanner.
8. When the scan is complete, an image thumbnail will be
added to the film strip at the top of the window. Push the
negative/slide tray through the scanner to continue scanning
the originals.

 Loading...


