CRAC/CRAH Sensor Hardware Installation Manual
- 32 -
Validating and Commissioning the
Installation
Validate and commission the ThermaNode installation by activating the ThermaNode
and checking sensor and node operation and communication with the SynapSense Web
Console software application.
Before beginning the following steps, first verify (with lead supervisor or installer) all
necessary installation activities, including software installation and file exports are com-
pleted. Assure all peripheral hardware and software is powered on and functional (gate-
way, server, etc.).
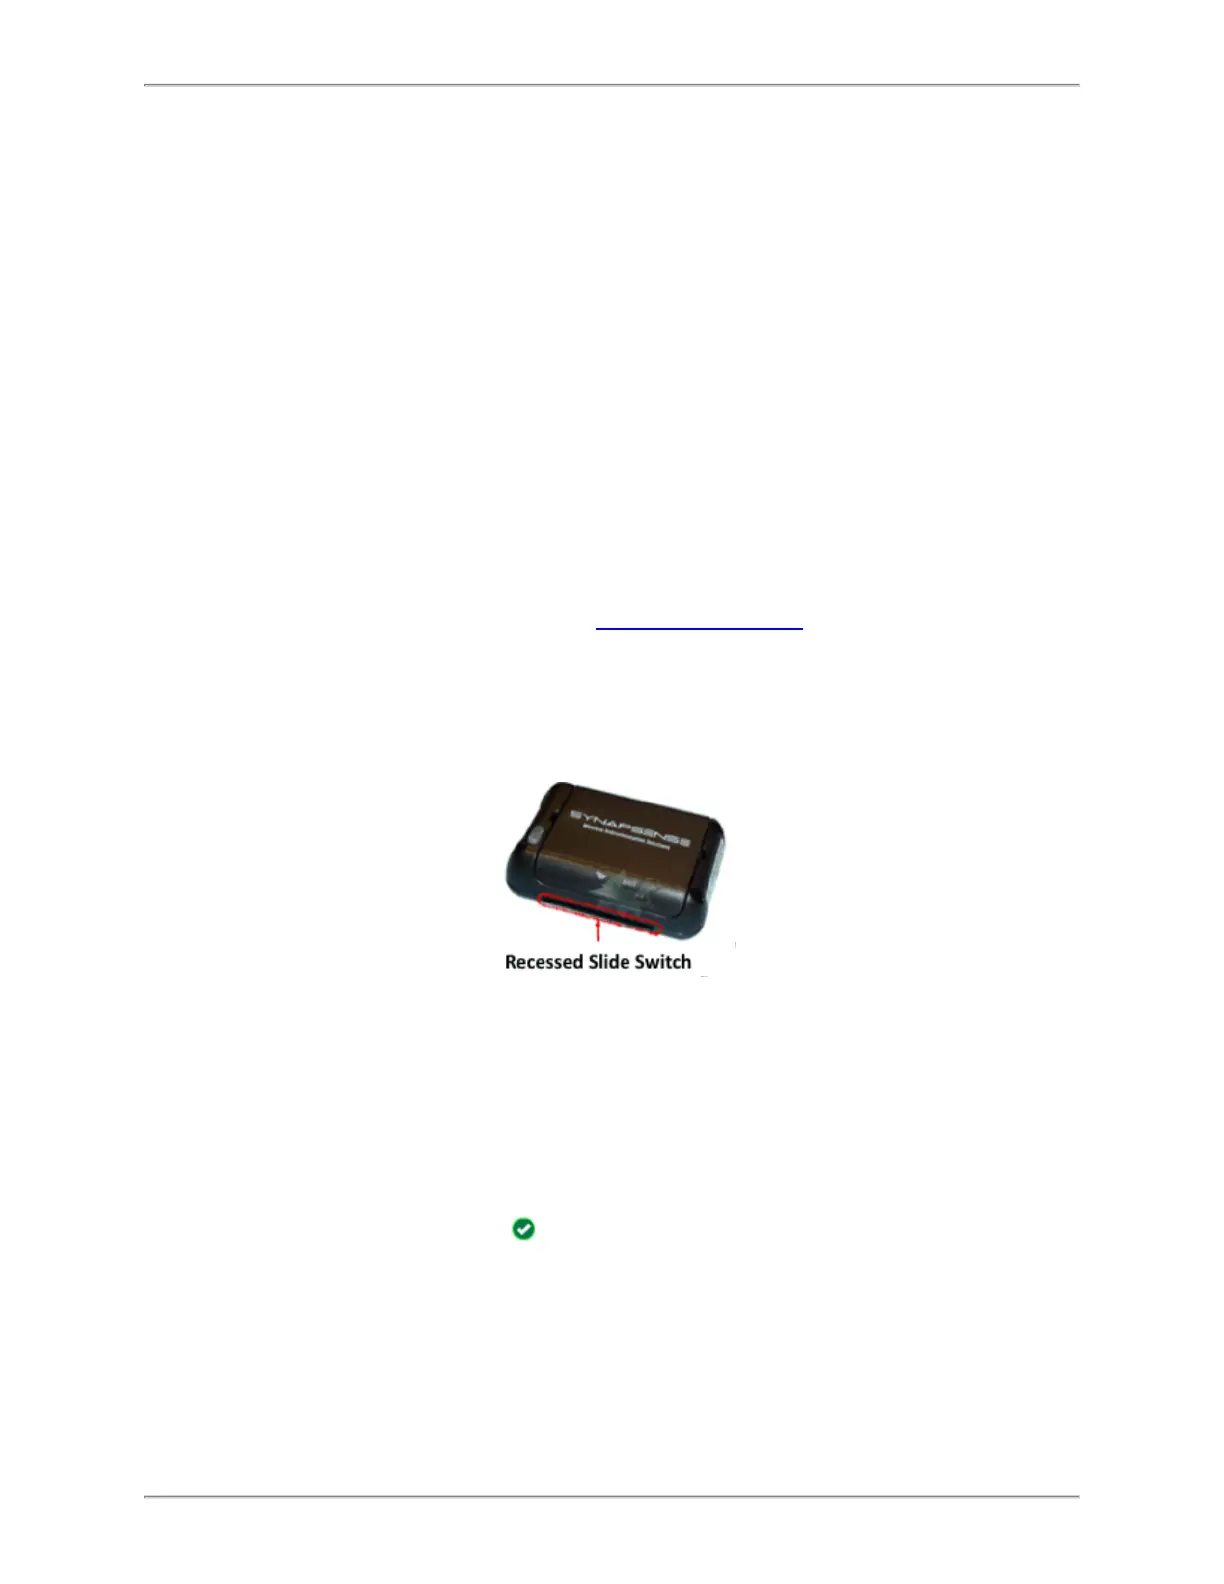
1. Power on the ThermaNode.
a. Slide the switch in the recessed slot to the ON position. Ensure LED light
sequence initiates properly (refer to ThermaNode LEDs in the following section
for more information).
b. If accidental activation occurs, reset node by sliding the switch to the OFF state,
complete sensor installation, and reactivate node by sliding the switch to the ON
position.
2. Inspect sensor-to-software communication to confirm sensor node operations and
communications. Refer to the Web Console User Guide for detailed information.
a. Open Web Console.
b. Select the data center from the Sites list.
c. Click the Data View tab.
d. Select CRAC/CRAH from the Data View: dropdown menu. A tabular view
of the Cabinet Node data displays.
e.
Verify green checks for each installed node in the Status column.
A red “X” in the Input columns indicates a problem. Ensure the node is ON,
and check for loose connections or damaged wires.