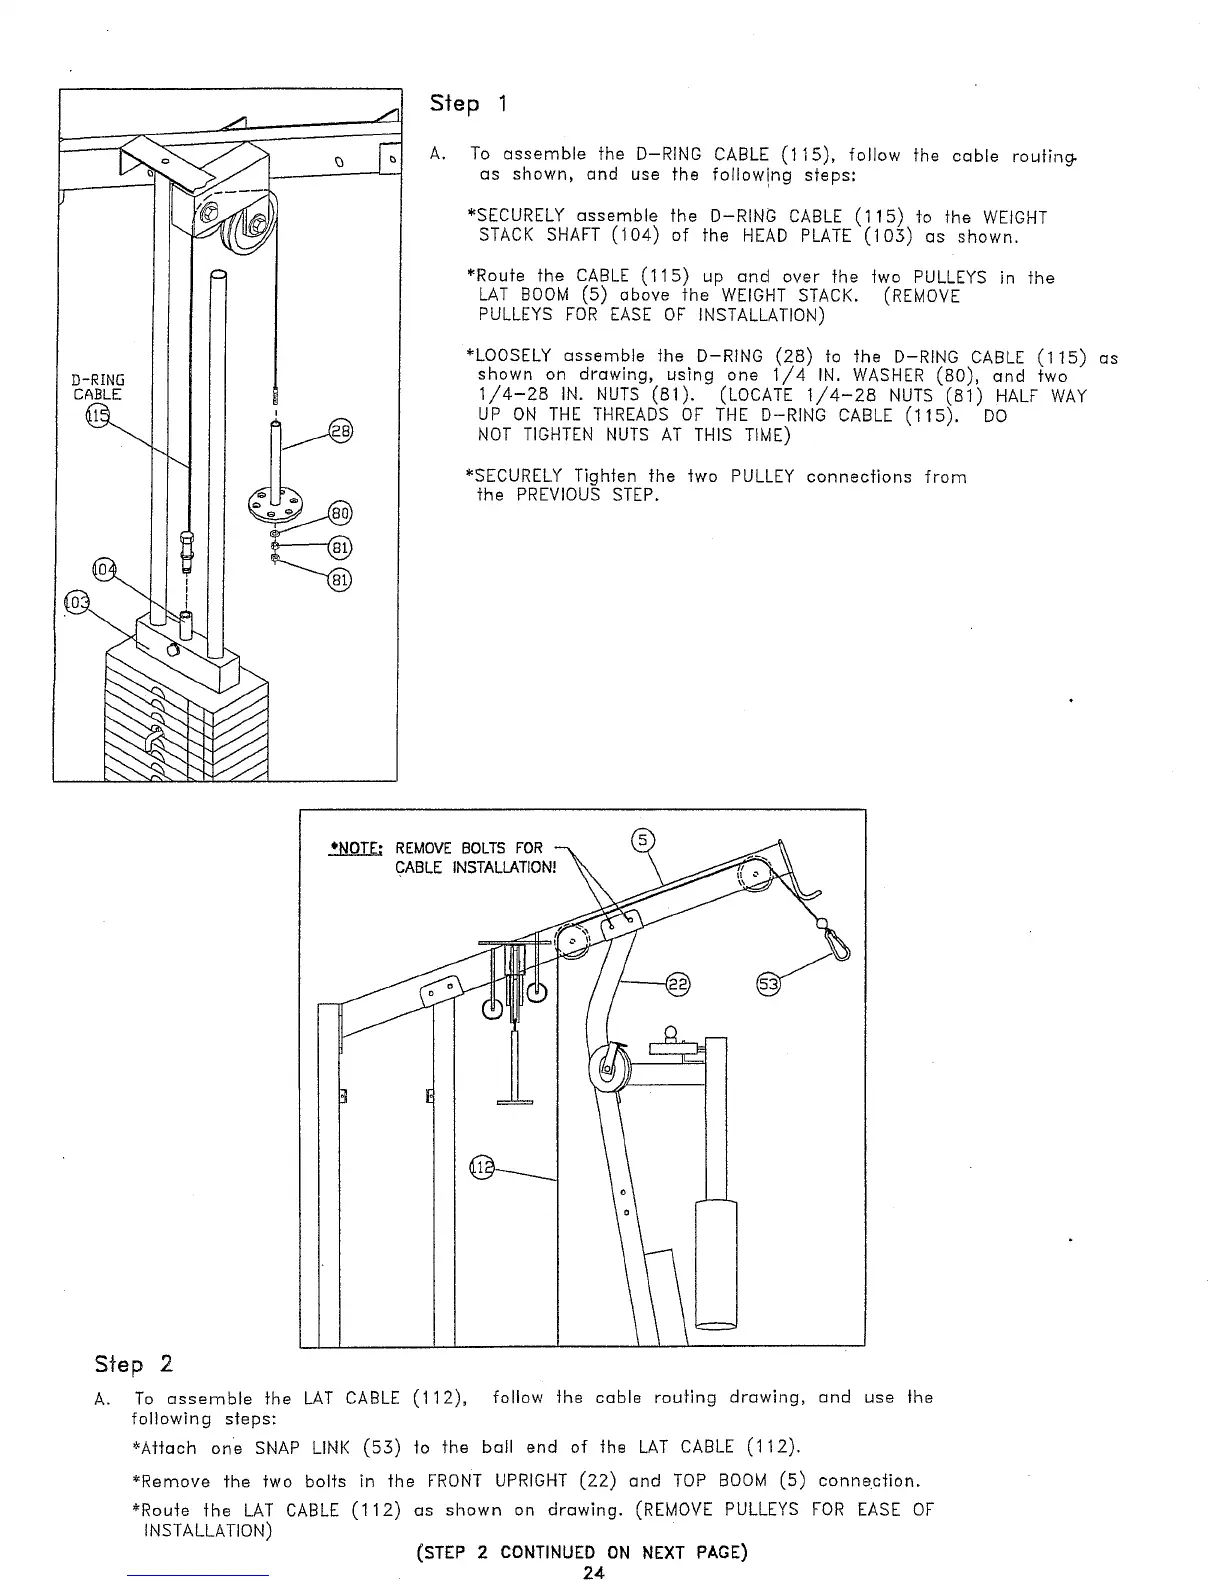
S~ep 1
To assemble the D-RING CABLE (115), follow the cable routin#
as shown, and use the follow!ng steps:
*SECURELY assemble the D-RING CABLE (115) to the WEIGHT
STACK SHAFT (104) of the HEAD PLATE (10.5) as shown.
*Route the CABLE (115) up cmd over the two PULLEYS in the
LAT BOOM (5) aboYe the WEIGHT STACK. (REMOVE
PULLEYS FOR EASE OF INSTALLATION)
*LOOSELY assemble the D-RING (28) to the D-RING CABLE (115)
shown on drawing, using one 1/4 IN. WASHER (80), and two
1/4-28 IN. NUTS (81). (LOCATE 1/4-28 NUTS (81) HALF
UP ON THE THREADS OF THE D-RING CABLE (115).
NOT TIGHTEN NUTS AT THIS TIME)
*SECURELY Tighten the two PULLEY connections from
the PREVIOUS STEP.
*NOTE;
REMOVE BOLTS FOR
CABLE INSTALLATION!
Step 2
A.
To assemble the LAT CABLE (112),
follow the cable routing drawing, and use the
following steps:
~Attach one SNAP LINK (55) to the bull end of the LAT CABLE (112).
~’Remove the two bolts in the FRONTUPRIGHT (22) and TOP BOOM (5) connection.
~Route the LAT CABLE (112) as shown on drawing. (REMOVE PULLEYS FOR EASE
INSTALLATION)
(STEP 2 CONTINUED ON NEXT PAGE)
24
 Loading...