Do you have a question about the ParaBody GS6 and is the answer not in the manual?
Read and follow all safety rules and warnings before using the equipment to minimize risk.
Key instructions for assembly and required tools for the ParaBody GS6 Gym System.
Detailed list of all components and their respective part numbers and quantities.
Comprehensive list of all hardware, including bolts, nuts, washers, and spacers.
Securely assemble the REAR FRAME (D) to the BASE (A) using specified bolts and nuts.
Loosely assemble BASE PLATES (B) and FOOT ASSEMBLY (F) to the BASE (A) using bolts and nuts.
Securely assemble the FRONT FRAME (E) to the BASE PLATES (B) using specified bolts and nuts.
Check the assembly of the headplate and weight plates as shown in figures 4 and 5.
Insert guide rods, slide weight stack spacers, cushions, and plates.
Assemble top assemblies, securing them to the frame with bolts and lock nuts.
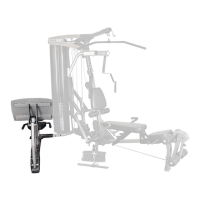
Securely assemble the PEC FLY MOUNT (U) and BACKING PLATE (V) to the FRONT FRAME (E).
Assemble RIGHT and LEFT PEC FLY ARMS (T, S) to the PEC FLY MOUNT (U) using specified hardware.
Assemble PEC HANDLES (P) to the LEFT and RIGHT PEC FLY ARMS (S, T) using bolts and washers.
Assemble SEAT ADJUST (M) and SEAT FRAME (AF) to base plates.
Assemble PIVOT ASSEMBLY (AG) and BENCH TUBE (J) to the seat frame and adjust.
Assemble SEAT SUPPORT BRACKET (O), SEAT HINGES (N), and seat pads (AQ, AR).
Assemble LEG PEDESTAL (AD) and BACK PAD (AP) to the frame components.
Assemble ROLLER PADS (AS) to the leg pedestal, seat frame, and front frame.
Assemble PRESS LOAD ARM (AE) and PRESS ARM (I) to the rear frame and upright.
Assemble PRESS ARM ADJUSTMENT (G) and connect it to the press arm components.
Attach press arm handles, connect push-pull cable, and assemble plastic sleeves.
Install LAT CABLE (AV), route it around pulleys, and assemble pulleys to frame components.
Route LOW CABLE (AW) through seat frame and assemble pulleys to leg pedestal and seat frame.
Assemble pulleys for the LOW CABLE (AW) to base plates and brackets using specified hardware.
Assemble pulleys and guards to base, tube, and press load arm, routing LOW CABLE (AW).
Assemble pulleys and guards for PEC FLY CABLE (AX) to mount, frame, and bracket.
Assemble AB CRUNCH CABLE (AY) and pulleys to front frame, pulley plates, and floating bracket.
Perform final adjustments, attach accessories like low row bar, ankle strap, and ab strap.
Recommendations for cleaning, lubrication, and inspecting the gym equipment.
Details on warranty coverage, terms, conditions, exceptions, and claim procedures.
Contact details for the Life Fitness Consumer Division and international offices.