IPR512: IP Monitoring Receiver 3 of 8 Quick Start
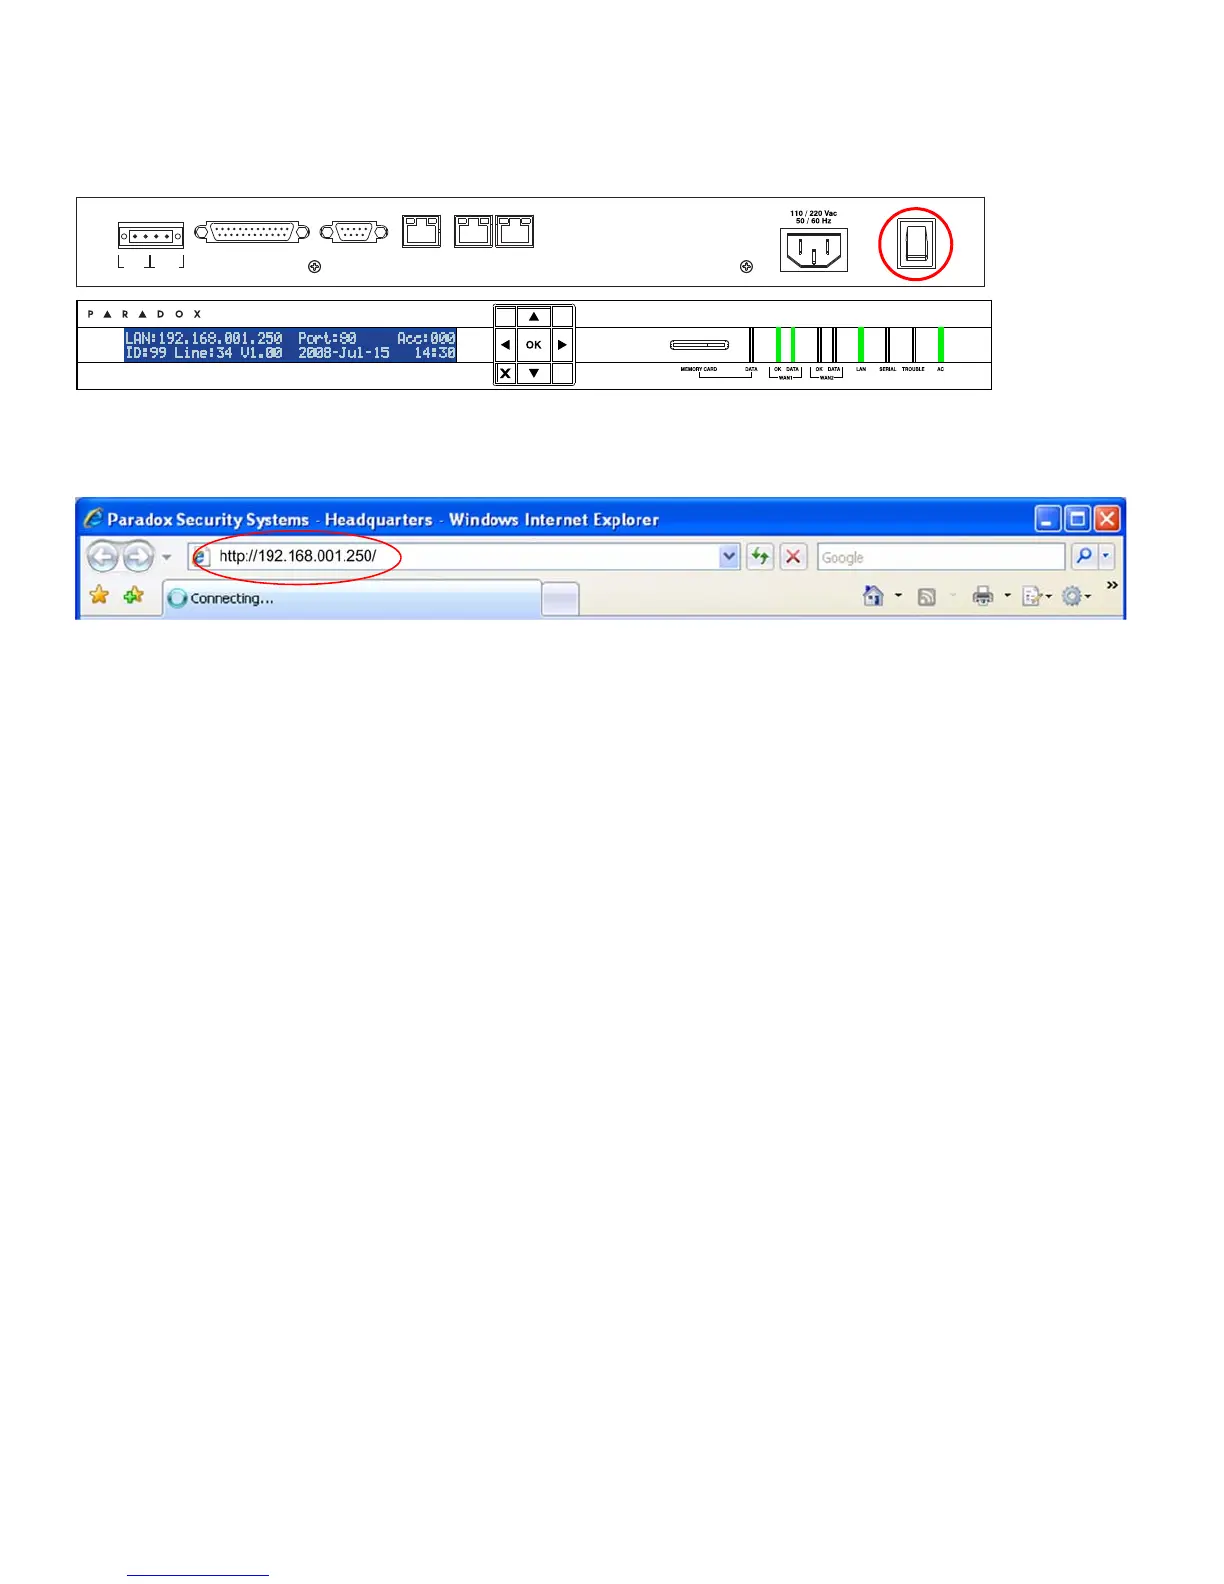
Step 7: Power Up
Turn on the receiver by pressing the on/off switch. The receiver will go through an initialization process. When complete,
the LCD will display the information show below and the WAN1, LAN and AC lights will be ON as shown below. Note: If the
TROUBLE light is ON, please refer to “Trouble and LED Display” on page 7. However, as long as the AC and LAN lights
are on, you can proceed to step 8.
Step 8: Access Receiver’s Web Page Interface
Open a web browser from a computer on the network connected to the receiver’s LAN port. Refer to “Step 3: Connect LAN
(Web Page Interface)” on page 2. In the address line, enter the receiver’s LAN IP Address (default: 192.168.001.250).
The Login window will appear. If you get an error page, you must change the receiver’s LAN IP address and Subnet Mask.
Speak to your network administrator to obtain an IP Address and Subnet Mask that will permit access to the receiver on
your network. Perform the following to change the receiver’s default IP Address and Subnet Mask:
1. Press OK on the receiver to access the Main Menu. If there are any troubles, pressing OK will enter the Trouble Menu.
If this occurs, press X to access the Main Menu.
2. Use the Up/Down arrows and scroll to LAN Settings and press OK. The LCD will display the
LAN IP Address and LAN Subnet Mask.
3. To change the IP Address, use the Up/Down arrows to change the value, use the Left/Right arrows to scroll and press
OK when done.
4. To change the Subnet Mask, use the Up/Down arrows to change the value, use the Left/Right arrows to scroll and
press OK when done.
5. The LCD will display New LAN settings saved for 4 seconds.
Step 9: Login
Enter the username (default: admin) and password (default: admin) and press the Login button. The username cannot be
changed, but you can change your password by clicking on Change Password.
COM 1
(PC)
COM
2
(SERIAL OUT)
LAN WAN
1 WAN 2
INPUT
TRIGGER
C1
COM NO
OUTPUT
RELAY
I
O
PARADOX.COM
IP Monitoring Receiver
IPR512