IPR512: IP Monitoring Receiver 4 of 8 Quick Start
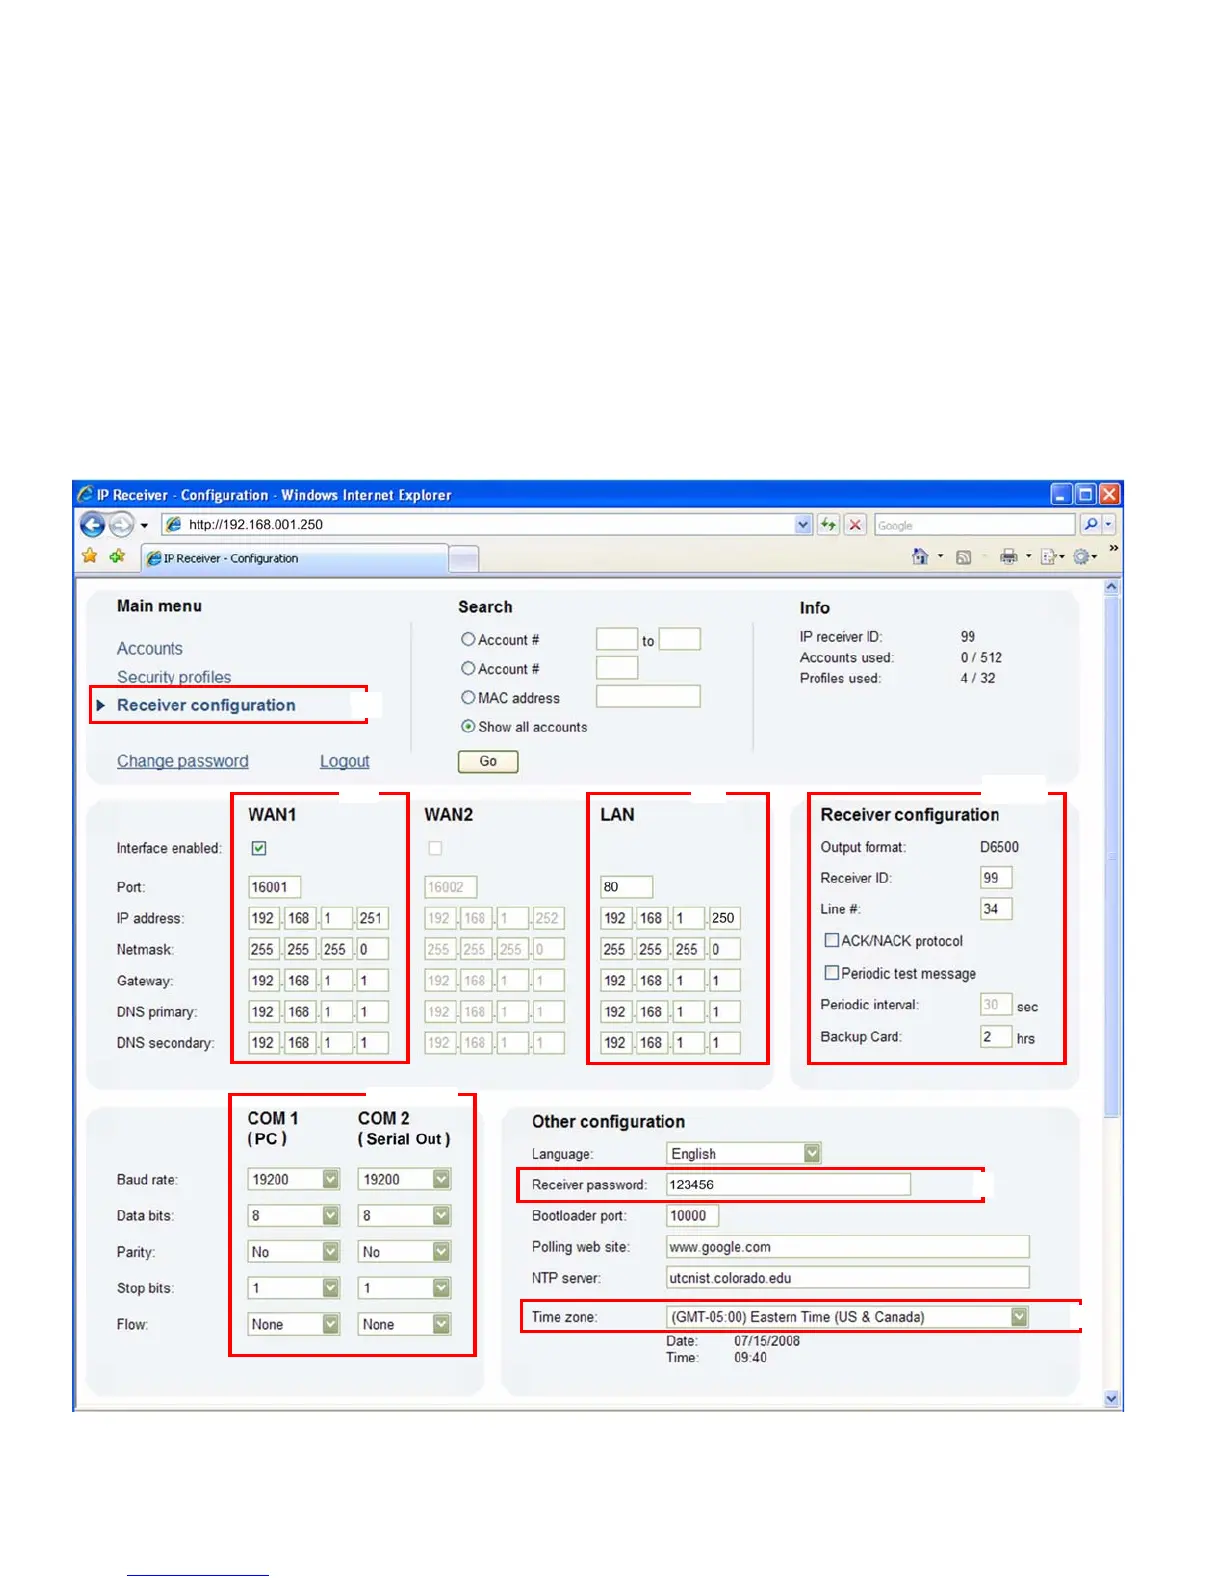
Step 10: Configure the Receiver
The following lists only the minimum programming required to get the receiver up and running. For more detailed
information on the settings in the Web Page Interface, please refer to the IPR512 Operations Manual.
1. From the Main Menu, click Receiver Configuration.
2. Enter the required WAN1 settings (speak to your network administrator).
3. Enter the required LAN settings (speak to your network administrator).
4. According to the automation software set the Receiver ID and Line #. (ID = 00 to 99 and Line = 00 to 34))
5. Select the ACK/NACK protocol check box, if you want the receiver to supervise communication with the Automation
Software.
6. In the PC column, adjust the COM1 port settings as required to communicate with the automation software.
7. Optional: In the Serial column, adjust the COM2 port settings as required to communicate with the printer/PC.
8. Type a password in the Receiver password text box. The password is a numerical value from 1 to 32 digits in length.
This password is used by the installer when registering a paradox reporting module to the receiver.
9. Select your Time Zone.
10. Scroll to the bottom of the page and click the Save button.