—
12
—
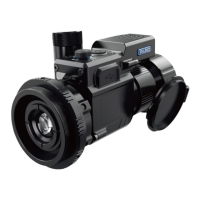
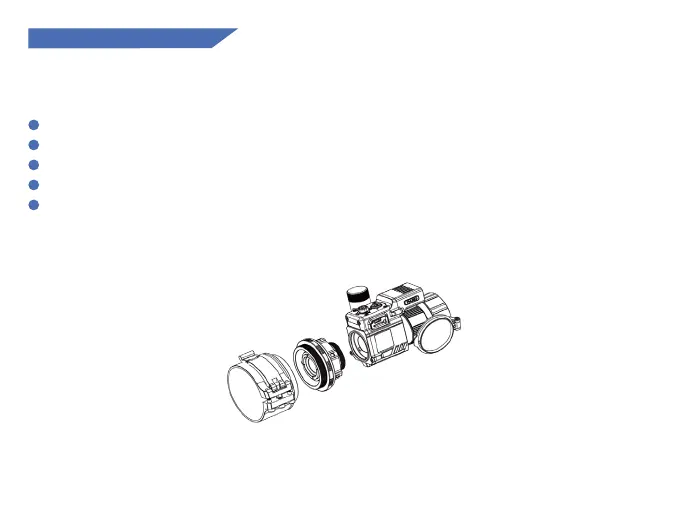
3. Adapter Installation
The adapter is not included in the package and needs to be purchased separately.
1
2
3
4
5
Prepare the thermal imaging device, one adapter, inserts and an Allen wrench.
Before installing the adapter, turn on the device to see the clear icons on screen.
Wrap 1-2 layers of insulating tape on the daytime scope's objective lens for protection.
Rotate the adapter to the thermal imaging eyepiece and release the adapter locking lever.
According to the diameter of the daytime scope's objective lens, select the right gasket(s) and
attach the adapter to the daytime scope, observe whether the display is in the center position
from the daytime scope's eyepiece, and adjust the level, press the adapter locking lever.
Picture 1