P
P
P
OWER
OWER
OWER
O
O
O
N
N
N
REFERENCE SEQUENCING
• Speed potentiometer across 1(low), 9(high),
2(wiper) OR
• External 2-wire speed reference between
1(-) and 2(+)
• Jumper 19 and 20 if no external trip contact
• Start contact between 12 and 20
• Jog contact between 16 and 20
• Reverse Direction contact between 15 and 20
• Health volt-free contacts between 21 and 22
• Running volt-free contacts between 23 and 24
CALIBRATION
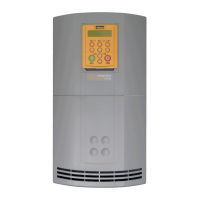
AC MOTOR DRIVE
7.5KW 400V 1.3
DIAGNOSTICS
Menu at Level 1
QUICK SETUP
Menu at Level 1
OPERATOR
Menu at Level 1
DOWN arrow to get to the DIAGNOSTICS menu
Press the M key to get to OPERATOR LEVEL
DOWN arrow to get to the QUICK SETUP menu
Press M to enter QUICK SETUP and set parameters relevant
to the operating mode of the drive by scrolling UP or DOWN
All calibration is done in software, through
the keypad
The 690+ can also be calibrated using the programming tool software
ESCAPE ONE LEVEL
ENTER MENU
SCROLL
UP
SCROLL
DOWN
The following is a list of the relevant parameters that you may need to check before starting the
drive. Several of these may not need adjustment if you are running a standard 60Hz, 460V 1800
RPM induction motor
V/Hz SV Vector
1 Control Mode Select the intended operating mode x x x
2 Max Speed Set max speed in RPM x x x
3 Min Speed Set min speed in % x x x
4 V/Hz shape Choose fan only for square curve x
5 Motor Current Motor full load current x x x
6 Motor Base Freq Motor nameplate frequency x x x
7 Motor Voltage Motor nameplate voltage x x x
8 Nameplate RPM Motor nameplate RPM x x x
9 Motor Poles for 1800rpm=4, for 1200rpm=6 x x x
10 Encoder Supply set between 5-15V to match encoder x
11 Encoder Lines Pulses per Revolution of encoder x
12 Encoder Invert Changes polarity of encoder feedback x
13 Autotune Enable Drive will Autotune if started x x
AUTOTUNE
• In the QUICK SETUP menu, set AUTOTUNE ENABLE to TRUE
• MAX SPEED should be greater than NAMEPLATE RPM for a successful autotune
• On the keypad press L/R for LOCAL mode
• Ensure that the motor is uncoupled and free to rotate without causing problems
• Press RUN. Drive will begin autotuning, The drive will stop without errors if autotune is successful
• Go to SYSTEM\SAVE CONFIG\APPLICATION and UP arrow to save your settings
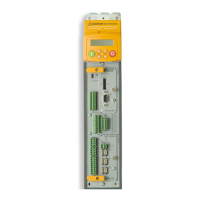
• The 6054 Encoder Techbox is required
only for closed loop Flux Vector Control
• Plug the 6054 into the left hand techbox
port, as shown. Securely snap into place,
then tighten the ground screw
• DIP switches 1,2,3,4 (blue arrow) set the
threshold voltage of the encoder signals.
Set all switches to ON (up position) for
complementary encoder signals
• Encoder connections to terminal block are:
1 (FUTURE) Health pulse H
2 (FUTURE) Health pulse H complement
3 Channel A
4 Channel A complement
5 Channel B
6 Channel B complement
7 Marker pulse M
8 Marker pulse M complement
9 Encoder Supply positive (5–15VDC)
10 Encoder Supply negative (0V)
11 Ground / Shield
SPEED FEEDBACK
Note
In V/Hz mode, Autotune is not
necessary and will not activate
This is the power-up welcome screen. If a different screen
appears, press E a few times to return to the this screen
START
START
JOG
JOG
REV DIR
REV DIR
HEALTH
HEALTH
N.O. CONTACT
N.O. CONTACT
RUNNING N.O. CONTACT
RUNNING N.O. CONTACT
SPEED
SPEED
REFERENCE
REFERENCE
EXT. TRIP
EXT. TRIP
+24VDC
+24VDC
 Loading...