Parker Hannin Corporation
Hydraulic Pump and
Power Systems Division
Marysville, Ohio USA
Bulletin HY28-2665-02/SVC/EN
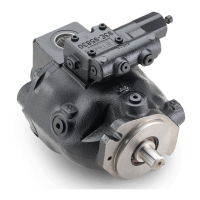
Medium Pressure Axial Piston Pumps
P1/PD Maintenance
35
2. Drain fluid from housing. Fluid drained from pump should be disposed of
properly.
3. Mount pump in fixture to prevent movement while removing main housing
bolts
4. Remove bolts holding the compensator assembly on the pump housing.
Additional fluid may drain out of the passages when the compensator is
removed. Set compensator aside for later disassembly and inspection
5. Remove the bolts attaching the port block to the main housing.
6. Carefully remove the port block. Use caution to avoid dropping the port
plate. Note the location of the bias spring - piston assembly and the control
piston assembly. The control piston, bias piston and bias spring may remain
in pump when port block is removed. Remove and discard the three white
Teflon seals on the port block. These seals should be replaced each time
the pump is disassembled.
7. Remove the control piston and the bias piston - spring assembly.
NOTE: For rotation change only, do not disassemble further, proceed to
step 16.
8. Remove the tapered roller bearing cone and shim from the end of the shaft.
9. Position the pump horizontally and remove the rotating group. Avoid
separating the
pistons from the barrel if possible. This will assist in
identifying damage between an individual piston and bore during component
inspection.
10. Remove the drive shaft.
NOTE: For shaft change only, no further disassembly is required. Proceed
to assembly procedure step 5.
11. Remove the cam by rotating it 90 degrees and carefully extracting it from the
pump housing. Note the large pocket under the cam fits on the pressure
control side of the pump housing (same side as the three seals on the
housing flange). Figure 2
Large Pocket
Pressure control
side of pump
Figure 2
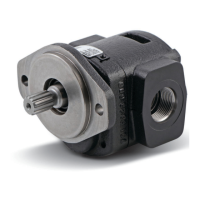
018, 028, 045 Pump Maintenance
2. Drain uid from housing. Fluid drained from pump should be disposed of
properly.
3. Mount pump in xture to prevent movement while removing main housing
bolts
4. Remove bolts holding the compensator assembly on the pump housing.
Additional uid may drain out of the passages when the compensator is
removed. Set compensator aside for later disassembly and inspection
5. Remove the bolts attaching the port block to the main housing.
6. Carefully remove the port block. Use caution to avoid dropping the port
plate. Note the location of the bias spring - piston assembly and the control
piston assembly. The control piston, bias piston and bias spring may remain
in pump when port block is removed. Remove and discard the three white
Teon seals on the port block. These seals should be replaced each time
the pump is disassembled.
7. Remove the control piston and the bias piston - spring assembly.
NOTE: For rotation change only, do not disassemble further, proceed to
step 14.
8. Position the pump horizontally and remove the rotating group. Avoid
separating the pistons from the barrel if possible. This will assist in
identifying damage between an individual piston and bore during component
inspection.
8a. If completing a seal change or complete overhaul on a 045 pump turn housing
over and remove the snap ring and shaft seal from the housing before moving
on to step 9.
9. Remove cam from housing. See Figure 2
PUMP DISASSEMBLY
Continued

 Loading...