Parker Hannin Corporation
Hydraulic Pump and
Power Systems Division
Marysville, Ohio USA
Bulletin HY28-2665-02/SVC/EN
Medium Pressure Axial Piston Pumps
P1/PD Maintenance
56
PUMP TEST PROCEDURE
TEST CIRCUIT
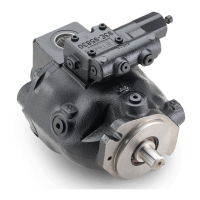
1. Test pump
2. Test stand prime mover
3. Pump pressure gauge
4. Non-compensating flow control
5. Load pressure gauge
6. Load relief valve
7. Safety bypass relief valve
8. Main flow meter
9. Case drain pressure gauge
10. Case drain flow meter
11. Filter assembly with bypass
12. Cooler assembly with bypass
13. Reservoir
NOTE: Items 4 and 5 are required
for load sense pump test.
Test criteria based on hydraulic oil ISO 32 per Parker HF-0 specifications.
Oil temperature: 50°C ± 2°C (120°F ±10°F). NOTE: insure that the hydraulic
system does not overheat during this test procedure.
Operating speed: 0 - 2300 rpm ± 30 rpm.
Case pressure: Maximum 14.5 psi (1 bar)
1. Mount pump on test fixture. Insure that shaft alignment is within specified
tolerances.
2. Fill case with clean oil. Connect upper drain port to reservoir with no
restrictions. Insure other drain ports are properly plugged.
3. Connect inlet and pressure lines. Insure that lines are filled with oil. Refer to
circuit below. For units with “L” compensators, connect a suitable pilot line
from port “X” to the pump discharge pressure line, down stream of the
non-compensating flow valve.
4. Confirm direction of rotation for pump and drive are correct.
5. Reduce the main compensator setting to minimum. For units with “L”
compensators, advance the load sense compensator adjustment unt
volume stop is included, back adjustment all of the way out.
il it
bottoms out, and lock into position.
6. Set maximum volume stop (if included) to full displacement. If minimum
7. If possible, gradually increase pump speed to 1800 ± 30 rpm with no load.
8. Screw in compensator adjusting screw until it bottoms out, with no pressure
on system load-relief valve.
9. Break-in pump at times
and pressures listed below. Adjust the load-relief
valve to the pressure listed for the times indicated. After break-in, reduce
compensator setting to 280 bar (4060 psi), and adjust system load relief to
cause pump to compensate three times to verify that pump compensates on
and off stroke properly.
Time 30 seconds 30 seconds 30 seconds
EM
8
2
7
6
4
1
11
12
10
5
9
13
3
“X”
Circuit 1
Pressure
PUMP TEST PROCEDURE
TEST CIRCUIT
1. Test pump
2. Test stand prime mover
3. Pump pressure gauge
4. Non-compensating flow control
5. Load pressure gauge
6. Load relief valve
7. Safety bypass relief valve
8. Main flow meter
9. Case drain pressure gauge
10. Case drain flow meter
11. Filter assembly with bypass
12. Cooler assembly with bypass
13. Reservoir
NOTE: Items 4 and 5 are required
for load sense pump test.
Test criteria based on hydraulic oil ISO 32 per Parker HF-0 specifications.
Oil temperature: 50°C ± 2°C (120°F ±10°F). NOTE: insure that the hydraulic
system does not overheat during this test procedure.
Operating speed: 0 - 2300 rpm ± 30 rpm.
Case pressure: Maximum 14.5 psi (1 bar)
1. Mount pump on test fixture. Insure that shaft alignment is within specified
tolerances.
2. Fill case with clean oil. Connect upper drain port to reservoir with no
restrictions. Insure other drain ports are properly plugged.
3. Connect inlet and pressure lines. Insure that lines are filled with oil. Refer to
circuit below. For units with “L” compensators, connect a suitable pilot line
from port “X” to the pump discharge pressure line, down stream of the
non-compensating flow valve.
4. Confirm direction of rotation for pump and drive are correct.
5. Reduce the main compensator setting to minimum. For units with “L”
compensators, advance the load sense compensator adjustment unt
volume stop is included, back adjustment all of the way out.
il it
bottoms out, and lock into position.
6. Set maximum volume stop (if included) to full displacement. If minimum
7. If possible, gradually increase pump speed to 1800 ± 30 rpm with no load.
8. Screw in compensator adjusting screw until it bottoms out, w
ith no pressure
on system load-relief valve.
9. Break-in pump at times and pressures listed below. Adjust the load-relief
valve to the pressure listed for the times indicated. After break-in, reduce
compensator setting to 280 bar (4060 psi), and adjust system load relief to
cause pump to compensate three times to verify that pump compensates on
and off stroke properly.
Time 30 seconds 30 seconds 30 seconds
EM
8
2
7
6
4
1
11
12
10
5
9
13
3
“X”
Circuit 1
Pressure
PUMP TEST PROCEDURE
TEST CIRCUIT
1. Test pump
2. Test stand prime mover
3. Pump pressure gauge
4. Non-compensating flow control
5. Load pressure gauge
6. Load relief valve
7. Safety bypass relief valve
8. Main flow meter
9. Case drain pressure gauge
10. Case drain flow meter
11. Filter assembly with bypass
12. Cooler assembly with bypass
13. Reservoir
NOTE: Items 4 and 5 are required
for load sense pump test.
Test criteria based on hydraulic oil ISO 32 per Parker HF-0 specifications.
Oil temperature: 50°C ± 2°C (120°F ±10°F). NOTE: insure that the hydraulic
system does not overheat during this test procedure.
Operating speed: 0 - 2300 rpm ± 30 rpm.
Case pressure: Maximum 14.5 psi (1 bar)
1. Mount pump on test fixture. Insure that shaft alignment is within specified
tolerances.
2. Fill case with clean oil. Connect upper drain port to reservoir with no
restrictions. Insure other drain ports are properly plugged.
3. Connect inlet and pressure lines. Insure that lines are filled with oil. Refer to
circuit below. For units with “L” compensators, connect a suitable pilot line
from port “X” to the pump discharge pressure line, down stream of the
non-compensating flow valve.
4. Confirm direction of rotation for pump and drive are
correct.
5. Reduce the main compensator setting to minimum. For units with “L”
compensators, advance the load sense compensator adjustment unt
volume stop is included, back adjustment all of the way out.
il it
bottoms out, and lock into position.
6. Set maximum volume stop (if included) to full displacement. If minimum
7. If possible, gradually increase pump speed to 1800 ± 30 rpm with no load.
8. Screw in compensator adjusting screw until it bottoms out, with no pressure
on system load-relief valve.
9. Break-in pump at times and pressures listed below. Adjust the load-relief
valve to the pressure listed for the times indicated. After break-in, reduce
compensator setting to 280 bar (4060 psi), and adjust system load relief to
cause pump to compensate three times to verify that pump compensates on
and off stroke properly.
Time 30 seconds 30 seconds 30 seconds
EM
8
2
7
6
4
1
11
12
10
5
9
13
3
“X”
TEST CIRCUIT
Time 30 seconds 30 seconds 30 seconds
Pressure
62-69 Bar
900-1000 psi
200-207 Bar
2900-3000 psi
269-276 Bar
3900-4000 psi
060, 075, 100, 140 Pump Test Procedure
PUMP TEST PROCEDURE

 Loading...