11 GB/CY
Preparing for use
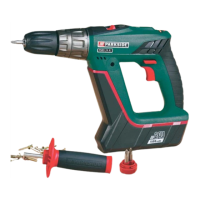
Push the coupler (see Fig. A) onto the recharge-
able battery pack
9
. Insert the mains plug
into the socket.
The red charge indicator LED
15
indicates that the
charging process has started. The red light goes out
as soon as the battery pack
9
is fully charged.
The green charge indicator LED
16
shows that
the charging process is complete and the
battery pack
9
is ready for use.
NOTE: If the rechargeable battery pack is discharg
ed
and still hot from from the tool being used, it will not
be recharged immediately. The charging process
will start automatically, as soon as the rechargeable
battery pack has cooled to an adequate temperature.
Do not use t
he quick-charge process to charge
a battery pack
9
for a second time in close
succession. Otherwise there is the danger that
the battery pack
9
will become overcharged
and its useful life and that of the charger reduced.
Switch the charger
14
off for at least 15 min-
utes between successive charging processes.
To do this pull the mains plug out of the socket.
Inserting / removing the battery
pack into / out of the device
Removing the rechargeable battery pack:
In order t
o remove the rechargeable battery,
turn the appliance 180°.
Press the unlocking button
8
and push the re-
chargeable battery pack
9
out of the appliance.
Inserting the rechargeable battery pack:
Push the r
echargeable battery pack
9
onto
the appliance.
Checking the battery
charge state
Press the battery charge state test button
3
.
The remaining charge capacity is shown on the
LED display
2
.
2-speed gear operation
In first gear (gear selector switch
1
in
position: 1)
the device achieves a speed of approx. 500 min
-1
and a high torque. For example, for screwing work
with small screw diameters.
In second gear (gear selector switch
1
in
position: 2)
the device achieves a speed of approx. 1800 min
-1
and a lower torque. For example, for rapid drill
progress in masonry or large drill or screw diameters.
Torque preselection
Use the torque preselection ring
13
to set the torque.
When this set torque is reached the clutch decouples
the drive. This allows you to screw in screws to a
predetermined depth, which is ideal e.g. for screw-
ing in a series of screws.
Select a low
er setting for small screws or soft
materials.
Select a high setting f
or large screws, hard ma-
terials, or when screwing out screws.
For dr
illing tasks select drilling setting by placing
the torque preselection ring in the
position.
Drilling / screwing /
impact drilling
Drilling / screwing:
Turn the setting ring
12
to the symbol .
Impact drilling:
Tur
n the setting ring
12
to the symbol .
Changing inserted tools
Your cordless hammer drill has a fully automatic spindl
e
lock
and is fitted with a single-sleeve drill chuck
with radial lock “Made in Germany” by
.
Once the motor has come to a halt, the drive shaft
is automatically locked so that the quick-action drill
 Loading...