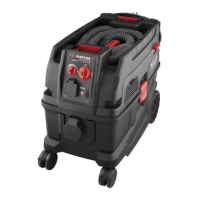
GB IE
NI CY
9
Assembly
Pull out the mains plug.
This will prevent danger of injury
from electric shock.
The appliance is supplied with the
textile lter bag (
16) tted.
1. Put on the feet (7)
2. Insert the lter:
- Foam lter for wet vacuuming
(
15),
- Material lter (
16) for dry
vacuuming,
- Paper lter bag ( 17).
Never vacuum without a lter!
3. Place the motor housing (1) on
top of the dirt collector (6) and
close it
with the clips (8).
4. Connect the vacuum hose (13)
and the accessories.
Operation
Fully unwind the suction hose (
13) before commencing work.
Switching on/off
Connect the mains plug.
Switching on the vacuum:
On/off switch (
3) in position “I”.
Switching off the vacuum:
On/off switch (
3) in position “O”.
Nozzle usage
Floor nozzle (
18) with insert at-
tachment (
19):
for wet and dry vacuuming of smooth sur-
faces and tted carpets.
Floor nozzle (
18) without insert
attachment ( 19):
for wet and dry vacuuming of tted carpets
and for removing persistent dirt.
• Press the clips on the right and left side
of the oor nozzle (
18) and remove
the insert attachment (
19).
Mind that sensitive surfaces might
get scratched if the insert attach-
ment is not used.
Crevice nozzle (
20):
for vacuuming gaps, corners and radiators.
Wet vacuuming
1. For wet vacuuming or to vacuum wa-
ter, t the foam lter (15) to the lter
basket (21).
To avoid tearing the foam lter (15):
- Use only a dry lter;
- Before inserting, twist the edge of
the lter slightly and then roll it back.
2. Suctioning up (draining) water: place
the suction hose (
13) on the handle
(
14) into the water tank and suc-
tion up the water.
3. Empty the waste container immediately
after vacuuming because it is not de-
signed to store liquids (see “Cleaning/
Maintenance”).
Never reach into the water to
be suctioned up. Danger of
electric shock.
If the waste container is full, a oat
closes the suction opening, and the
vacuum operation is interrupted.
Switch off the machine and empty
the waste tank.
 Loading...
