- 6 -
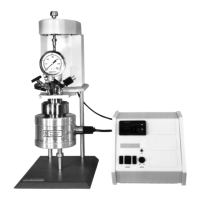
4560 Mini Bench Top Reactors
Parr Instrument Company
Revision 6-28-02
ASSEMBLE THE REACTOR
These reactors require at least 10 sq.
ft. of work space on a sturdy bench or table
in a well ventilated area with convenient
access to an electric outlet, running water,
and a drain. If the tabletop is not heat
resistant it would be ideal to provide an
insulated pad on which to set the vessel
when it is hot.
1. Set the Temperature Controller near the
reactor, leaving a space of at least six
inches between the controller and the
base of the reactor so that the controller
will not be unduly affected by radiant
heat. Connect the reactor to the
controller using information contained in
its Instruction Manual No. 232M or follow
the steps below.
2. The support and heater are shipped fully
assembled. The heater raises and
lowers on its support rod to permit the
vessel or cylinder to be removed. Lower
the heater, open the hinged retainer on
the front of the support and slide the
vessel into its support. Fixed head
vessels have a square lip which fits into
a matching groove in the support plate.
Removable vessels are supported by the
split rings which rest on the support plate
adapter. The stirrer drive connector lifts
by rotating and lifting the knob above the
belt guard. The universal joint contains a
cross pin that slips into the groove on top
of the magnetic drive.
3. There is a bracket at the back of the area
where the split ring rests. The thumb
screw on the drop band which encircles
the split ring closure should fit into the
slot on this bracket. This will keep the
vessel from rotating when stirring viscous
reactions. It may be necessary to
reposition the drop band if the gage does
not face forward when the thumb screw
is in the slot.
4. Connect the power cord from the heater
into the heater socket on the rear panel
of the controller.
5. Plug the motor power cord into the motor
socket on the rear of the controller.
6. Note the voltage requirement stamped
on the controller nameplate, and then
plug the power cord into an appropriate
outlet. Power for these reactors should
be drawn from a 3-slot, grounded outlet
capable of carrying up to the full current
rating of the system.
7. Connect the thermocouple extension
wire to both the thermocouple and to the
controller in the reactor input “Master”
position on the rear panel. For vessels
of materials other than stainless steel,
insert thermocouple into thermowell.
8. Connect cooling water to the magnetic
drive. See Instruction Manual No.234M.
9. Connect the rupture disc to a safely vented
connection or area. See Instruction
Manual No. 231M.
10. Using the switch on the Temperature
Controller, turn on the motor for a short
run to check the stirrer drive system but
do not turn on the heater, put heater
toggle switch in center position (OFF).
There must always be a vessel in the
heater when it is turned on, and the
vessel and heater sizes must match.
If the heater is operated without proper
size vessel in contact with the mantle,
the mantle may overheat and burn out.
 Loading...