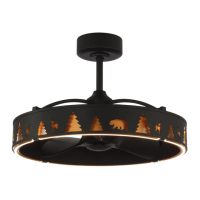
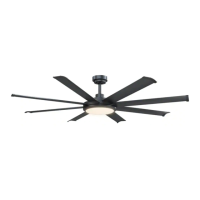
This document provides installation, operating, and maintenance instructions for the Parrot Uncle 530173SQ-SMART Ceiling Fan.
Function Description
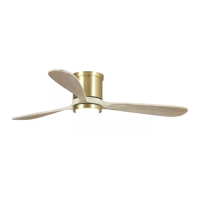
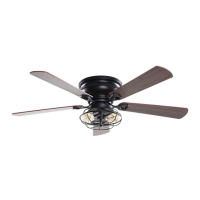
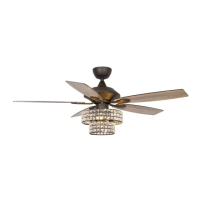
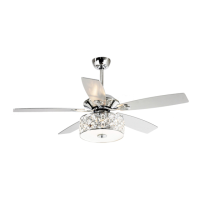
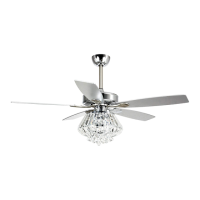
The Parrot Uncle 530173SQ-SMART is a ceiling fan designed to provide airflow and can be controlled via a remote control or a dedicated smartphone application. It features a reversible motor for seasonal use (forward for cooling, reverse for heat circulation). The fan is also compatible with smart home systems like Alexa and Google Home for voice control.
Important Technical Specifications
- Model Number: 530173SQ-SMART
- Power Source: AC 110-120 Volt, 60Hz
- Maximum Fan Motor Amps: 1.0
- Maximum Light Watts: 180 (incandescent or ballast and LED)
- Fan Support: Must be mounted to an outlet box marked "Acceptable for fan support of 35 lbs. (15.9 kg) or less."
- Blade Clearance: Blades must be at least 2.1 m (7 feet) above the ground and at least 30 cm (0.3 m or 30 inches) from walls or other obstacles.
- Ceiling Angle: Shall not exceed 30 degrees for mounting the controller.
- Remote Control Model: RE-028W
- Remote Control Battery: CR2032 3.0V (not included)
- Fan Dimensions:
- Overall Diameter: 52 inches (Ø52")
- Height from ceiling to bottom of fan: 10.15 inches
- Motor housing diameter: 7.67 inches
- Motor housing height: 5.51 inches
- Blade length from motor housing: 7.08 inches
- Blade width: 5.9 inches (at widest point)
Usage Features
Installation
The installation process involves attaching a mounting plate to an outlet box, connecting electrical wires, assembling the fan motor and blades, and finally securing the fan to the mounting plate. All wiring must comply with the National Electrical Code (NASI/NFPA 70-1999) and local electrical codes. A qualified, licensed electrician is recommended for electrical installation.
Remote Control Operation
The fan is operated using a remote control (Model RE-028W) with the following functions:
- Fan Speed: 3 (high), 2 (medium), 1 (low) keys.
- Fan Off: OFF key.
- Reverse Function: REV key (do not operate while blades are in motion; turn off fan and wait for blades to stop before reversing direction).
- Light Control: LIGHT key for on/off, LIGHT+ for dimmer up, LIGHT- for dimmer down.
- Learning Function: A "LEARN" button on the remote is used to pair with the receiver.
- Code Combinations: The remote control unit is equipped with roll code combinations to prevent interference with other remote units. If interference occurs, the code combination in the transmitter and receiver can be changed.
APP Control Connection
The fan can be controlled via the "ParrotUncle Smart" app, available on the App Store and Google Play.
- Download and Account Creation: Download the app and create an account using email or mobile phone.
- Device Connection:
- Open the app, press "+" to add a device.
- Tap "Auto Scan."
- Wait for the device to appear, then tap "Next" and "+" to add it.
- Connect to your home Wi-Fi.
- Wait for the connection to complete.
- Alexa Integration:
- Ensure the device is connected to the app and working normally.
- Open the Alexa app, search for the "ParrotUncle Smart" skill.
- Link the skill by logging in with your ParrotUncle Smart account and password, then authorize and connect.
- Alexa will automatically discover the device.
- Google Home Integration:
- Ensure the device is connected to the app and working normally.
- Open the Google Home app, set up a device, and choose "Works with Google."
- Search for "ParrotUncle Smart," log in with your ParrotUncle Smart app account and password, then authorize and connect.
- Google Assistant will automatically discover the device.
Resetting Network Settings
To reset the fan's network settings:
- Power off the fan.
- Power on the fan.
- Within 30 seconds, press and hold the "off" button on the remote.
- The light will flash twice, indicating a successful reset.
- The device can now be re-connected via the app.
Maintenance Features
Troubleshooting Guide
The manual includes a troubleshooting guide for common issues:
- Fan/Remote Not Working:
- Check remote range (within 20 feet).
- Reset remote control (turn off power, remove batteries, wait 10 seconds, replace batteries, turn power on).
- Check battery orientation and charge.
- Verify frequency switches (DIP switches) on remote and receiver are set to the same frequency.
- Check main and branch circuit fuses/breakers.
- Ensure any Variable Speed Wall Switch is specifically designed for ceiling fans.
- Check line wire connections and switch wire connections.
- Contact customer service if issues persist.
- Fan Is Noisy:
- Tighten all motor housing screws.
- Tighten screws attaching fan blades to the motor.
- Ensure wire nut connectors are not rattling.
- Allow a 24-hour "breaking-in" period for new fans.
- Secure glassware tightly if using a light kit.
- Ensure a small gap between the canopy and ceiling (canopy should not touch the ceiling).
- Verify the ceiling box is secure and rubber isolator pads are used between the mounting bracket and outlet box.
- Fan Wobbles:
- Verify all blades and blade bracket screws are secure.
- Run the fan for 10 minutes to allow self-adjustment.
- If wobble persists, check blade level by measuring the distance from the ceiling to each blade tip (measurements should be within 1/8 inch).
- Use the included Blade Balancing Kit if wobble is still noticeable.
- Interchanging two adjacent blades can redistribute weight for smoother operation.
- WARNING: Do not bend blade arms, insert foreign objects between rotating blades, or clean the fan while it is in motion to avoid personal injury or damage.
- Light Not Working:
- Check bulb installation and ensure it's a good working bulb.
- Replace non-working bulbs.
- Reset the remote control (as described above).
Care and Cleaning
- Regular Cleaning: Use a soft brush or lint-free cloth to clean the fan. Avoid scratching the paint finish.
- Power Disconnection: Always turn off electricity at the circuit breaker or fuse box before cleaning or performing any repairs.
- Avoid Water: Do not use water or detergent to clean the ceiling fan, as it can damage the motor or blades and pose an electrical shock risk.
- Lubrication: The motor has permanently lubricated ball bearings and does not require oiling.