EasyManua.ls Logo

Parrot Uncle F8219110V - User Manual

Parrot Uncle F8219110V
16 pages
Print Icon
To Next Page IconTo Next Page
Loading...
CEILING FAN
Question and Answer IconNeed help?

Do you have a question about the Parrot Uncle F8219110V and is the answer not in the manual?

Summary

Safety Information

General Safety and Installation Warnings

Essential safety precautions for installation and operation, including electrical safety and proper mounting.

SAFETY TIP

User Safety and Installation Best Practices

Comprehensive tips for safe installation, operation, and maintenance of the fan.

Product Usage Notes and User Suitability

Important notes on product usage, user capabilities, and child supervision.

Parts and Components Identification

Hardware and Accessories

List of hardware and accessories included with the fan for installation.

Fan Components Diagram

Diagram illustrating the various components of the ceiling fan assembly.

Remote Control and Balancing Kit

Identification of the remote control unit and balancing kit components.

Installation Steps

Attaching Fan to Electrical Box

Securing the mounting bracket to the outlet box and preparing for fan assembly.

Canopy and Motor Assembly Installation

Steps for installing the canopy, decorative covers, and connecting the fan motor assembly.

Blade Attachment

Instructions for attaching the fan blades to the motor assembly using screws.

Wiring and Remote Installation

Wiring Diagram and Connections

Diagram illustrating electrical connections between the fan, receiver, and power source.

Remote Control Receiver Installation

Procedure for installing the remote control receiver within the fan canopy.

Canopy and Ring Installation

Steps for securing the canopy and canopy ring to the mounting bracket.

Operating Your Fan

Fan Speed Control

Explanation of fan speed levels and how to adjust them using the remote control.

Fan Direction Control

How to change the fan's blade direction for warm or cool weather settings.

Remote Operation and Receiver Installation

Remote Control Holder Installation

Instructions for mounting the remote control holder on a wall surface.

Receiver Installation in Ceiling Fan

Detailed steps for installing the remote receiver, including wiring connections.

Wiring Connections for Receiver

Schematic of wire connections required for the remote control receiver.

Transmitter Operation and FCC Statement

Transmitter Button Functions

Explanation of the buttons on the remote transmitter for controlling the fan and light.

FCC Compliance Statement

Information regarding the device's compliance with FCC rules and potential interference.

Troubleshooting Guide

Fan or Remote Not Working

Steps to diagnose and resolve issues where the fan or remote control is unresponsive.

Fan Noise Issues

Solutions for common fan noise problems, including screw tightness and break-in periods.

Fan Wobble Resolution

Procedures to identify and correct fan wobble, including blade balancing.

Light Not Working

Troubleshooting steps for issues with the fan's light kit, including bulb replacement.

After Installation

Fan Wobble Explanation and Reduction

Information on normal fan movement and methods to minimize or correct wobble.

Noise During Operation

Explanation of normal operational noises and the break-in period for new fans.

Care and Cleaning Instructions

Guidelines for periodic cleaning and maintenance of the ceiling fan.

Overview

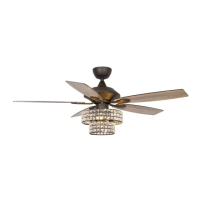
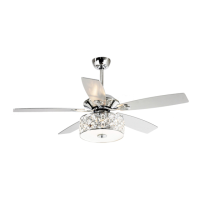
This document is a comprehensive "Use and Care Guide" for a Parrot Uncle ceiling fan, model F8219110V. It provides detailed instructions for installation, operation, and maintenance, emphasizing safety precautions throughout.

Function Description:

The Parrot Uncle ceiling fan is designed to provide air circulation and, optionally, illumination in residential settings. It operates on AC 110-120 Volt 60Hz power and features multiple fan speeds and a reversible blade direction to optimize comfort in both warm and cool weather conditions. The fan is controlled via a remote, allowing users to adjust speed, turn the fan and light on/off, and set a sleep timer.

Usage Features:

The fan offers a range of features for user convenience and comfort:

  • Remote Control Operation: The fan is primarily operated using a remote control, which allows for easy adjustment of settings from anywhere within a 20-foot range of the receiver.
  • Multiple Speed Settings: The remote provides six distinct fan speeds, ranging from low (1) to extra high (6), enabling users to select the appropriate airflow for their room size and comfort preferences.
  • Reversible Blade Direction: A key feature for year-round comfort, the fan includes a reverse switch that changes the direction of the blades. In warm weather (forward mode), the fan creates a downdraft, producing a cooling effect. In cool weather (reverse mode), it creates an updraft, circulating warm air trapped near the ceiling without creating a direct draft. It is crucial to ensure the fan blades have come to a complete stop before changing the direction.
  • Light Kit Integration: The fan is designed to accommodate a light kit, providing ambient illumination. The light can be turned on or off independently using the remote control.
  • Sleep Timer: The remote control includes buttons for setting a sleep timer (2hr, 4hr, 8hr), allowing the fan to operate for a set duration before automatically turning off.
  • Safety First Design: The manual repeatedly stresses the importance of safety during installation and operation. It highlights the need to turn off power at the circuit breaker, use UL-listed components, and ensure secure mounting to an appropriate outlet box.
  • Clearance Requirements: For safe and effective operation, the fan must be mounted with a minimum of 7 feet (2m) clearance from the trailing edge of the blades to the floor, and at least 30 inches from walls or other upright structures.
  • Electrical Compliance: All wiring must adhere to the National Electrical Code NASI/NFPA 70-1999 and local electrical codes, and installation should be performed by a qualified, licensed electrician if the user is unfamiliar with electrical wiring.
  • Mounting Bracket Design: The mounting bracket is specifically designed to slide into place on an outlet box with the provided screws, simplifying the initial installation step.
  • Blade Balancing Kit: To address potential wobble issues, a blade balancing kit is included, along with instructions on how to use it to ensure smooth and stable operation.

Maintenance Features:

The manual provides straightforward guidelines for maintaining the fan, ensuring its longevity and optimal performance:

  • Regular Cleaning: Periodic cleaning is the only required maintenance. Users should use a soft brush or lint-free cloth to avoid scratching the paint finish. It is crucial to turn off the electricity before cleaning the fan.
  • Avoid Water and Detergents: Water or detergents should not be used when cleaning the fan or its blades, as this could damage the motor or blades and pose a risk of electrical shock. A dry dust cloth or lightly dampened cloth is suitable for most cleaning.
  • Lubrication: The motor features permanently lubricated ball bearings, eliminating the need for oiling.
  • Troubleshooting Guide: A dedicated troubleshooting section helps users diagnose and resolve common issues such as the fan/remote not working, noisy operation, fan wobble, or the light not functioning. This guide provides step-by-step solutions, including checking power, battery replacement, wiring connections, and blade adjustments.
  • Remote Control Battery Care: To prevent damage to the transmitter, the 12-volt battery should be removed if the remote is not used for an extended period. The transmitter should also be stored away from excessive heat or humidity.
  • Post-Installation Checks: After installation, users are advised to check that all connections are absolutely secure and that spliced conductors are carefully pushed up into the outlet box, with wires spread apart as specified. All setscrews should be checked and retightened.
  • "Breaking-in" Period: For new fans, a 24-hour "breaking-in" period is recommended, during which most operational noises are expected to disappear.
  • Wobble Self-Adjustment: After proper installation, the ceiling fan should be run for 10 minutes to allow it to self-adjust and minimize any wobble. If wobble persists, the manual provides instructions for verifying blade level and using the balancing kit.

Parrot Uncle F8219110V Specifications

General IconGeneral
BrandParrot Uncle
ModelF8219110V
TypeCeiling Fan
Blade Span52 inches
Blade ColorWalnut
Blade MaterialWood
Number of Blades5
Fixture Color FamilyBrown
Motor TypeAC Motor
Speed Settings3
ReversibleYes
Light IncludedYes
Mounting TypeDownrod Mount
FinishOil Rubbed Bronze
MaterialMetal

Related product manuals