Do you have a question about the Parrot Uncle F6291 and is the answer not in the manual?
Defines CAUTION and WARNING notices, covering hazards and procedures.
General safety precautions for installation, operation, and maintenance.
Requirements for choosing a proper location for ceiling fan installation.
Instructions for unpacking the fan and checking for included items.
Lists and illustrates all included parts for the ceiling fan.
Instructions for installing the mounting bracket and receiver mounting plate.
Guidance on hanging the fan and making electrical wiring connections.
Steps for installing the remote control receiver and managing its wires.
Instructions for attaching the motor assembly to the mounting plate.
Procedure for lifting, aligning, and securing the motor housing.
Steps for attaching blade brackets to fan blades.
Procedure for attaching the assembled blades to the fan motor.
Instructions for connecting the wire plug for the light kit.
Steps for attaching the glass shades and installing light bulbs.
Important points and requirements before using the remote control.
Instructions for installing the receiver unit for remote control functionality.
Guidance on setting the code switch for transmitter and receiver.
Explanation of the functions of each button on the remote transmitter.
Covers normal motor noise, movement, rattling lights, and wear and tear.
Instructions for operating the fan in summer and winter modes.
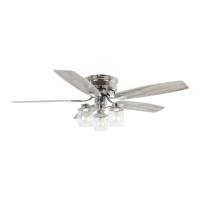
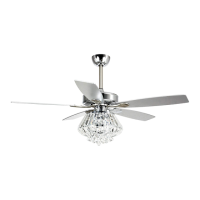
This document provides comprehensive installation and operating instructions for a Parrot Uncle ceiling fan, model F6291, emphasizing safety precautions and proper usage. The manual is designed to guide users through the setup process, ensuring safe and efficient operation of the fan.
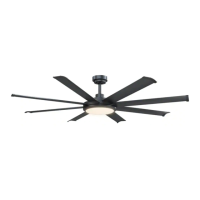
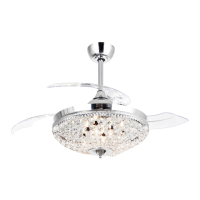
The Parrot Uncle F6291 is an indoor ceiling fan designed to provide air circulation and illumination. Its primary function is to cool rooms during warmer months by creating a downward airflow and to help circulate warm air during colder months by creating an upward airflow. The fan is equipped with a light kit, offering dual functionality as both a fan and a light source. It operates via a remote control, allowing users to adjust fan speed and light settings conveniently. The fan is intended for fixed wiring installations and must be connected through a mains switch, typically an existing wall switch, to ensure proper power isolation.
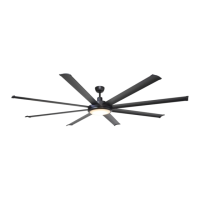
The F6291 ceiling fan offers several features designed for user convenience and optimal performance. The fan blades must be installed at a height greater than 2.3 meters (7.5 feet) above the floor to ensure safety and compliance with regulations. For enclosed outdoor installations, the fan should be at least 1.5 meters from the perimeter of the roof/eaves to protect it from direct or indirect rain or sunlight. The chosen location must also ensure that the rotating blades do not come into contact with any objects.
The fan is operated using a dedicated remote control. Before operating with the remote, the ceiling fan's manual switch must be set to HIGH speed, and the light kit (if any) must be in the ON position. The remote control allows for independent operation of the fan and light. Users can set different codes for multiple fans with remote control units to prevent interference, enabling independent control of each fan. The remote control requires a 12V battery for operation.
For summer use, the fan should be set to spin in an anti-clockwise direction, creating a cool downward breeze. In winter, the fan should spin in a clockwise direction, pushing warm air off the ceiling and circulating it downwards into the living areas, typically at a lower speed than in summer. This dual-direction functionality makes the ceiling fan an environmentally smart choice for year-round climate control, potentially reducing both cooling and heating costs.
The installation process involves several steps, starting with securing the mounting bracket directly to the building structure, such as a concrete ceiling, steel structure, or timber frame, rather than an outlet box. This ensures the fan can support its weight of approximately 35 kg. The remote control receiver mounting plate is then installed onto the bracket. Wiring connections are made for the signal connector, receiver's output connector, and receiver's input connector, ensuring proper live, neutral, and ground connections. The lamp wires connector is left unconnected if the fan is used without a light kit. An isolation switch must be installed for safety.
After wiring, the receiver is placed on the mounting plate, and the wires are arranged and secured with a cable tie. The motor housing is then attached to the mounting plate, followed by the decorative motor housing, which is secured by aligning slots and holes with screws and rotating clockwise until the screws drop into recesses. Blade brackets are attached to the blades using screws and fabric washers, and the blade assemblies are then attached to the motor using noise-dampening motor gaskets and motor screws. Finally, the light kit is installed by removing screws from the switch housing cap, inserting the wire plug, attaching the switch housing to the cap, and then installing the glass and E26 bulbs (not included) into the lamp holders.
The manual highlights several maintenance considerations to ensure the longevity and safe operation of the ceiling fan. Regular checks are recommended to confirm that all connections are proper and secure after installation, preventing the fan from falling or causing damage. Users are advised to handle the motor drive shaft and fan blades with care during installation to avoid bending or damage. If any defect is noticed, customer service should be contacted before installation.
The use of an unapproved remote controller will void the warranty, emphasizing the importance of using only Mercator-approved remote controllers. Solid-state controllers should not be used. The fan should not be removed from the ceiling after installation. Before any work, including installation or replacing lamps, electricity must be turned off at the main power box by removing the fuse or turning off the circuit breaker.
The manual also addresses common issues such as fan noise and wobble. It states that all electric motors, including fan motors, make some noise and may feel hot to touch, which is not a fault. Ceiling fans are not generally rigid-mounted, and some movement during operation is normal and does not indicate a fault or risk of falling. Slight variations in movement between different models are also normal. Fan lights can rattle if not supplied with the fan, and such rattling is not covered by warranty.
Normal wear and tear, such as threaded components working slightly loose or blade carriers becoming slightly bent due to vigorous cleaning or bumping, can cause extra wobble and noise. While not covered under warranty, careful handling and maintenance can prevent or reduce these problems. Night noises, which are often more noticeable in quiet environments, are also discussed as a common occurrence that is typically outside the manufacturer's warranty, as slight signals superimposed in the electricity supply can cause changes in motor noise.
The remote control battery should be replaced before it weakens and leaks, as this can damage the transmitter. Used batteries should be disposed of properly and kept out of reach of children. To reduce the risk of fire or injury, the product should not be used in conjunction with any variable (rheostat) wall control. The remote control receiver should not be installed in damp locations or immersed in water, as it is designed for indoor use only. Leads should not be pulled or cut shorter, and the unit should not be dropped or bumped.
| Brand | Parrot Uncle |
|---|---|
| Model | F6291 |
| Type | Ceiling Fan |
| Style | Modern |
| Number of Blades | 3 |
| Light Kit Included | Yes |
| Fan Diameter | 52 inches |
| Remote Control Included | Yes |
| Blade Span | 52 inches |
| Motor Speed | 3 Speeds |
| Reversible Motor | Yes |
| Light Included | Yes |
| Mounting Type | Downrod Mount |
| Finish | Brushed Nickel |
| Warranty | 1 year |