EN – For the installer
12
User and installation guide
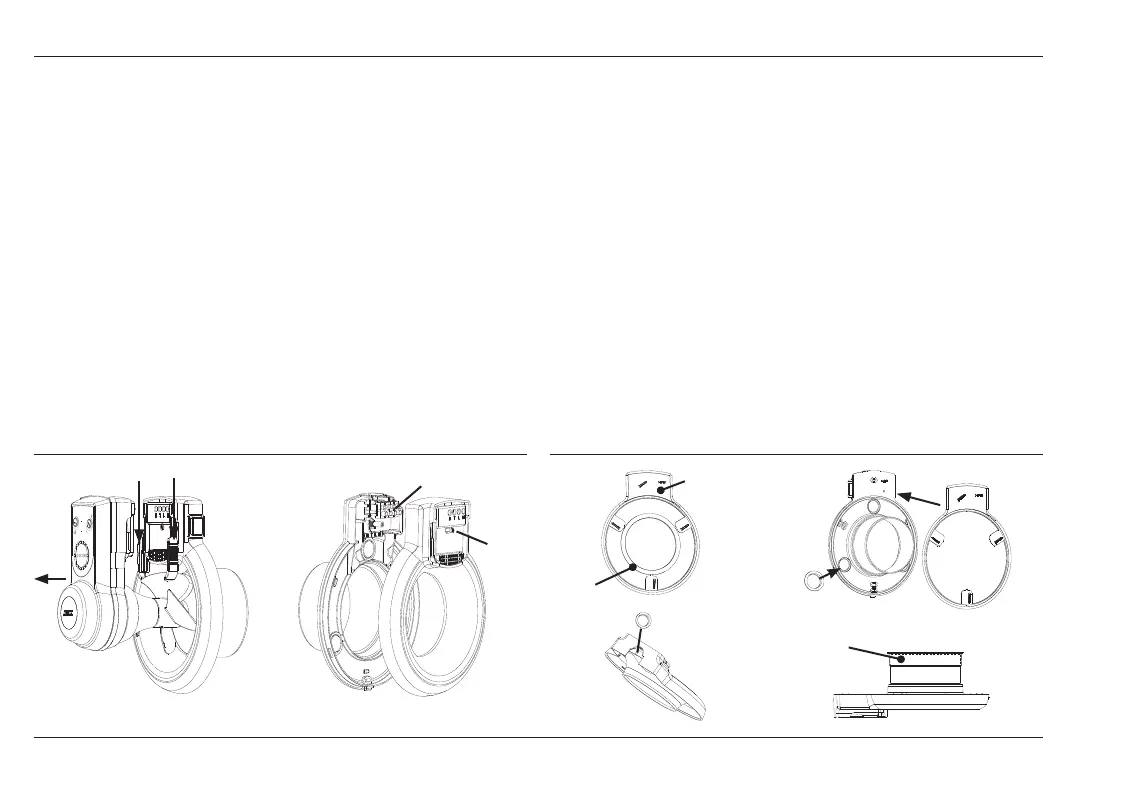
Preparations
Push the two locking buttons towards the centre (A1) and lift the motor unit
out of the frame. Then remove the motor unit (A2).
Unscrew screw B1 and remove the housing from the frame.
The terminal block (B2) is behind the frame.
Add this to the side until the frame is attached to the structure.
Installing the seal and cable gland
The seal supplied is in two parts: gasket (C1) and cu (C2).
Separate these from each other.
Install the gasket on the back side of the housing (D1). Note that the gasket
also serves as a bushing for the screws. For a concealed electrical con-
nection, install the cable gland in one of the three knockout openings (D2).
The cable gland must be used for surface electrical connection as well.
For this, a breakaway section in the housing must be removed (E).
The rubber cu should be used for assembly in the ceiling, Ø100 mm pipe
(F).
Installation
B1
B2
A1
A2
C1
C2
D2
D1
F
E
 Loading...