Page 3
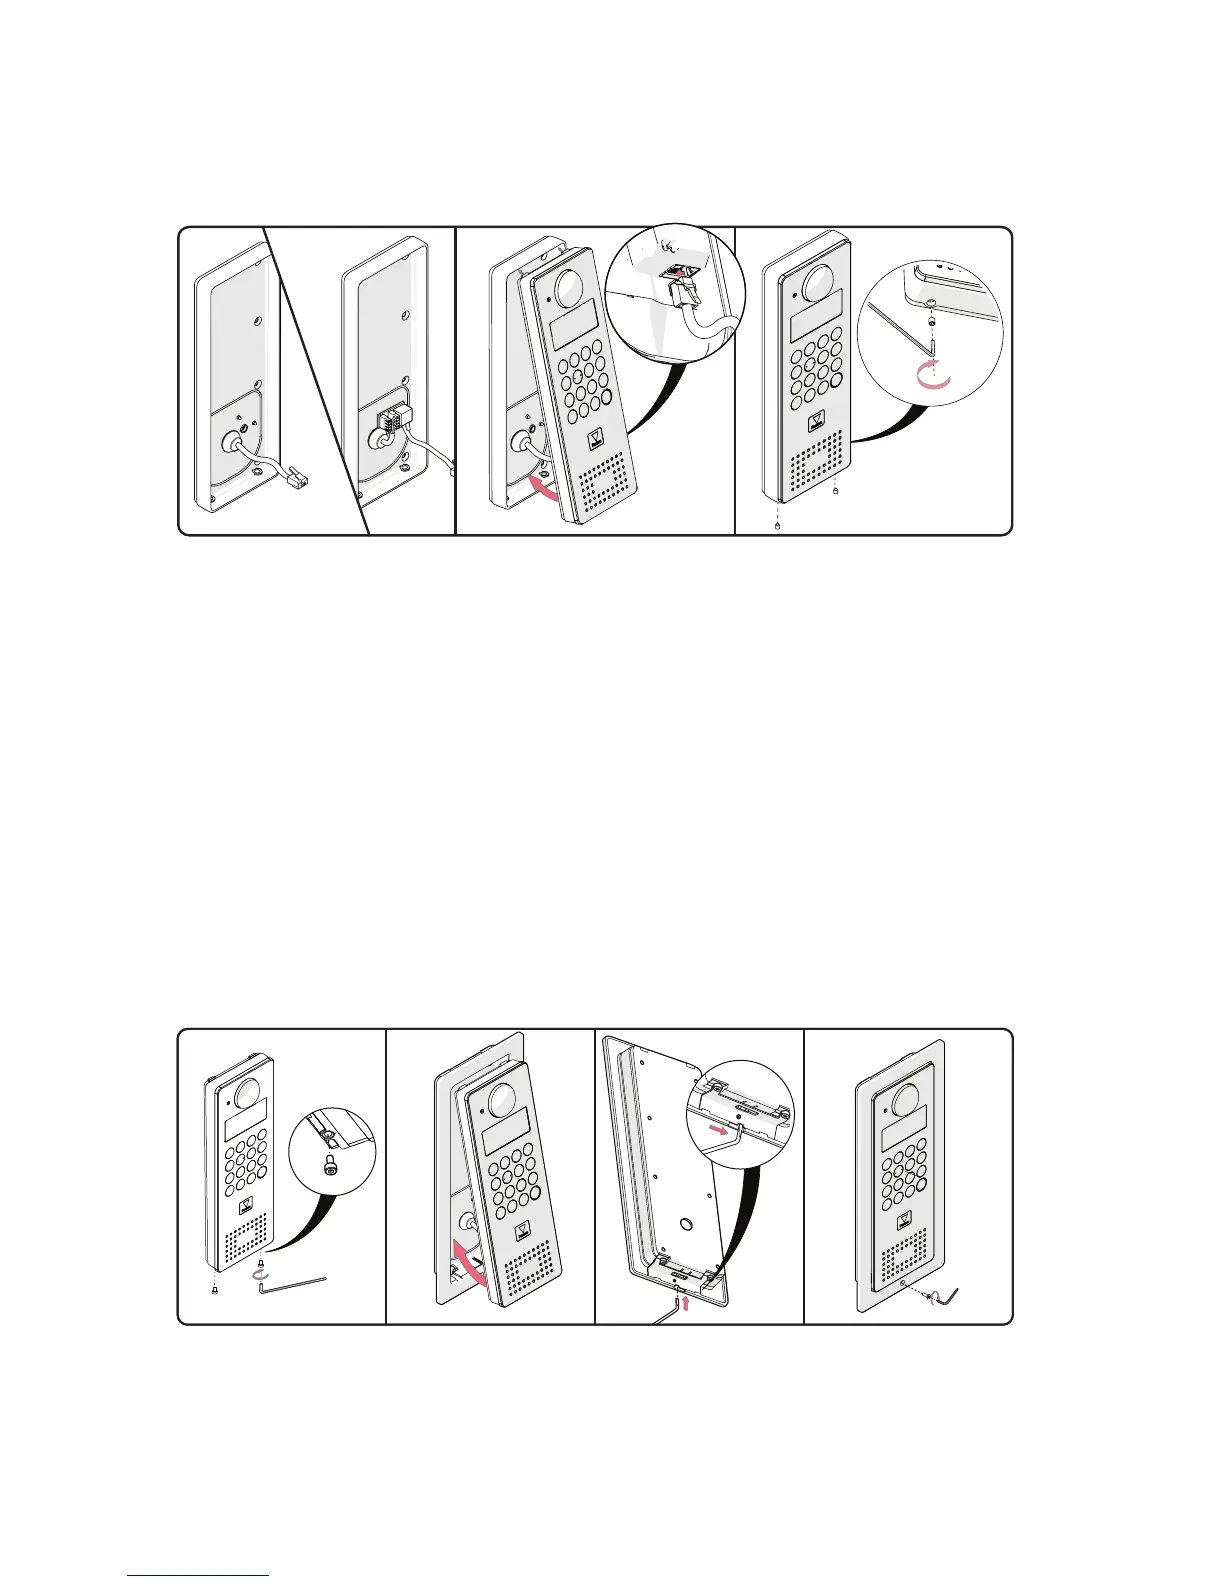
FLUSH MOUNT
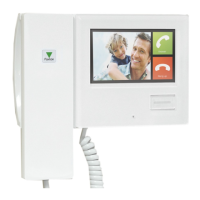
SURFACE MOUNT
1. Determine and mark the height and position for the camera.
2. Mark and drill the hole for the network cable (network patch or Cat5). Ensure that the waterproof grommet will
have clearance behind the backbox.
3. Determine the position of the mounting screws, drill the holes and push in the No 8 wall plugs.
4. Pass the cable through the backbox and secure with the grommet. (A loose grommet is supplied for Cat5 cable)
5. Secure the backbox to the wall with the screws provided.
6. If using Cat5, wire this to the IDC connector (see wiring label) and attach the short patch lead.
7. Connect the cable to the panel.
8. Locate the panel, top rst, into the backbox and secure on the underside with the two security screws.
9. The key for the screws should be stored in the control box for future use.
The entry panel may be mounted in a ush mount backbox.
1. Determine and mark the height and position for the camera.
2. Mark and drill the hole for the network cable (network patch or Cat5). Ensure that the waterproof grommet will
have clearance behind the backbox.
3. Cut a hole in the wall to accept the backbox as required.
4. Determine the position of the mounting screws, drill the holes and push in the No 8 wall plugs.
5. Pass the cable through the backbox and secure the grommet. (A loose grommet is supplied for Cat5 cable).
6. Secure the backbox to the wall with the screws provided. Ensure the sliding latch on the underside is to the right.
7. If using Cat5, wire this to the IDC connector (see wiring label) and attach the short patch lead.
8. Screw the two Allen screws into the underside of the panel to act as locating pins for the sliding latch.
9. Connect the cable to the panel.
10. Locate the panel, top rst, into the backbox and secure by sliding the latch to the left trapping the Allen screws.
11. Fit the security screw at the bottom of the backbox to lock the latch.
12. The key for the security screw should be stored in the control box for future use.
 Loading...