Page 6
1. Set Interface ID
5. Panel settings
from Panel settings menu - Press key 1
from the Engineer menu - Press key 5
This sets the control unit that the Net2 Entry panel is associated with. Enter the Serial Number of the control unit
and then press Bell.
2. Factory reset
Press 1. Yes
Press 2. No
This returns the Entry panel to Factory settings
3. Backlight
This sets when the Entry panel backlight will be on.
Press 1. Always on
Press 2. Never on
Press 3. Only on in low light
from Panel settings menu - Press key 2
from Panel settings menu - Press key 3
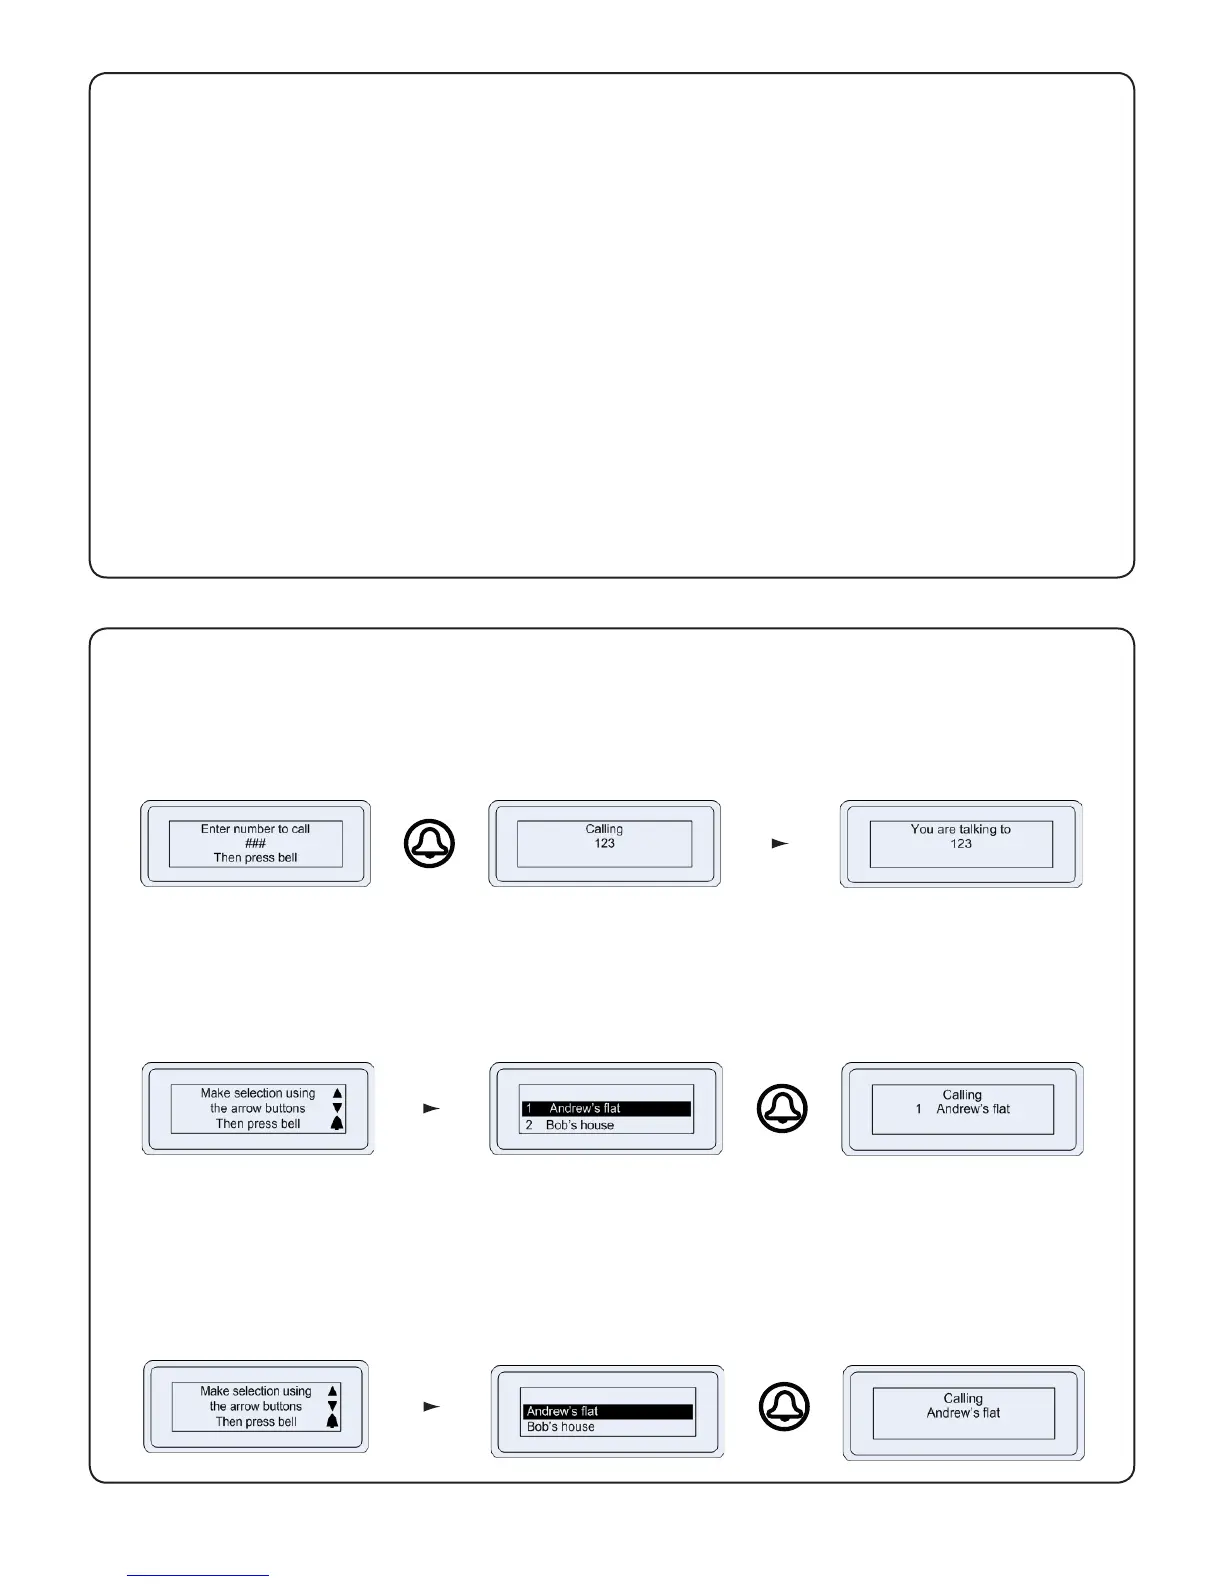
1. Number only
6. Operating Mode
from Set Operating mode menu - Press key 1
from the Engineer menu - Press key 6
This displays ### and requires the visitor to enter the number without the assistance of a list.
2. Numbered list
3. Text selection
from Set Operating mode menu - Press key 2
from Set Operating mode menu - Press key 3
This displays the monitor IDs to the visitor as a numeric list with its name which they can scroll or enter the number.
This displays the monitor names to the visitor in alphabetical order which they can scroll through and select.
Menu will also respond to numeric input.