7
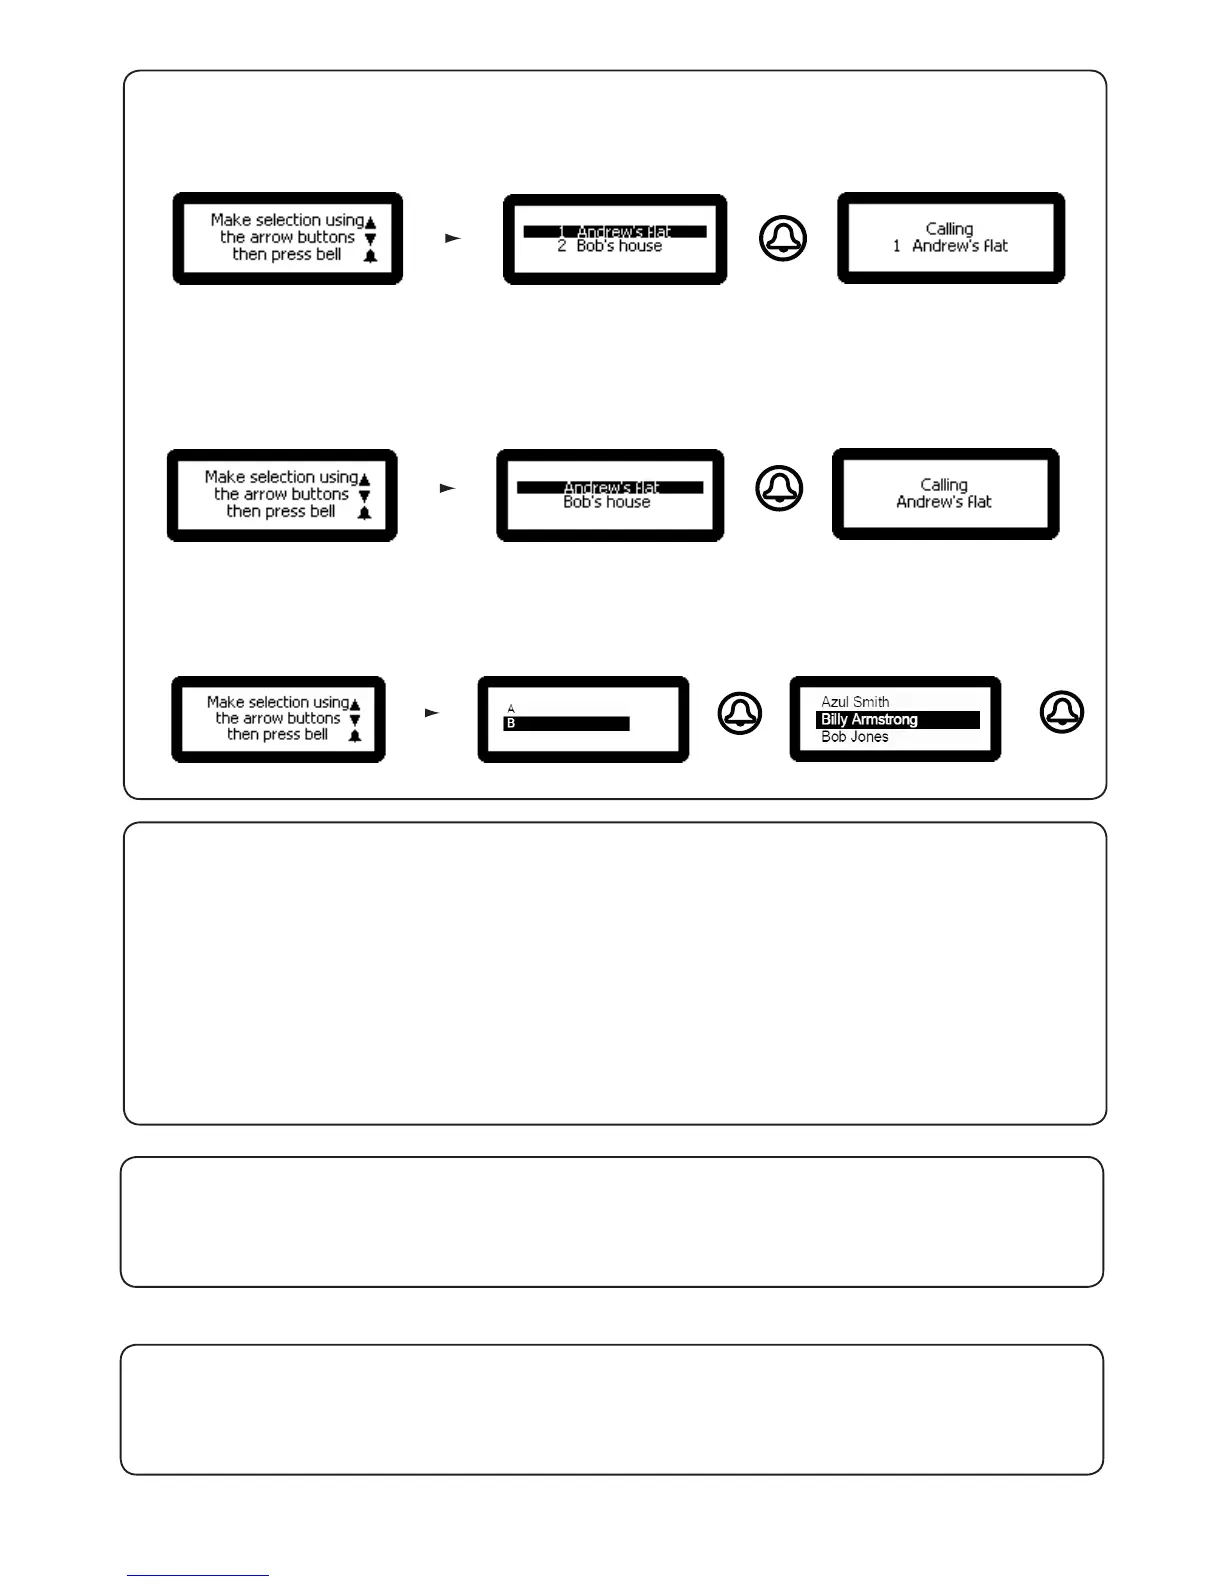
2. Numbered list
3. Text selection
from Set Operating mode menu - Press key 2
from Set Operating mode menu - Press key 3
This displays the monitor IDs to the visitor as a numeric list with its name which they can scroll or enter the number.
This displays the monitor names to the visitor in alphabetical order which they can scroll through and select.
Menu will also respond to numeric input.
1. Set Engineer Code
7. Engineer Access
from Engineer Access menu - Press key 1
from the Engineer menu - Press key 7
This allows the Engineer to change the Engineer code
2. Change Engineer Token
This allows the engineer to add / change the Engineer token
from Engineer Access menu - Press key 2
The engineer can create a token that can be presented to the proximity reader instead of using the engineer code to
gain access to the Engineer Menu.
8. Language
from the Engineer menu - Press key 8
This displays the language options available for this monitor.
9. About
from the Engineer menu - Press key 9
This displays information about the panel. (e.g. the current version number)
4. Text search
from Set Operating mode menu - Press key 4
This displays the monitor names beginning with a certain letter when a particular letter is selected from the list. The
visitor can then press the bell button, choose the selected occupant and press the bell button again to call.