1
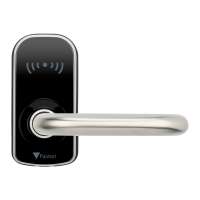
PaxLock Pro – Installation
and Commissioning Guide
Overview
Checks to make prior to installation
Through door holes
When installing a PaxLock Pro it is important to
ensure the environment the PaxLock Pro is to be
installed in is t for purpose.
This application note covers the preparation that
should be carried out before, during and after
installation to ensure the longevity of the PaxLock
Pro as well as correct installation.
Before installing the PaxLock Pro onto the door it is important to check that the door, frame and any
relevant door furniture are in good working order. This is important to ensure both the longevity and
smooth operation of the PaxLock Pro once installed
.
The PaxLock Pro has been designed to work with locksets that are either European (DIN 18251-1) or
Scandinavian prole as shown in Figure 1.
The through door holes must be 8mm diameter and the central follower must have at least 20mm
clearance around it.
Figure 1 – European drilling holes (left) & Scandinavian drilling holes (right)
AN1173-AE
Net2
This application note also covers a few common problems which may impact the performance
and quality of the PaxLock Pro