EasyManuals Logo

Paxton PaxLock Pro Installation And Commissioning Guide

Paxton PaxLock Pro
10 pages
To Next Page IconTo Next Page
To Previous Page IconTo Previous Page
Page #7 background imageLoading...
Page #7 background image
AN1173-AE
Net2
7
PaxLock Pro Installation
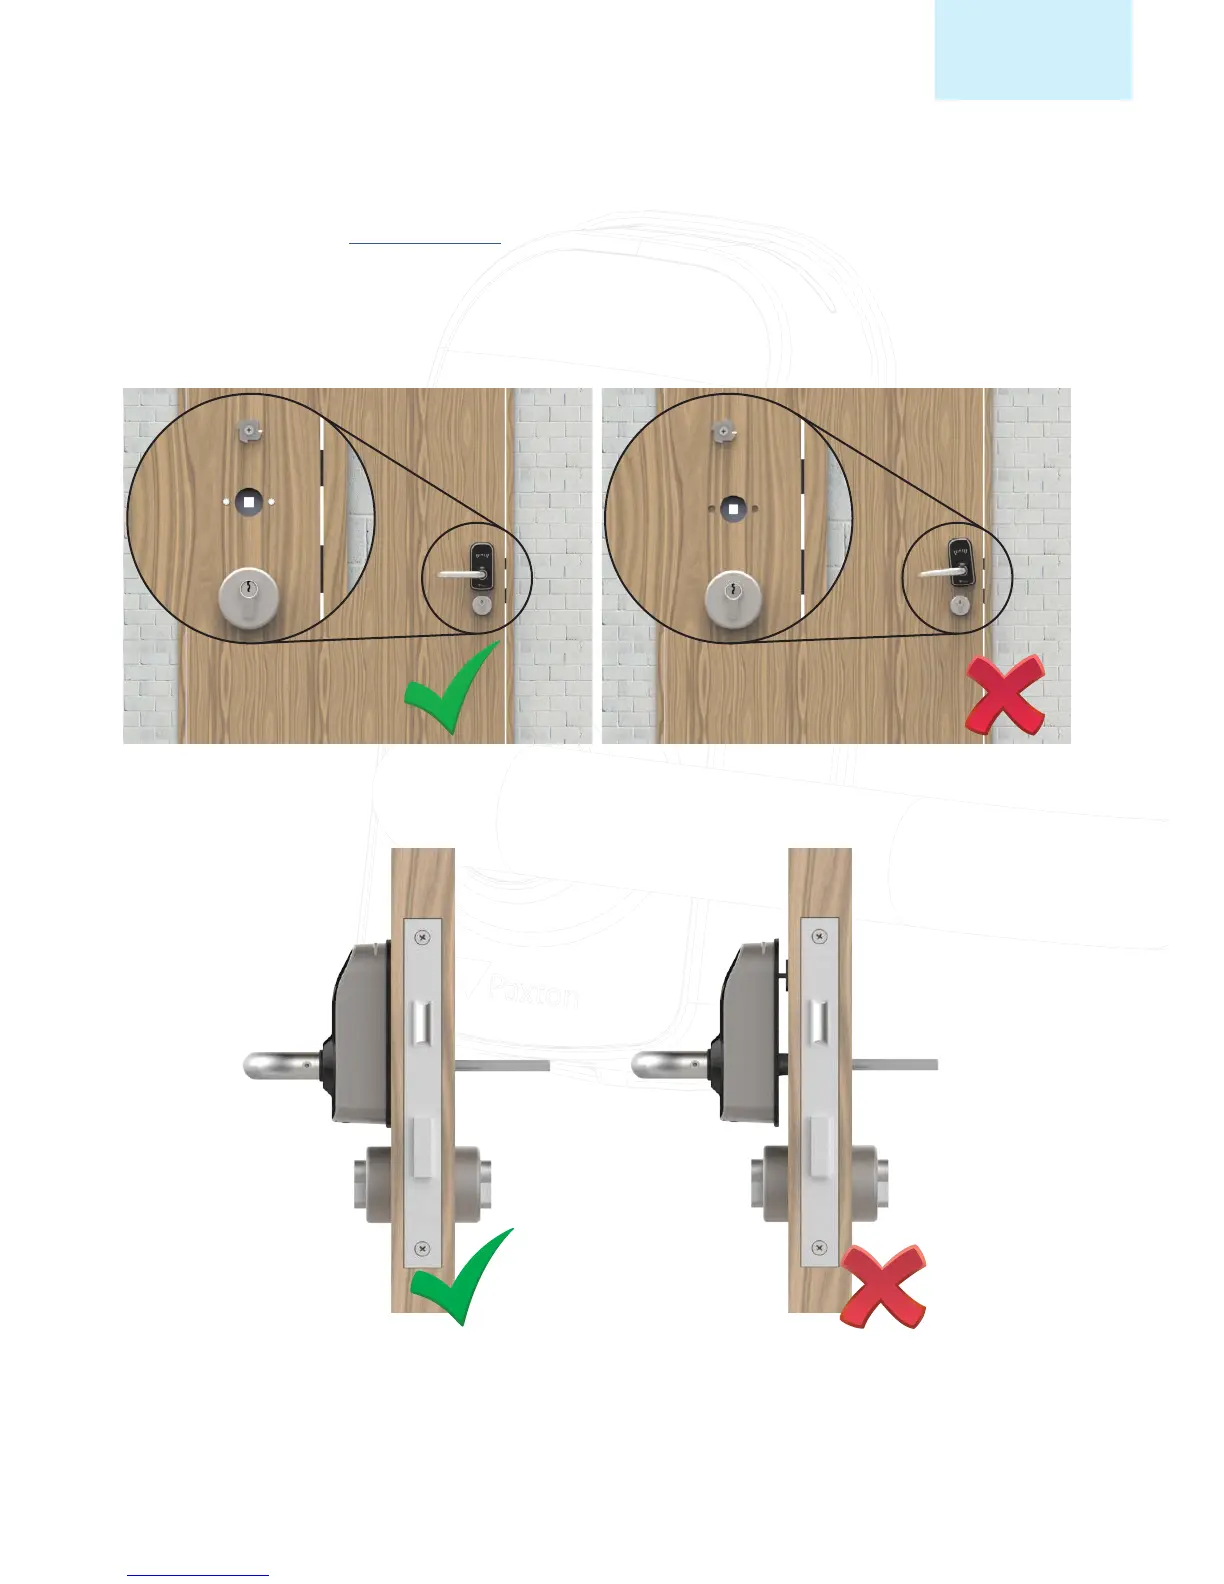
The supplied template < Paxton.info/3585 > should be used to check that the holes in the door are in the
right location and correctly sized for the PaxLock Pro.
To ensure the PaxLock Pro is perpendicular to the door edge it is important to mark and drill the anti-
rotation screw in the correct location, as indicated below.
When passing the PaxLock Pro through the door to t it, the unit must sit completely ush against the face of
the door. If this is not the case the holes in the door may need adjusting.

Other manuals for Paxton PaxLock Pro

Questions and Answers:

Question and Answer IconNeed help?

Do you have a question about the Paxton PaxLock Pro and is the answer not in the manual?

Paxton PaxLock Pro Specifications

General IconGeneral
OrientationVertical
Product type-
Mounting typeSurface-mounted
Housing materialMetal
Compatible productsPaxton PaxLock Pro

Related product manuals