8
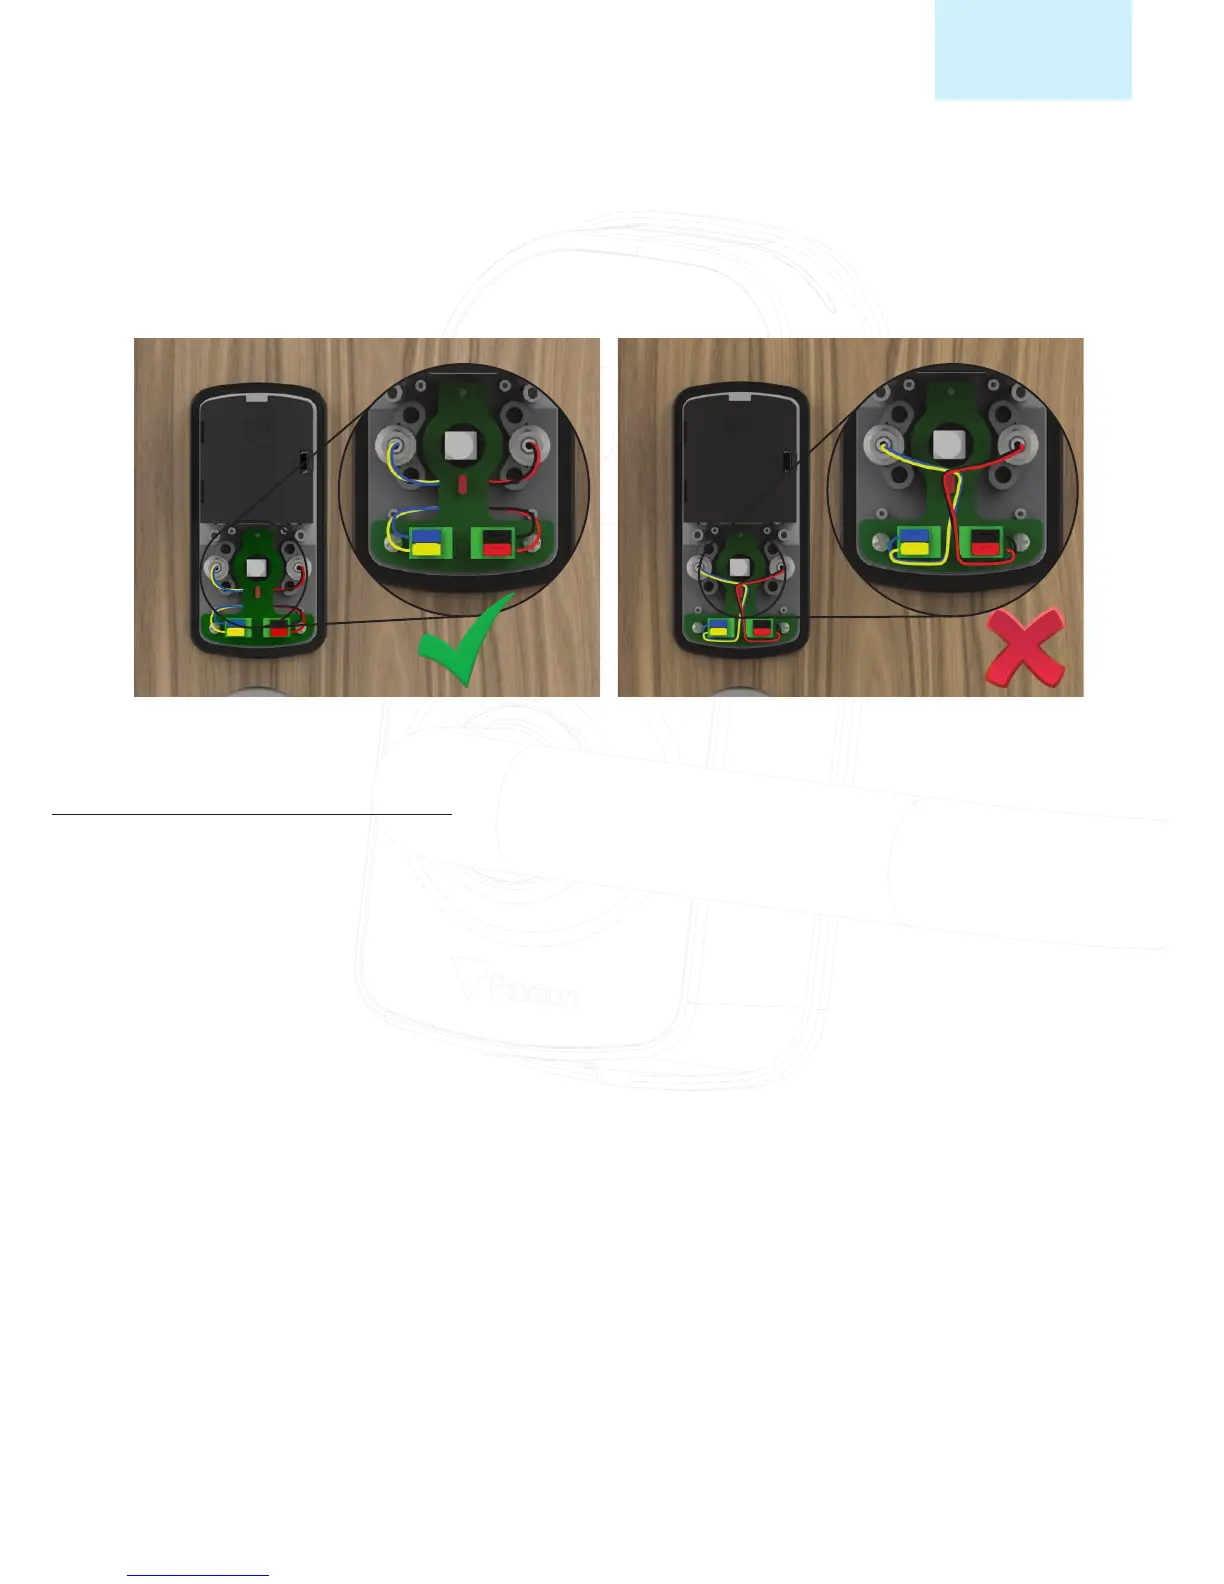
After terminating the power and data cables it is important to tuck the cables behind the PCB in the
centre of the device, as indicated below
Once the PaxLock Pro has been installed there are several checks that can be made to ensure the PaxLock
Pro has been installed and is functioning correctly.
When the PaxLock Pro is rst powered up it will remain in an unlocked state. This will give you the chance
to check the following;
1. Does the latch fully retract when depressing the handle?
2. Does the door open smoothly without rubbing on the frame, latch or oor?
3. When letting go of the handle does the latch fully return to its natural position?
4. Is it smooth and easy to open the door?
5. When closing the door does the latch sit within the keep?
6. When the door is closed does the deadbolt (if present) project smoothly into the keep?
If the answer is yes to all the above, then either a standalone pack can be enrolled, or the unit can be
bound to a Net2Air bridge. If the answer is no, refer to the troubleshooting guide below.
Post installation commissioning
 Loading...