12
m4
11
90˚
10
9
m4 x 16mm
16
15
2
1
14
m4 x 10mm
13
-Don’t over tighten
-ne pas trop serrer
-niet te strak trekken
-Nicht zu eng anziehen
-No sobreajuste
-Dra inte åt för hårt
-Draai niet te vast
-Não aperte demasiado
-Ne húzza meg túlságosan
-Undlad at overspænde
!
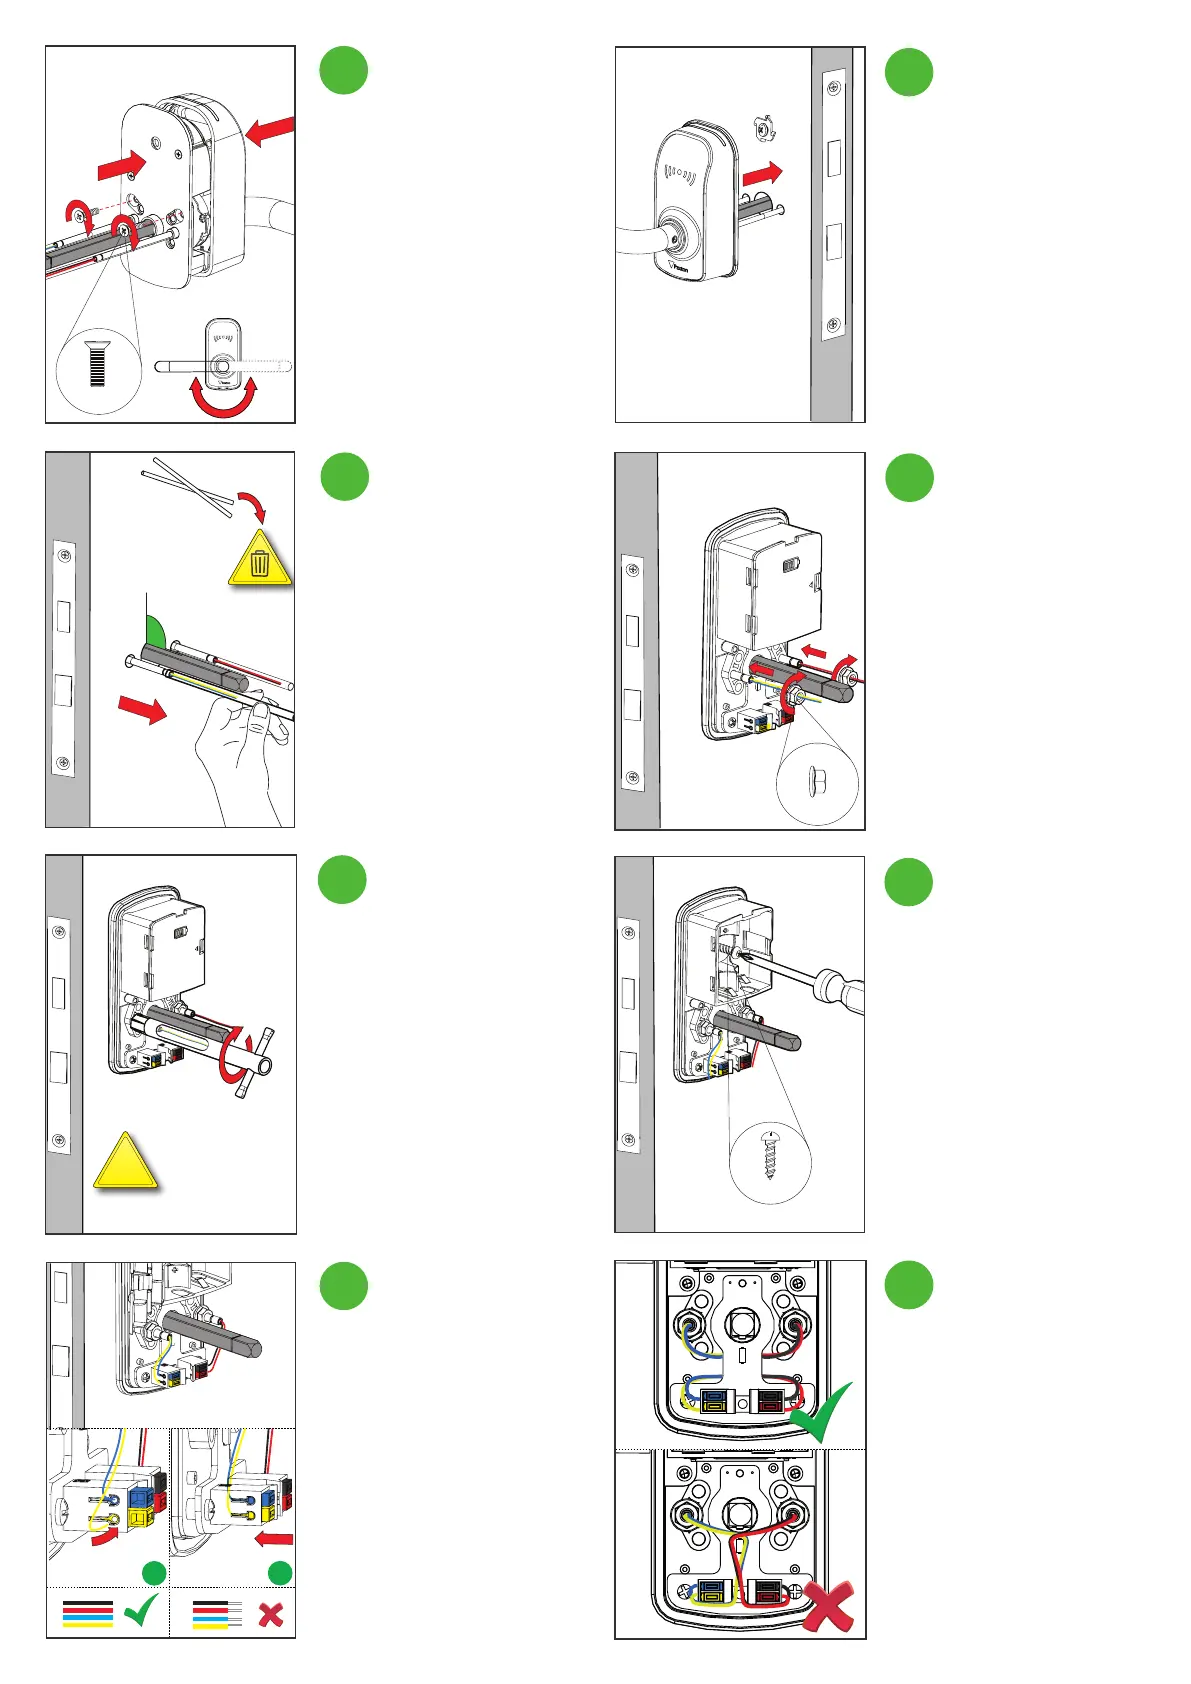
Hand the PaxLock Pro to suit the
door.
Then secure the chassis to the body
using the 2 m4 x 16mm bolts
provided.
Feed the through door bolts and
spindle through the lockset
ensuring it sits ush against the
door face.
Discard or recycle the paper straws. Feed the battery side chassis over
the bolts and spindle.
Thread the supplied m4 nuts over
the wires and onto the bolts.
Tuck the wires behind the PCB so
they do not obscure the circuit
board.
Unclip the 4 connector blocks.
Insert each colour wire into its
corresponding coloured connector
and close the connector block until
you hear a click.
NOTE: Do NOT strip the wires.
Screw the self-tapping m4 x 10mm
wood screw into the door.
Tighten the m4 nuts with the box
spanner provided
Caution: Over tightening can
cause the back plate to bow. Only
hand tighten using the box
spanner provided.
4