7 8
Warning: Danger of explosion! In order to avoid accidents, do not reverse connect
the charging and discharging ports or short circuit, and do not install them in a
closed environment. Rain proof and moisture-proof protection must be installed in the
outdoor.
Attention!! The above steps can be omitted without wall mounting.
Attention!! When Only one battery is using inverter below 5kw or other loads below
5kw are recommended.
Attention!! Before making the final DC connection, please ensure that the battery
switch / DC circuit breaker is disconnected, and ensure that the positive (+) must be
connected to the negative positive(+), and the negative (-) must be connected to the
negative(-).
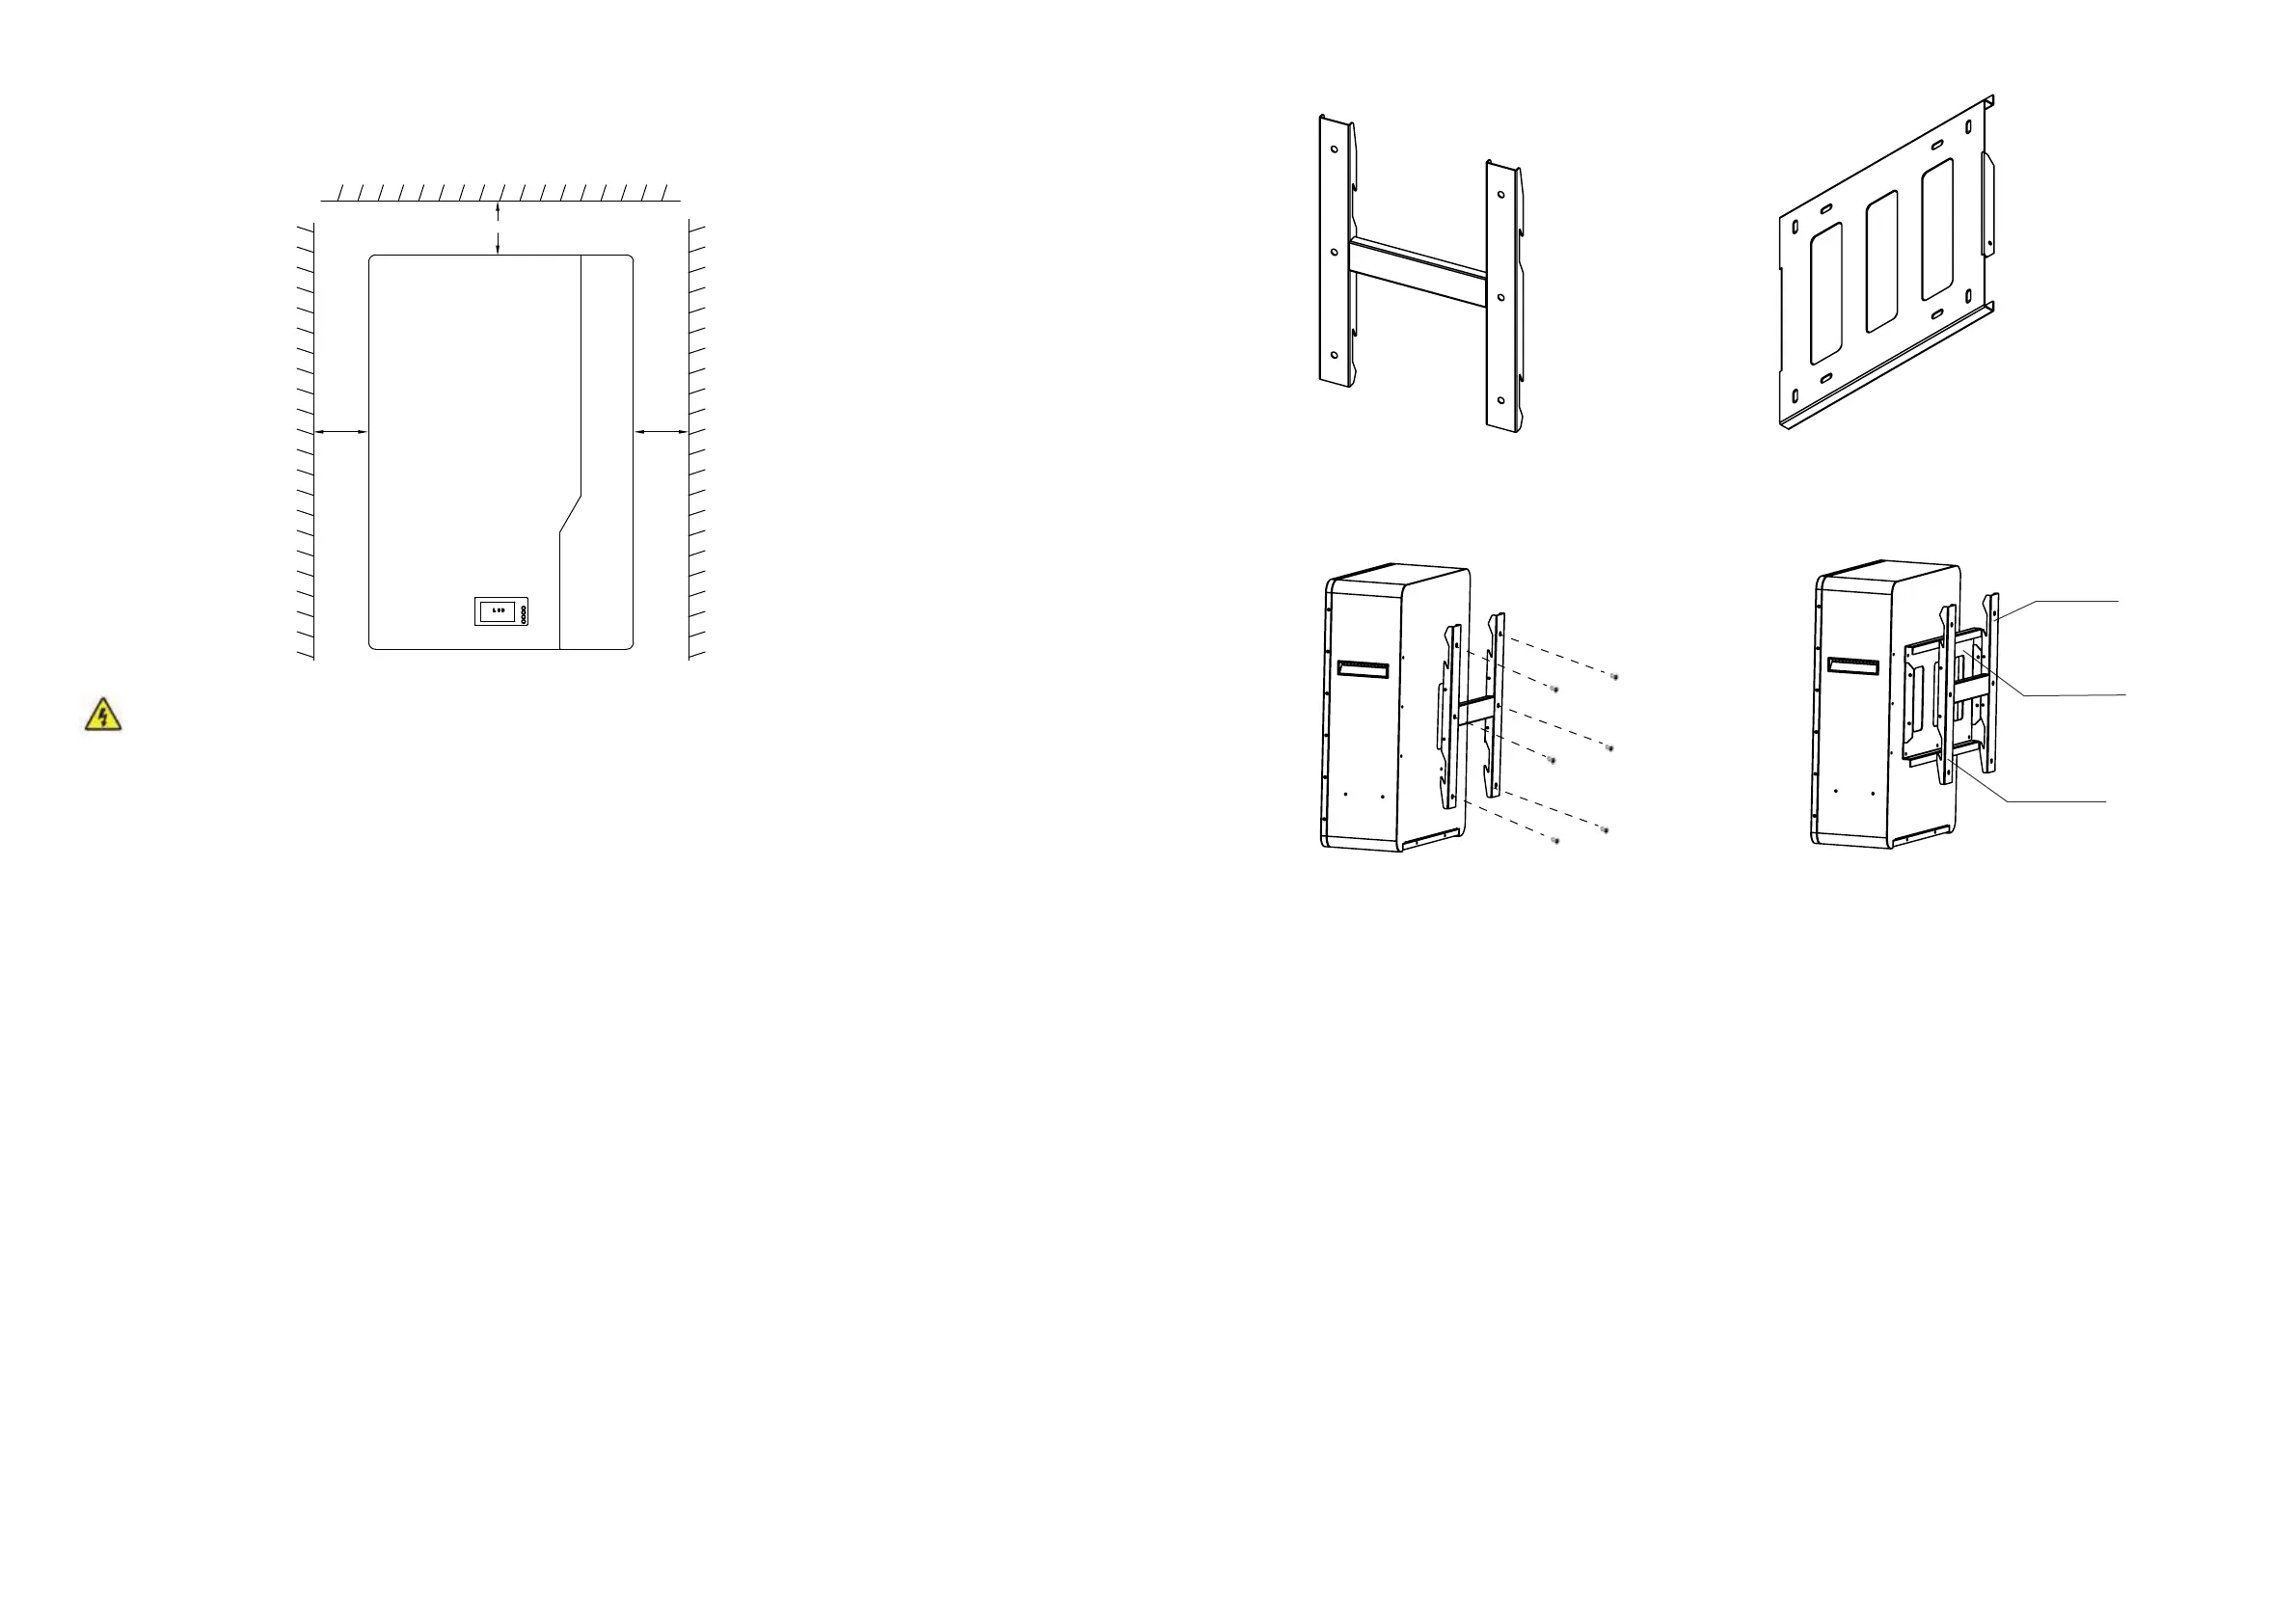
3.4 Schematic diagram of the wall mounted installation
As shown in the pictures above:
(1) According to the actual situation,first install the wall mounting plate with M8 expansion
screw on the wall to ensure that the installation is firm (picture1).
Note: the height of the expansion screw protruding from the wall shall be controlled within
25mm to avoid interference with the battery box during installation (Picture 2).
(2) Fix the wall mounting bracket on the outer box of the battery with M6 screws,
and ensure that the bolts are tightened with a torque of 2-3 nm (Picture 3).
(3) After all the above are installed, hang they on the wall mounting bracket,
and final lock the case and wall mounting bracket with M5 screws to prevent
accidental tripping(Picture4).
200 200
200
Picture 1 Picture 2
Picture 3 Picture 4
Wall mount bracket
Wall mounting bracket
Screw fixing hole