EasyManua.ls Logo

PEERLESS CW61 User Manual

PEERLESS CW61
43 pages
To Next Page IconTo Next Page
Page #1 background imageLoading...
Page #1 background image
Commercial and Industrial Ovens
IF REPLACEMENTS PARTS ARE NEEDED,
be sure to give the model number when ordering, including prex and sufx letters.
Please retain this manual for future reference
Model # Serial #
NEW STANDARD LIMITED PARTS & LABOR WARRANTY
Peerless products are guaranteed against manufacturing defects for one
year from date of installation for parts and labor. All SC Series ovens qualify
for two years parts and labor. Proper start-up procedures must be followed
and warranty card submitted to activate either warranty. If warranty is not
activated, parts will be covered until the term of the warranty expires but labor
will not be covered. Excluded from this warranty are any claims related to
items that should have been performed at the time of installation such as:
improper utility connections, poor methods of venting, checking gas pressure
and calibration of controls, also excluded are normal maintenance items such
as adjustments to pilots, burners and cleaning related issues.
When making a claim for warranty service, during a claim inspection by
Peerless or its service representative, it is determined that the equipment

been properly maintained, or has been subject to misuse, abuse, has not
been properly installed / calibrated* or misapplication, neglect, accident,

be VOID.
* Warranty terms are VOID if instructions provided with equipment are not
followed.
ovens
CW41 CW61 CW100 C131
CW51 2324 2348
P.O. Box 859 Sandusky, Ohio 44870 (419) 625-4514 FAX 625-4597
www.Peerlessovens.com ofce@peerlessovens.com
InstructIon Manual
Question and Answer IconNeed help?

Do you have a question about the PEERLESS CW61 and is the answer not in the manual?

PEERLESS CW61 Specifications

General IconGeneral
BrandPEERLESS
ModelCW61
CategoryOven
LanguageEnglish

Summary

New Standard Limited Parts & Labor Warranty

Set Up Instructions

Proper Flue Box Connection for Stacking Units

Step 1: Mount Z Baffle

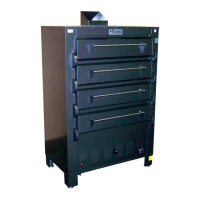
Mount the 'Z' baffle under the flue opening of the top oven.

Step 2: Mount Flue Boxes

Mount both flue boxes and interconnect them.

Step 3: Mount Flue Hat

Mount the proper flue hat and utility connections.

Do's and Don'ts of Venting

Prohibited Venting Practices

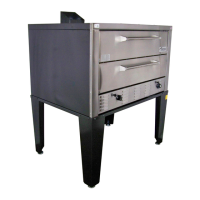
Avoid direct vent without divertor, 90-degree elbows, or direct venting in kitchen hoods.

Recommended Venting Practices

Install under a hood, direct vent, or next to a hood with stove pipe.

Installation Instructions CW Series

CW Series Lighting and Shut Down Instructions

CW Series Troubleshooting Guide

CW Series Oven Uneven Heating

Diagnose issues causing uneven heating and food burning.

CW Series Burner and Pilot Light Out

Troubleshoot reasons for burner and pilot light extinguishing.

CW Series Main Burner Fails to Ignite

Resolve issues preventing the main burner from igniting.

CW Series Oven Temperature Control Failure

Troubleshoot thermostat not cutting down at set temperature.

CW Series Parts Replacement Instructions

Installation Instructions Models 2324, 2348

Operation Instructions Models 2324, 2348

Light Pilot and Burner

Open access door, depress red button on safety valve and light pilot.

Hold Pilot Button

Hold the pilot button for 30 to 45 seconds after lighting.

Troubleshooting Guide Models 2324, 2348

2324/2348 Series Oven Uneven Heating

Diagnose issues causing uneven heating and food burning.

2324/2348 Series Burner and Pilot Light Out

Troubleshoot reasons for burner and pilot light extinguishing.

2324/2348 Series Main Burner Fails to Ignite

Resolve issues preventing the main burner from igniting.

2324/2348 Series Oven Temperature Control Failure

Troubleshoot thermostat not cutting down at set temperature.

Cautions

Gas Odor Procedure

Shut off gas and contact supplier if gas odor is detected.

FibraMent-D Baking Stone Instructions

Baking Stone Handling Warnings

Handle stones carefully, avoid thermal shock, wedging, and improper cleaning.

Robertshaw Flame Master Oven Control

By-Pass Flame Adjustment

Adjust the by-pass flame to achieve a minimum stable flame.

Robertshaw Control Recalibration

When to Recalibrate

Field recalibration is seldom necessary, only if cooking results prove control inaccuracies.

Recalibration Procedure

Follow steps to check oven temp, adjust calibration plate, and replace dial.

Robertshaw Auto-Calibrator Oven Heat Control

By-Pass Flame Adjustment

Adjust the by-pass flame to achieve a minimum stable flame.

Oven Control Recalibration

Recalibrate the oven control to match actual oven temperatures.

Robertshaw TS Series Safety Valves

Troubleshooting Pilot Issues

Troubleshoot pilot not staying lit by checking drafts, flame, and thermocouple.

CW/PE Series Wiring Diagram

Related product manuals