9
ASSEMBLING THE TABLE
Directions:
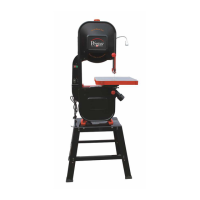
1. Install the table-tilting bracket with two hex head bolt with flat washer. Block the bolts A (image H)
Now you are ready to go to the next step, assembling the table.
If you are alone we recommend firstly to remove the blade from the band saw before installing the table to
avoid breaking the fine blade. If somebody is helping you, (we recommend it, you should be able to install the
table without any damage to the blade.
H
2. Put in place the long hex head bolt B with nut. (image H). Don’t block it now. This bolt is the stop block
where the table will lean on when the table will be perfectly square.
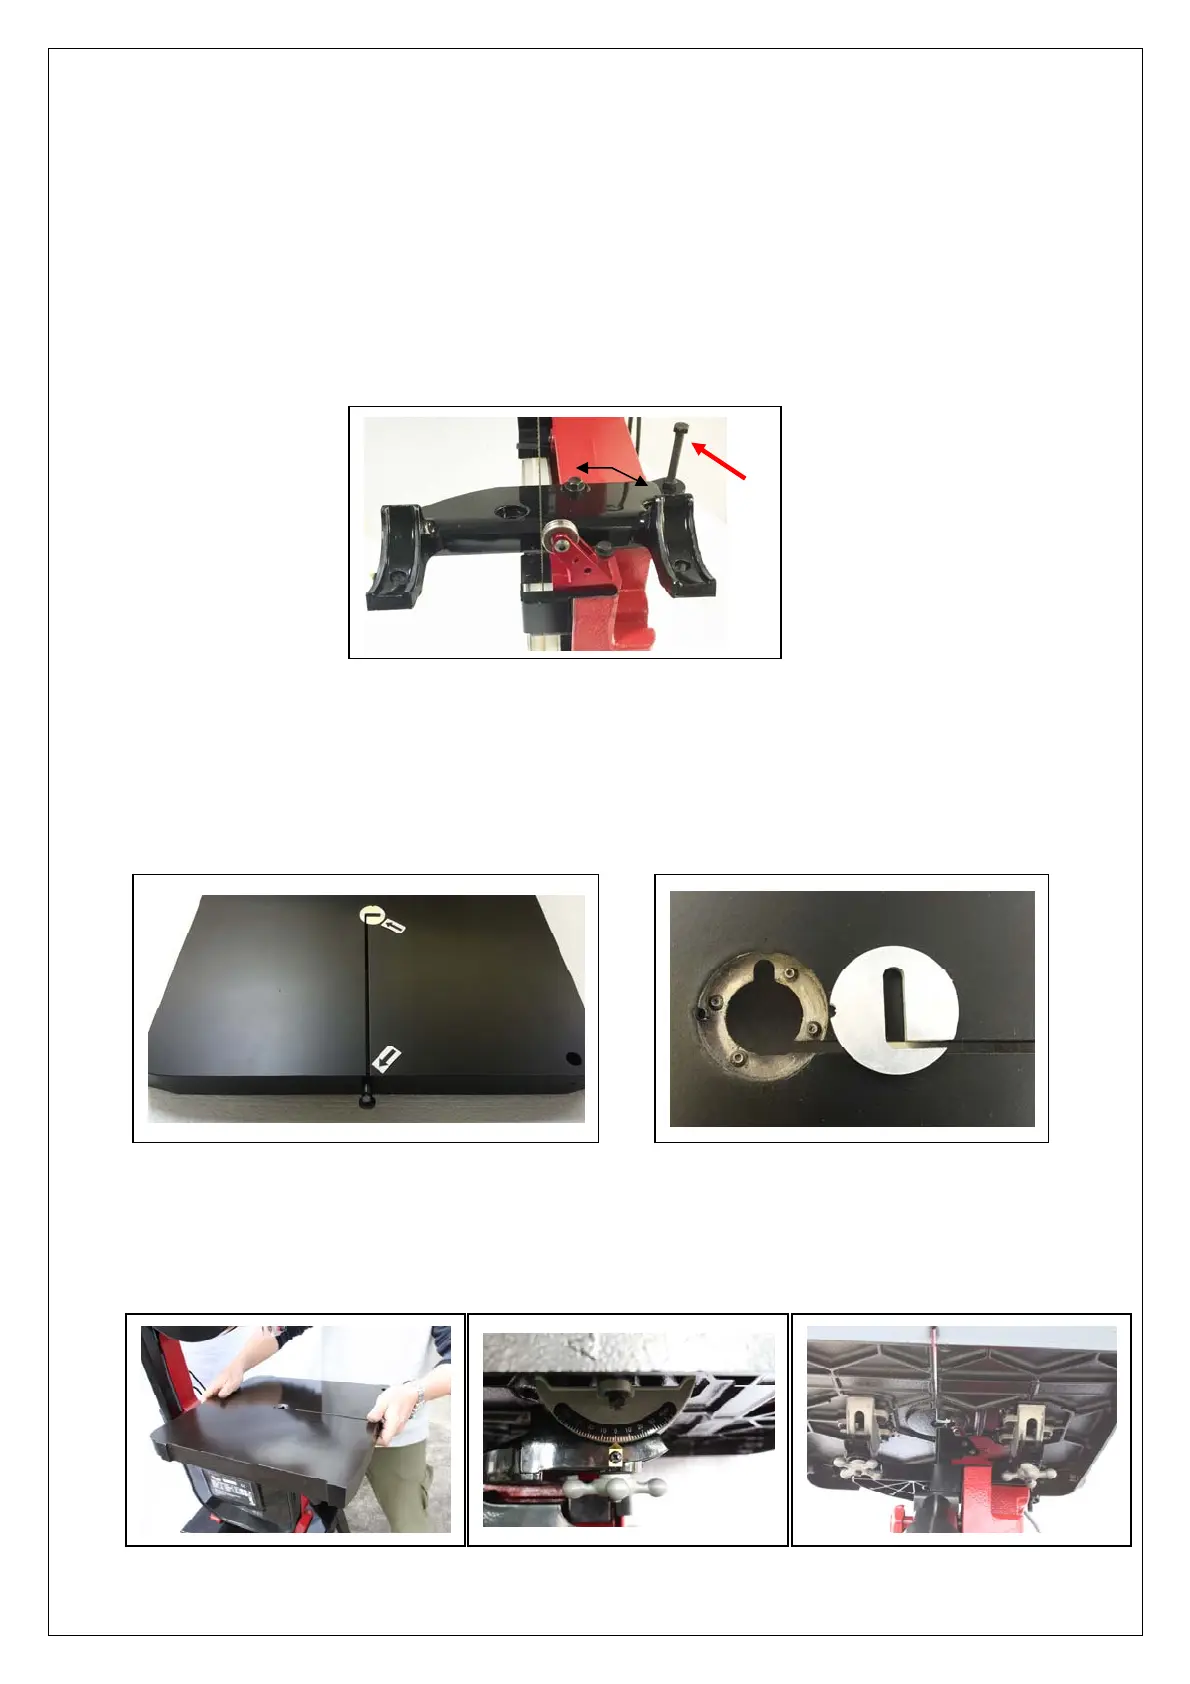
3. Remove the insert from the center of the table and the table alignment pin on the side of the table. (image I)
4. This insert rests on four Allen screws. Screw/unscrew these four screws to adjust the position of this insert on
the surface of the table. (image J)
I
J
5. Grab the table on hand and turn it with the black face on top. Under the table verify that the long bolts are
hanging at the center of each trunnion. If the blade is still on the machine, move the table very carefully, the
blade passing through the slot until the blade is at the central part of the table. Then take it down at his final
position, both long bolts passing through the table-tilting bracket. Finally put in place both lock knobs. (image
K-L-M).
K
L
M
B
A