10
BASIC ADJUSTMENTS AND CONTROLS
6. If you have removed the blade, you have now to put it back, following the instructions concerning this
important point.(Pages 7+8).
N
O
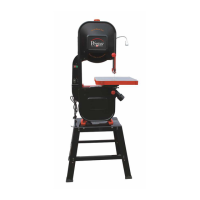
7. Re-install the table insert in the center of table and the alignment pin on the side. (Images N + O)
8. Adjusting blade tension
Determining ideal blade tension is somewhat subjective. It is learned
through practice and experience, depending of personal
preference and individual work habits.
But you need to know that the best work will be always made with a
blade rather too tense than not enough.
Suggestion:
When the blade is in tension and the upper guide in highest position,
push the blade at middle height with your finger, if you are able to
obtain an arrow of 3-4mm, the tension is correct. (Image P)
Q
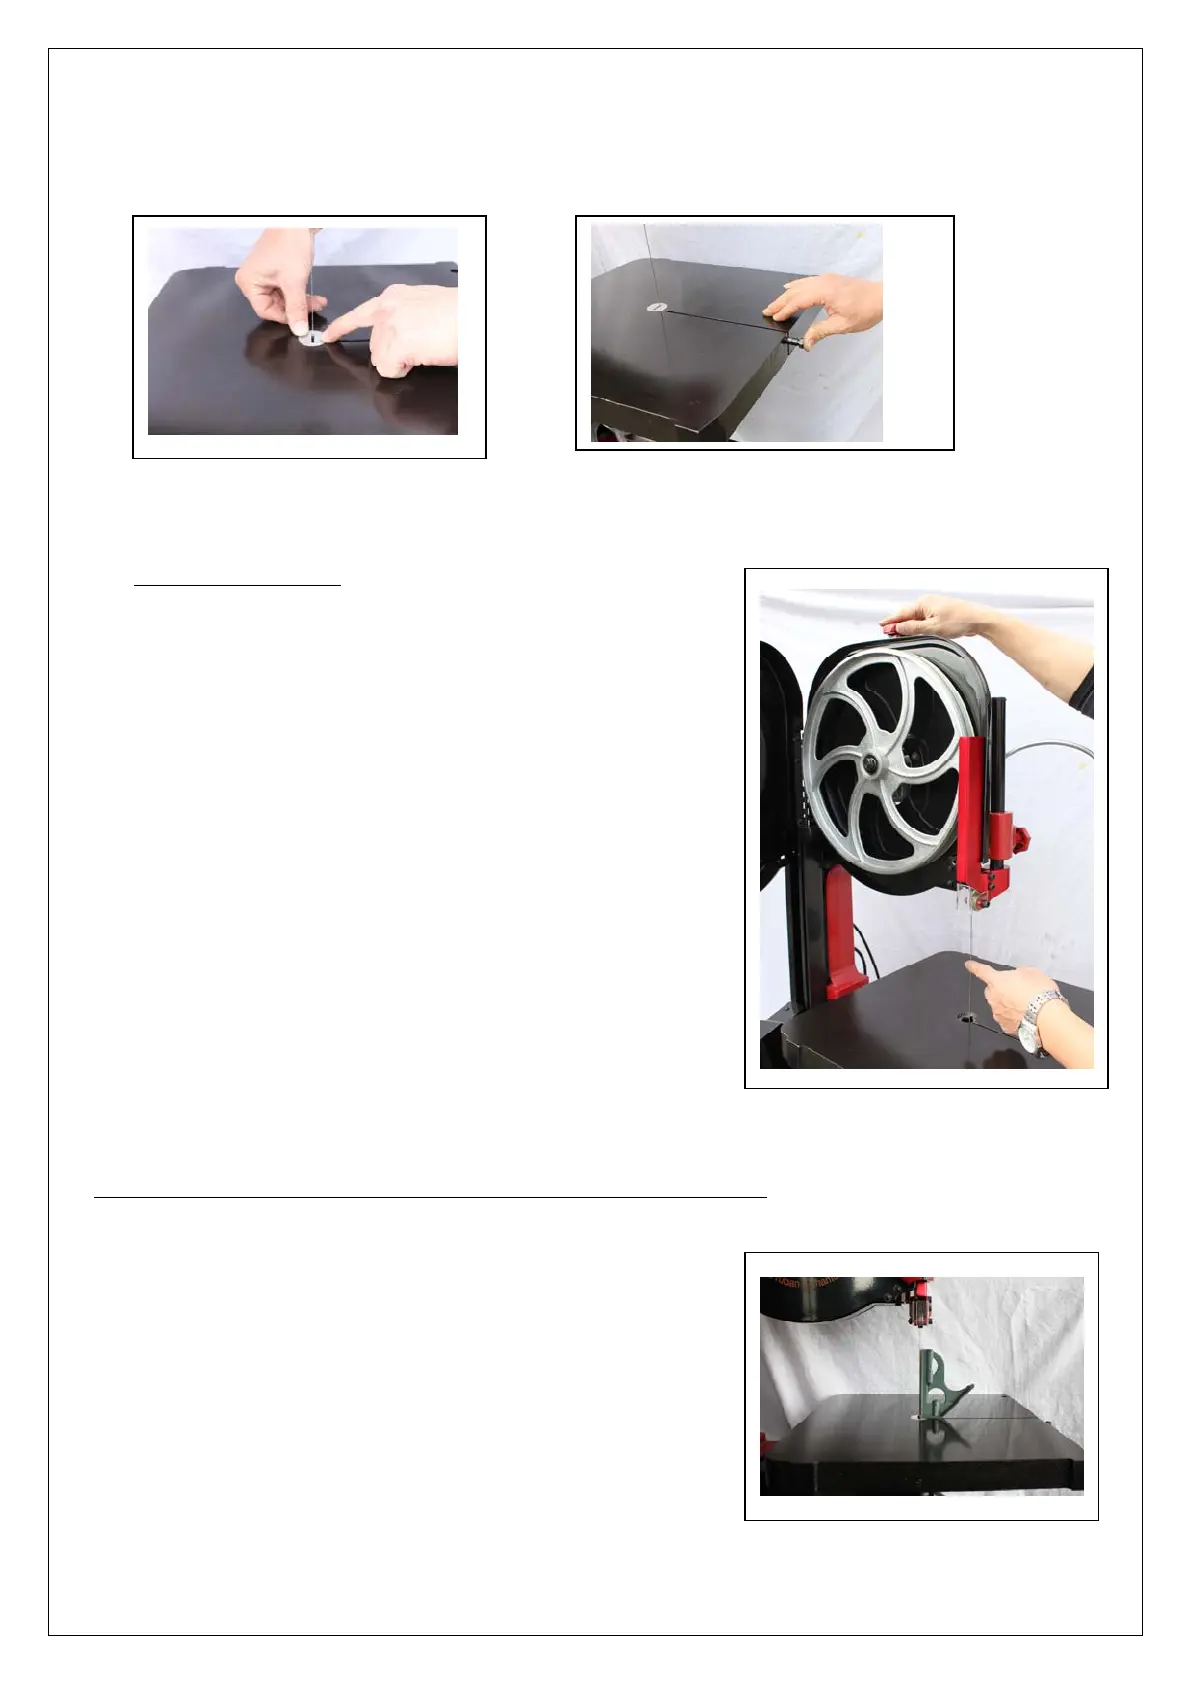
Very important: verification of the squaring between the table and the blade.
1. Screw the screw B (image H page 9) of about 10mm, the head
of the bolt must not be in contact with the table.
2. Unscrew both lock knobs then adjust perfectly the angle with a
square gauge, block again the table. (image Q)
3. Unscrew the screw B until it just touch the table, block the nut.
The stop block is now in place and the 90° angle will be easily
found again in the future.
P