Do you have a question about the Pegasus MC Series and is the answer not in the manual?
Provides an overview of the manual's purpose and instructions.
Explains the meaning of DANGER, WARNING, and CAUTION symbols.
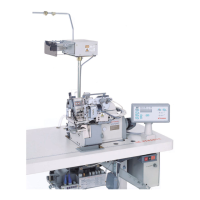
Details the intended applications and purpose of the labor saving device.
Lists conditions that may affect the device's life, function, performance, and safety.
Outlines safety precautions to be taken during maintenance procedures.
Instructions for pre-operation checks of the machine and device.
Emphasizes the need for proper training for operators and maintenance personnel.
Guidance on properly unpacking the machine and device.
General steps for installation and preparation before operation.
Detailed instructions for connecting the air lines to the device.
Instructions for safely connecting the power cords and checking voltage.
Steps for securely connecting the ground wires.
Checks to perform on cords and air lines before turning on the power.
Safety guidelines for working with and operating the machine.
Procedures and precautions for maintaining, checking, and repairing the device.
Information regarding the battery in the MC power box.
Describes the intended applications for attaching elastic.
Details tape width, machine speed, and programmable items.
Instructions for mounting the MC device bracket.
Steps to install the console box and its bracket.
Procedure for mounting the power box.
Guide for installing the reel stand.
Instructions for mounting the lint collector.
Steps for installing the solenoid, filter regulator, and speed controller.
Instructions for installing the knee switch.
Guide for installing the pitman rod/switch.
How to set the air pressure using the filter regulator knob.
Procedure for draining collected moisture from the filter regulator.
Operation of the machine treadle for starting and activating the MC device.
Using the knee switch to select feeding amounts A or B.
Activating the tape cutter using the finger switch.
Function of the positioner switch for running the machine.
Procedure for moving the MC device to access components.
Adjusting the guide on the presser foot for smooth tape feeding.
Returning the MC device to its operational position.
Steps to lock the flat spring and open the roller.
Inserting the elastic tape into the machine guides.
Fine-tuning guides for smooth tape passage.
Inserting tape between rollers and up to the presser foot guide.
Steps to release the lever and close the roller.
Adjusting roller pressure for smooth tape feeding.
Verifying smooth tape passage through rollers and guides.
Selecting a sewing mode or stopping the tape feed roller.
Entering the desired inserting amount of tape (elastic).
Details the base length setting, usually no change needed.
Changing the programmed item (A-Z) for sewing data.
Selecting the display language between Japanese and English.
Setting the number of stitches to stop the tape feed roller.
Stitches to turn the tape feed roller in reverse at sewing start.
Stitches from sewing start until thread chain is sucked up.
Stitches from tape cut to when thread chain is sucked up.
Stitches while tape is not fed and thread releaser operates.
Setting the feeding speed of tape (elastic) at sewing start.
Instructions for initializing the MC device before first use.
Overview of default sewing data and their adjustable ranges.
Procedure to change programmed items (A-Z) for sewing data.
How to check and set the tape inserting amount.
Detailed steps for setting the tape inserting amount.
Setting stitch count for reverse tape feed to remove slack.
How to perform an operation test to diagnose issues.
Safety instructions for needle removal before adjustment.
Checking smooth thread cutting by turning the pulley.
Procedure for removing the cloth guide plate if needed.
Removing the screw and chain cutter from the machine.
Adjusting cutting pressure using screw and nut.
Securing the adjusted cutting pressure.
Mounting the chain cutter onto the machine.
Re-installing the screw after adjustment.
Positioning the movable knife at the bottom of its stroke.
Adjusting the overlap between movable and stationary knives.
Securing the adjusted knife overlap.
Re-attaching the cloth guide plate.
Instructions for replacing the needle after adjustment.
Adjusting needle thread tension for thread chain and plain seaming.
Adjustments for the drop feed mechanism.
Setting the air cylinder speed for optimal performance.
Verifying and adjusting the feed dog height.
| Brand | Pegasus |
|---|---|
| Model | MC Series |
| Category | Sewing Machine |
| Language | English |