8 Pelco Manual C1490M (10/98)
3.0 INSTALLATION
3.1 DOME DRIVE
1. Turn on power to the back box. The red LED should light to indicate power. If
the LED does not light, correct the trouble before proceeding. (Refer to Sec-
tion 6.0, TROUBLESHOOTING, in manual C1487M.) If the light operates, you
may either leave power on or turn it off before continuing the installation.
2. Set the switches on the bottom of the dome drive. Refer to Table A for the
settings for SW1, and Table B and Table C for SW2.
3. Install the dome drive in the back box. Line up the green tab and red tab on the
dome drive with the green label and red label on the back box. Raise the dome
drive into the back box and push on the ends of the tabs until they both click
into place on the back box.
4. Turn on power, if it is not on. Listen for the fan operating. If the fan does not
work, the dome will overheat and shut down. If the fan does not work, return
the back box electronic assembly and dome drive to the factory for repair.
Refer to Section 6.1, BACK BOX ELECTRONIC ASSEMBLY REMOVAL, in
manual C1487M.
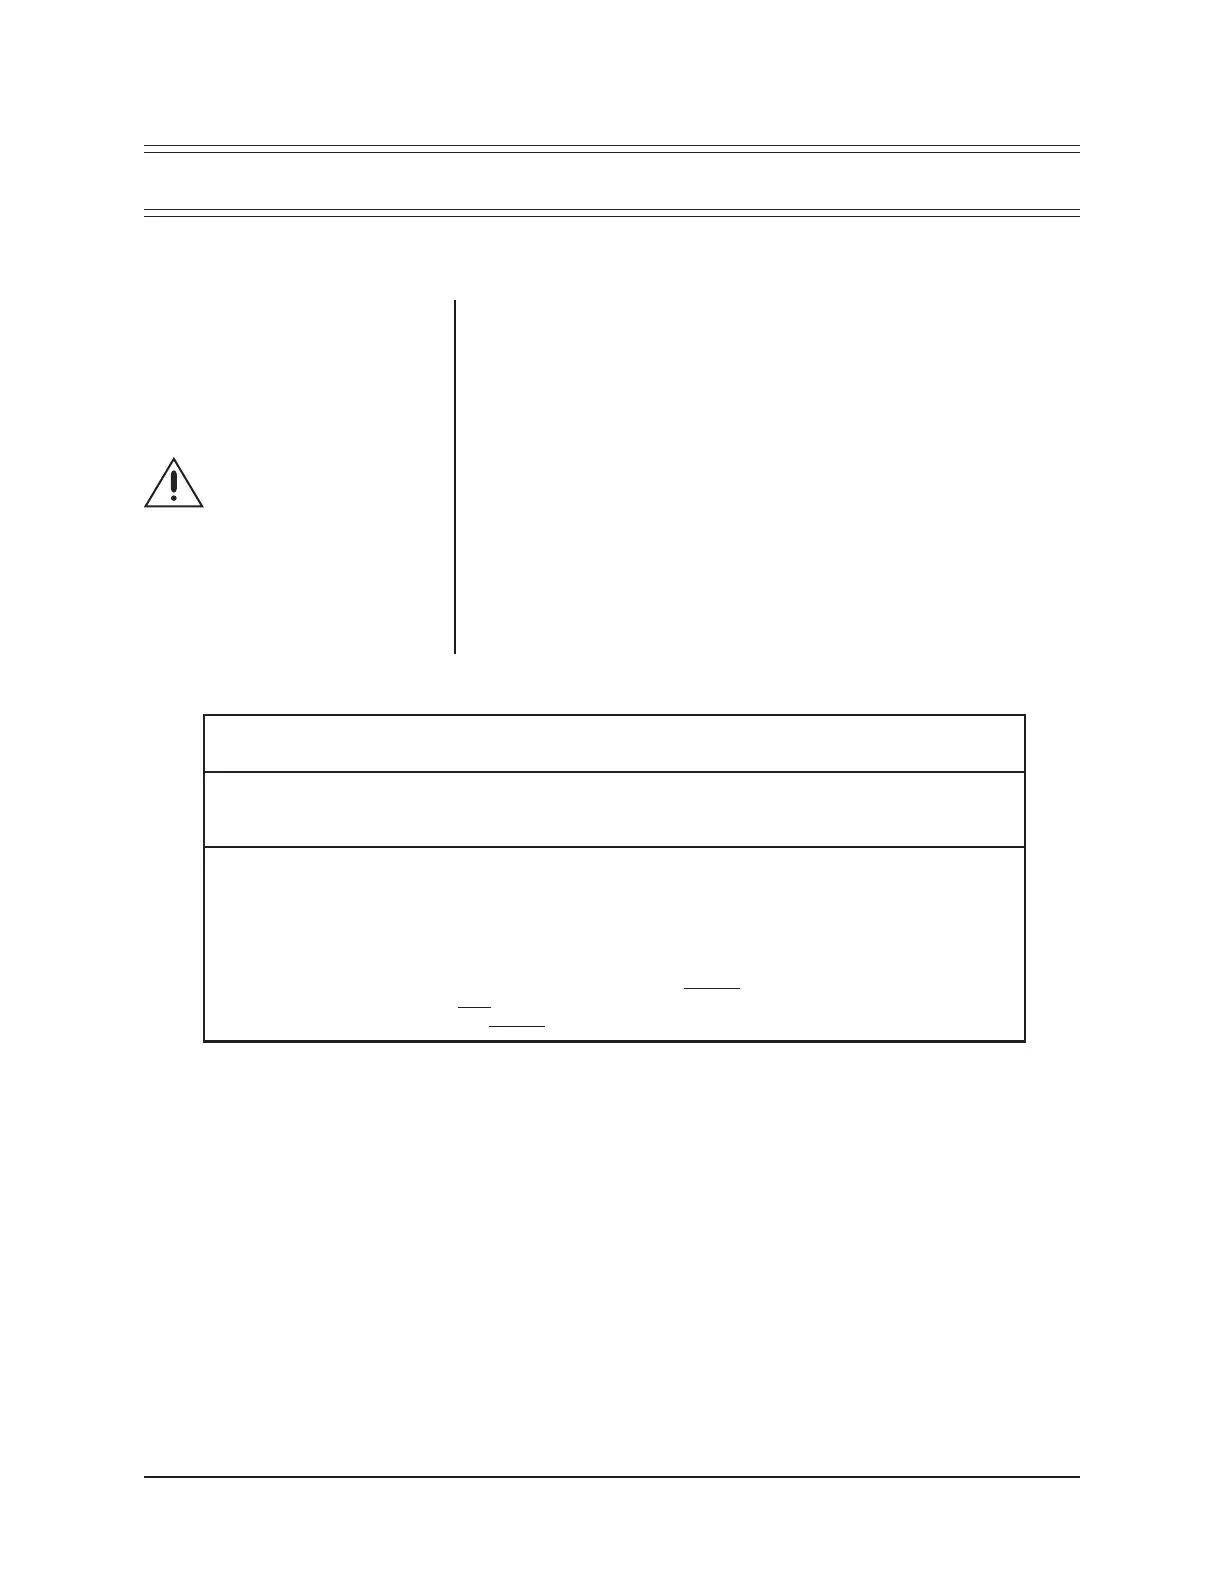
Table A. Switch Settings for SW1
Control Type Switch Setting
SW1-1 SW1-2 SW1-3 SW1-4 SW1-5 SW1-6 SW1-7 SW1-8
Coaxitron
®
OFF OFF OFF OFF OFF OFF OFF OFF**
P-Type Control ON OFF OFF OFF OFF OFF OFF OFF**
D-Type Control OFF ON OFF OFF OFF OFF OFF* OFF**
NOTES: Switches SW1-3 through SW1-6 MUST be OFF.
D-type control is RS-422 that is compatible with Pelco‘s CM6700, MPT9500 and CM8500
controllers or with American Dynamics control systems using the AD2083 Translator.
P-type control is RS-422 that is compatible with Pelco's CM6700/CM9750/CM9760 control systems.
* OFF- Use with controllers that have more than 32 presets.
ON- Use with American Dynamics controllers (32 presets).
** OFF - Use with all control systems except CM9502 with variable speed keyboards.
For CM9502 with fixed speed keyboards, set switch OFF.
ON - Use with CM9502 with variable speed keyboards for smoother joystick control.
NOTE:
For Coaxitron
®
control,
SW2 is not used and all switches
must
be OFF.
CAUTION:
Make sure
the dome drive locks into
place. Pull down on the
dome drive with moderate
pressure to ensure that it
stays in place.