Do you have a question about the Pentax MV-1 and is the answer not in the manual?
Attachment point for camera strap.
Indicates current frame number and total shots.
The main button to take a photograph.
Selects camera's shooting mode (AUTO, 100X, B).
Advances film and cocks the shutter.
Mount for external flash units.
Electrical contacts for dedicated flash units.
Sets camera to film's light sensitivity.
Adjusts exposure levels for specific conditions.
Used to rewind film into its cartridge.
Releases camera back for film access.
Mechanism for detaching lenses.
Activates the camera's self-timer.
Visual guide for mounting lenses correctly.
Adjusts lens to achieve sharp focus.
Scale on lens showing focus range at given aperture.
Marks correlating aperture and focus distance.
Adjusts the lens aperture (f-number).
Where the photographer looks to compose and focus.
Aids in aligning film.
Compartment for the film cartridge.
Initiates the film rewinding process.
Location for camera batteries.
Connects film advance mechanism to film.
Socket for attaching accessories.
Engages film perforations for advancement.
Guides the film path within the camera.
Winds exposed film onto itself.
Guides the film's path.
Covers the film chamber, may include memo holder.
Electrical connection for winders.
Mechanical parts controlling light exposure.
Keeps film flat for sharp images.
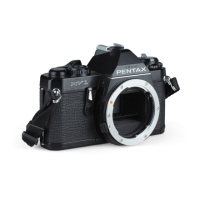
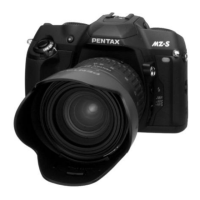
Describes camera's core features: SLR, auto exposure.
Specifies the lens mounting system used.
Lists common lenses designed for this camera.
Details shutter type, speed range, and manual settings.
Information on the self-timer delay duration.
Explains the light metering system and its range.
How the camera syncs with dedicated auto flashes.
Manual synchronization for non-dedicated flashes.
Describes viewfinder type, magnification, and eyepiece.
Explains the meaning of viewfinder LED indicators.
Details the instant-return mirror and auto diaphragm.
Operation of film winding and rewinding.
Compatibility and speed of external automatic winders.
Procedure for loading film into the camera.
Notes its automatic reset function.
Specifies battery type and its role in LED check.
Covers film chamber, mentions memo holder.
Physical dimensions of the camera.
Weight of the camera in grams and ounces.
Initial step before attaching a lens.
Aligning lens and camera mounts for attachment.
Using tactile cues for lens alignment.
Procedure for safely removing a lens.
Advice on setting down lenses to prevent damage.
Step-by-step guide for battery installation.
Important warnings for handling and safety.
Verifying battery function using LED indicators.
Step 1: Loading film and preparing for first shot.
Step 2: Adjusting camera for film sensitivity.
Step 3: Setting the desired lens aperture.
Step 4: Engaging automatic exposure mode.
Step 5: Achieving focus and framing the image.
Step 6: Using viewfinder LEDs for exposure confirmation.
Correcting exposure based on LED indicators.
How the camera selects shutter speed in AUTO.
Explains green, red, and yellow LED signals.
Safety precaution during film handling.
Recommended setting for initial film advance.
Accessing the film chamber.
Loading film into the chamber.
Engaging sprockets and advancing film.
Securing the film chamber.
Checking rewind knob rotation for proper loading.
Explains film sensitivity and its importance.
How to adjust the ASA dial to match film speed.
Storing film information for future reference.
How to select aperture with the mode dial on AUTO.
Recommended apertures for various lighting conditions.
Advanced techniques using aperture control for creative effects.
Camera is designed for AUTO mode, including with flash.
When to use '100X' and 'B' settings.
Using viewfinder LEDs to confirm exposure.
Interpreting red LED and correcting overexposure.
Interpreting yellow LED and potential blur.
How to adjust aperture for slow shutter speeds.
Alternatives if green LED is not achieved.
How shutter speed is automatically selected.
Directs users to advanced techniques.
Warning about shutter issues with lens cap on or low light.
Prevents light leaks during tripod use.
Manual flash sync or emergency use without batteries.
For long exposures requiring a cable release.
For ultra-long exposures.
Prevents light leaks during long exposures.
Achieving precise focus using the split-image circle.
Alternative focus method using the microprism collar.
Using overall viewfinder field for faster focus.
Tips for telephoto lenses with small apertures.
General advice for stable camera handling.
Recommended grip for horizontal shots.
Recommended grip for vertical shots, head support.
Alternative vertical grip with arm positioning.
Procedure to rewind exposed film into its cartridge.
Warning against forcing the film advance lever.
Releasing the rewind knob to open the back.
Crucial safety step during film unloading.
Camera's auto flash sync with the AF 200S.
How to attach the flash unit to the hotshoe.
Automatic synchronization at 1/100 sec.
Indicates when the flash is ready to fire.
Disregard other LEDs when using auto flash.
Compatibility with other cordless flashes.
Manually sync with non-dedicated flashes using '100X'.
Lack of flash ready indicator for other units.
Techniques for better results in challenging conditions.
Varying apertures for special effects.
Using wide apertures for fast shutter speeds to freeze motion.
How aperture affects the area in focus.
Achieving greatest depth of field with small apertures.
Creating shallow depth of field for subject isolation.
Adjusting exposure for backlighting or spotlights.
How to compensate for subjects against the light.
How to compensate for subjects under spotlights.
Importance of returning ASA dial to original setting.
Using a specific dial for compensation adjustments.
How to set the dial for double exposure compensation.
How to set the dial for quadruple exposure compensation.
How to set the dial for half exposure compensation.
How to set the dial for quarter exposure compensation.
Definition of depth of field and its relation to aperture.
How to read and use the depth-of-field scale on the lens.
How scale calibrations relate to focus distance and aperture.
How to set and activate the self-timer.
Steps to take multiple photos on one frame.
Technique for multiple exposures.
How to use the IR focusing mark on the lens.
Procedure for focusing with infra-red film.
Clarification on when adjustment is not needed.
How to use an adaptor for screw-mount lenses.
Limitation of adaptor regarding diaphragm control.
How metering changes with the adaptor.
Step-by-step attachment of adaptor and lens.
Procedure to detach the adaptor.
Clarification that the lever is not used for the adaptor.
How SMC Pentax lenses couple for metering.
When stop-down metering is required.
Lists accessories that necessitate this metering.
The camera's operational temperature limits.
How cold and condensation can affect the camera.
Recommendations for acclimatizing the camera.
How low temperatures affect battery performance.
How to clean viewfinder, lens, and filters.
Proper methods for removing fingerprints and dust.
Warning against touching internal mechanisms.
Advice on preventing physical damage to the camera.
Camera is not waterproof; precautions against water damage.
Steps to take if the camera gets wet.
Ideal conditions for storing the camera.
Advice on tripod screw length and using a spacer ring.
Details on defects covered and duration.
What is NOT covered by the warranty.
Manufacturer's liability for damages.
Steps for returning for service.
Procedures for servicing outside the country of purchase.
Responsibility for shipping and customs fees.
Importance of keeping receipts.
Ensuring service is done by accredited shops.
Notes on policies for specific countries.
| Film format | 35mm |
|---|---|
| Lens mount | Pentax K mount |
| Camera type | SLR |
| Shutter speed | 1 - 1/1000 second, Bulb |
| Exposure modes | Aperture priority auto, Manual |
| Metering | Center-weighted |
| ISO range | ISO 25-1600 |
| Viewfinder | Pentaprism |
| Focus | Manual |
| Flash | Hot shoe |
| Film advance | Manual |
| Power | Two LR44/SR44 batteries |
| Shutter | Vertical-travel metal focal plane shutter |