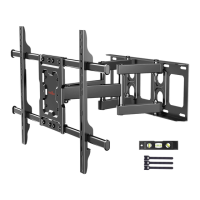
4A-1 4A-2
Step
4A Wood Stud Option
WARNING:
WARNING:
Ensure the wall plate is securely fastened to the wall before
continuing on to the next step.
● Any material covering the wall must not exceed 5/8 in. (16 mm)
● Nominal wood stud size: common 2 x 4 in. (51 x 102 mm) minimum
1½ x 3½ in. (38 x 89 mm)
● Stud center must be verified
WARNING:
Avoid potential personal injury or property damage! DO NOT
over-tighten the lag bolts [A1]. Tighten the lag bolts [A1] only until
the washers [A2] are pulled firmly against the wall plate
.
X
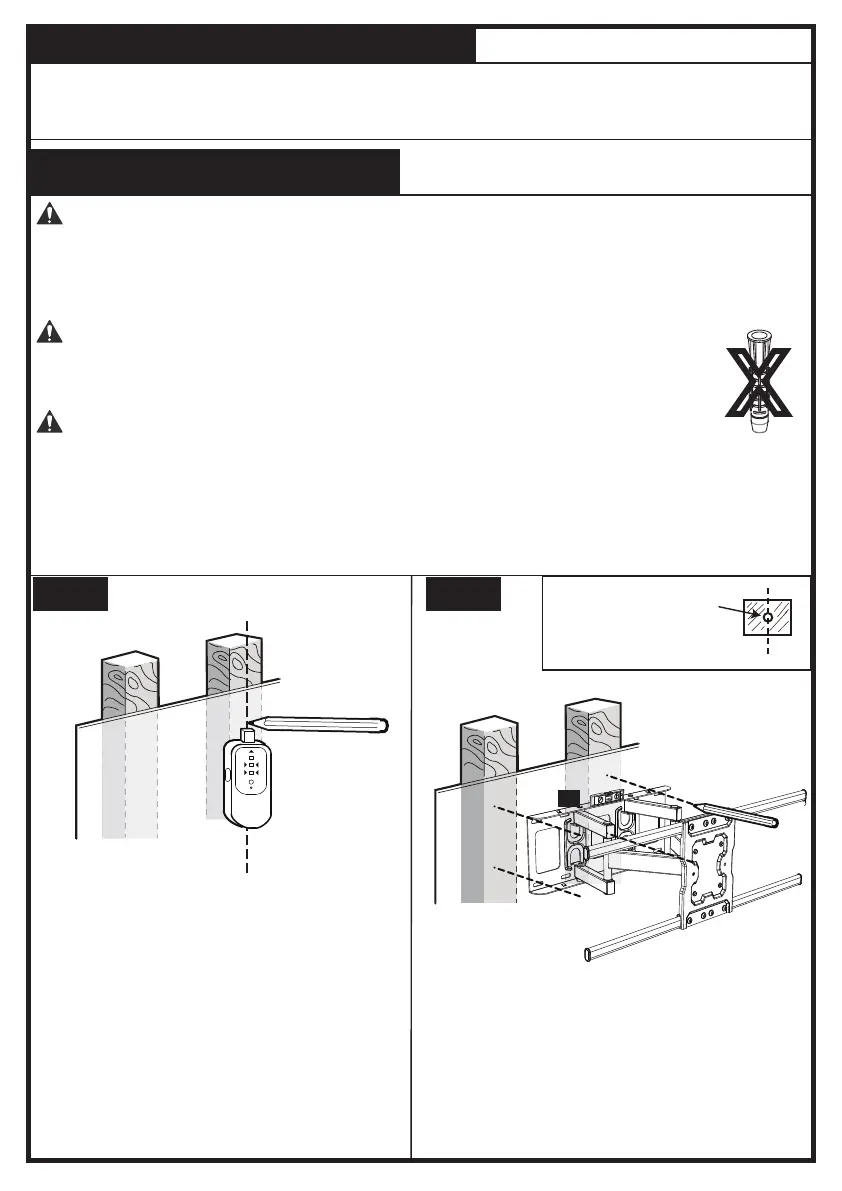
Step
4 Attach Wall Plate to Wall
For wood stud installation, follow STEP 4A
For concrete installation, follow STEP 4B
Ensure marking at
the center of the
stud.
Center line
Use a stud finder (not included) to locate
wood stud. Mark the edge and center
locatons.
05
6