6
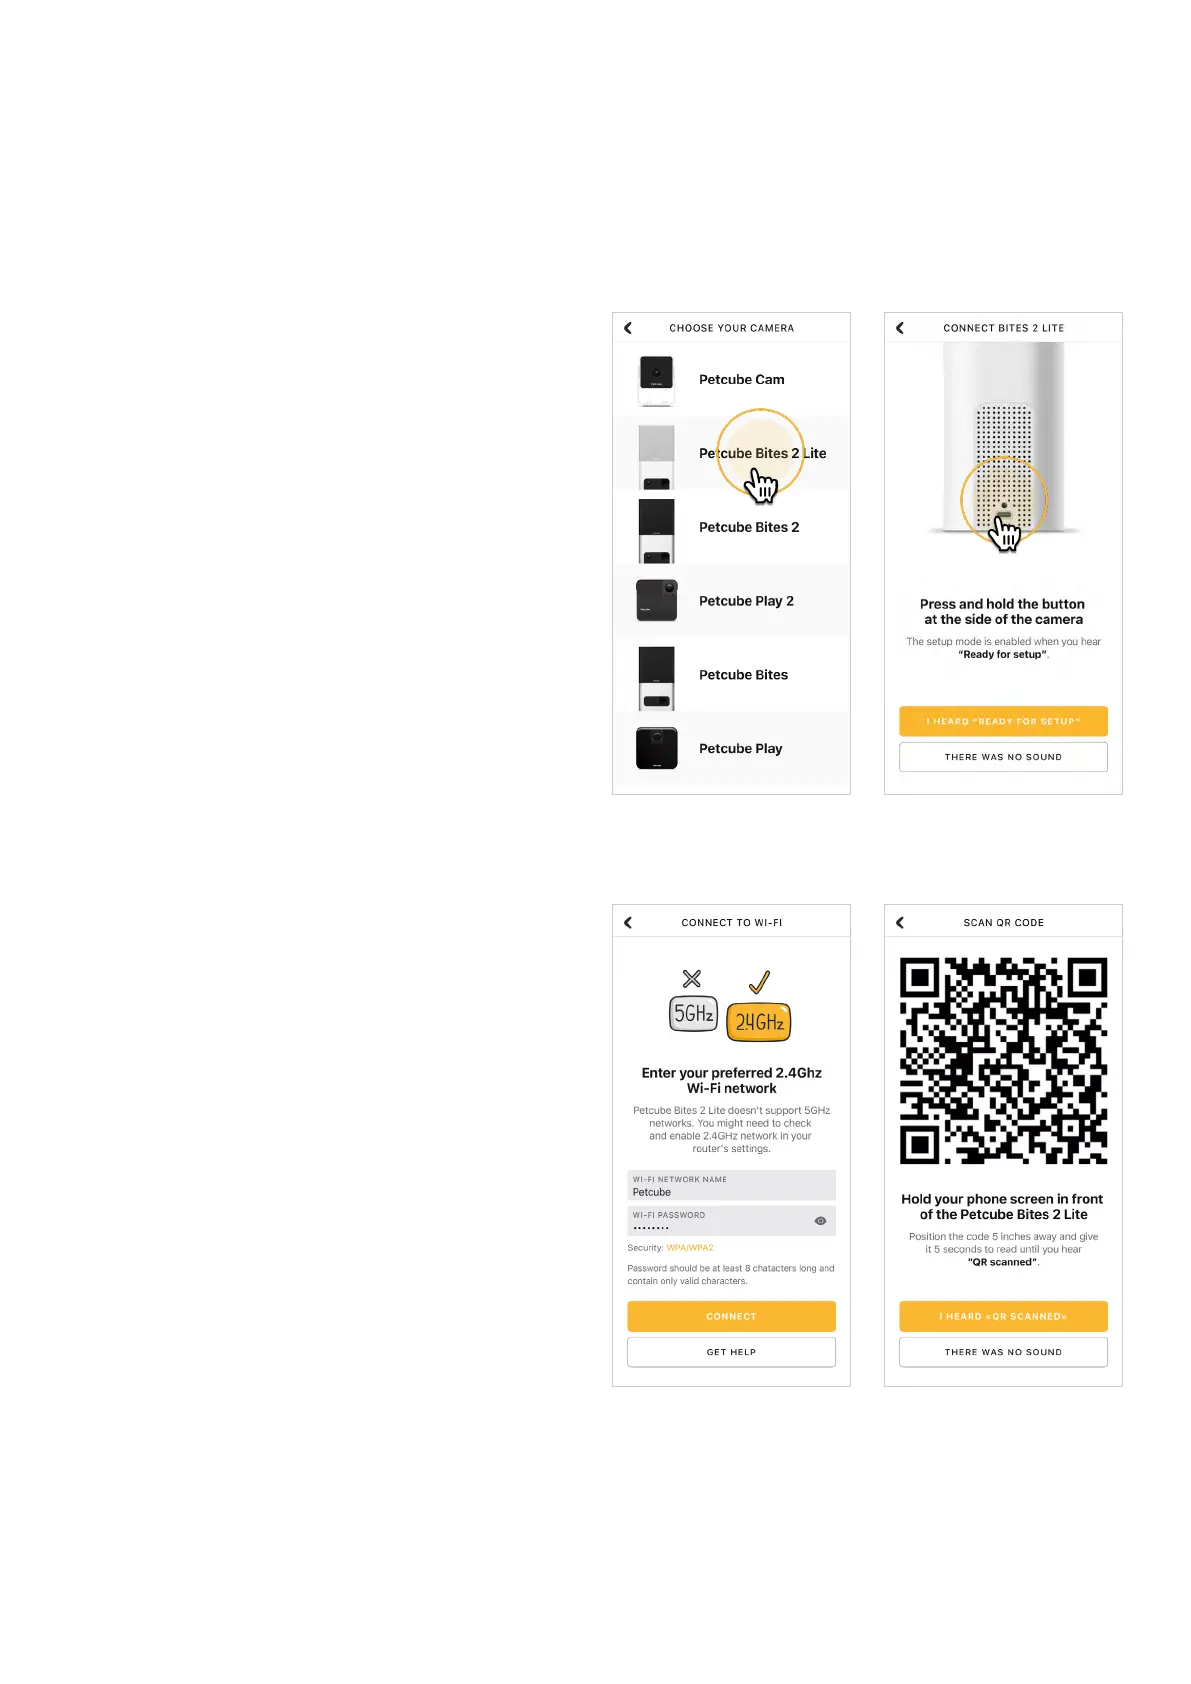
Step 5. As long as the LED light
is flashing on your camera, you’re
ready to enable the setup mode.
To do that, press the setup button
above the usb port on the camera until
you hear a short jingle and a message
saying «Ready to Connect», and tap
‘I heard «Ready to connect»
on the screen.’ (fig 4.1.6).
Step 6. At the top, you’ll see
the network that you’ll be connecting
the camera to, so tap ‘Next’
to continue the setup and enter your
Wi-Fi password or ‘Change network’
if you wish to connect it to a different
network (fig 4.1.7).
Keep in mind that only 2.4 Ghz Wi-Fi
networks are supported by Petcube
Bites 2 Lite. Please make sure you are
connecting to 2.4 Ghz Wi-Fi network.
Step 7. A QR code will be generated
on your phone screen. Hold your
camera at the 5-inch distance with
the lens facing the QR code until you
hear a message saying «QR code
scanned», check the box, tap ‘Next’
(fig 4.1.8 & 4.1.9).
Step 8. Your Petcube device
is almost set! Please wait until
it connects (figs 4.1.10 & 4.1.11) and
the light on the front panel turns blue.
Fig. 4.1.7 Fig. 4.1.8
Fig. 4.1.5 Fig. 4.1.6