6
Attach the Embellishment
Attachment
When reaching an embellishment block in a design,
the presser foot and needle will automatically be set
into correct position.
(The presser foot should be raised to “up position” and the
needle raised to its highest.)
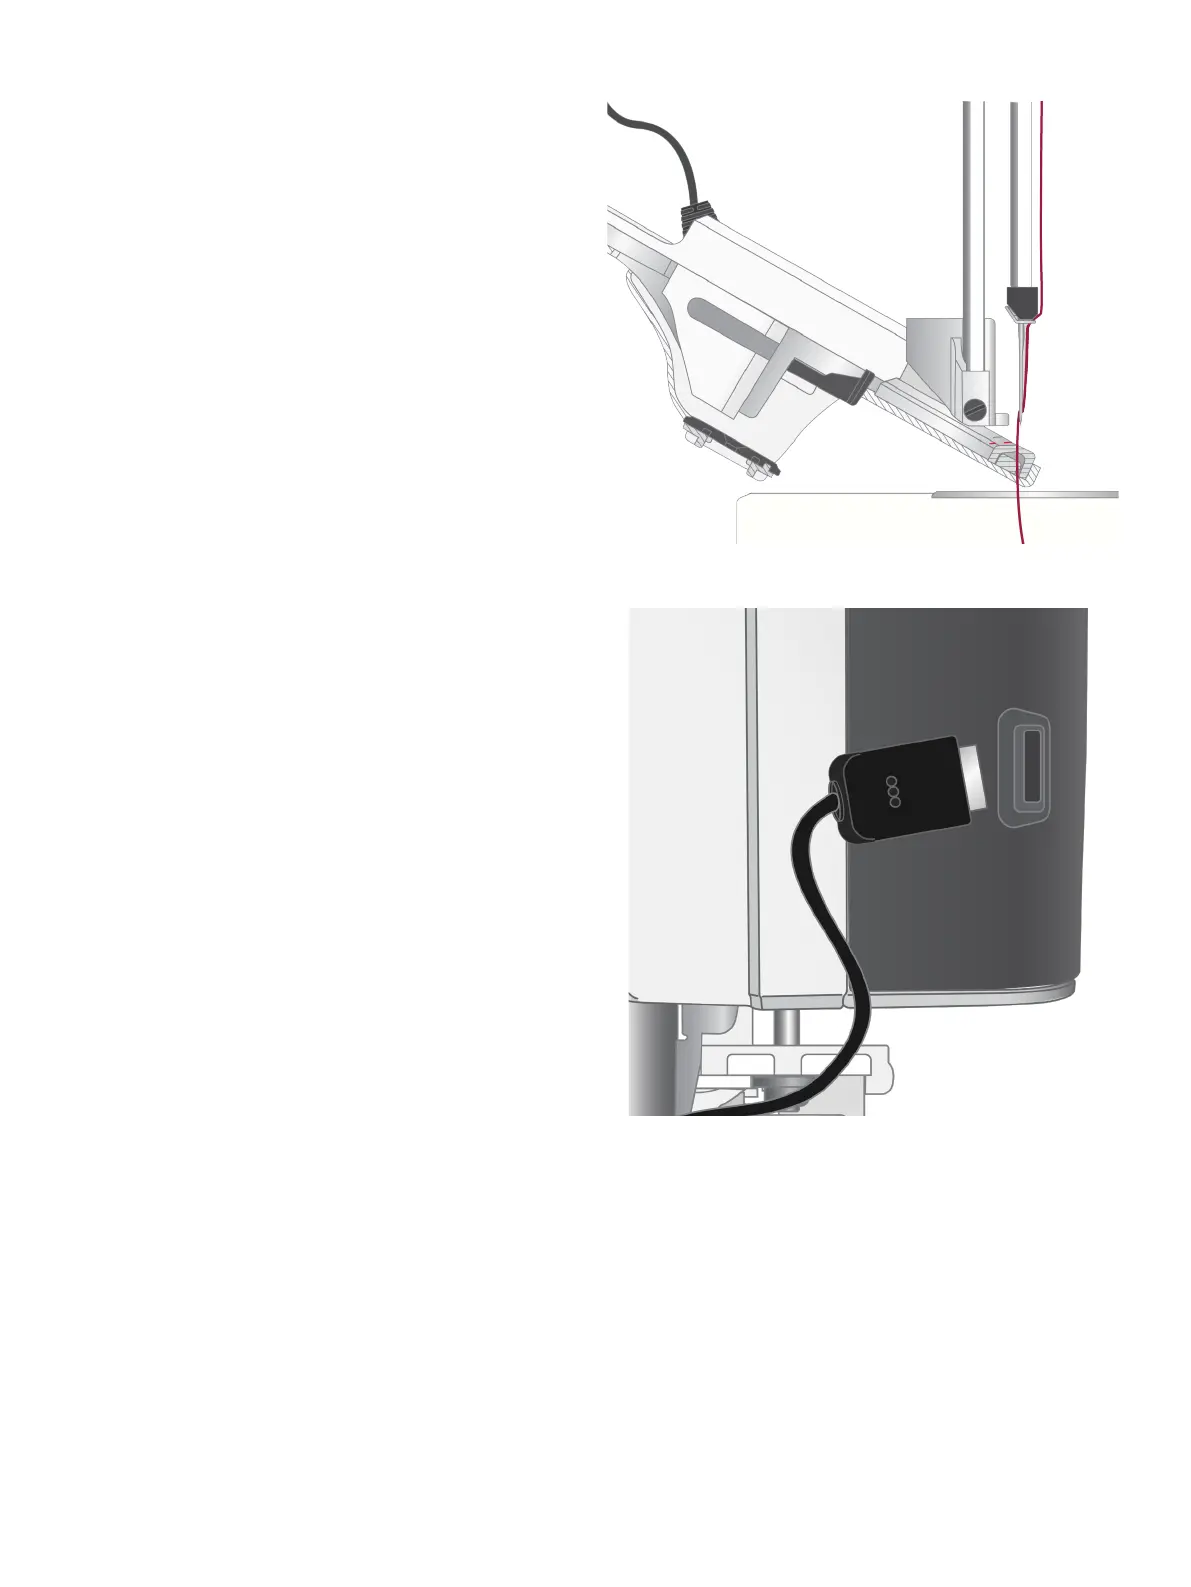
Tilt the Embellishment Attachment and insert it from
behind carefully. Make sure that the red markings align
with the needle. Slide the Embellishment Attachment
towards you onto the holder until it snaps into place.
Plug in the Embellishment
Attachment
Plug the cord into the accessory socket at the back of
the sewing head of your machine.
When the Embellishment Attachment is plugged in, a
pop-up message will appear and inform you that the
Embellishment Attachment needs to calibrate.
Touch
OK. The Embellishment Attachment will cali-brate
and move to the ready position.
Note: When plugged in, the pivot height of the Embellishment
Attachment must be adjusted to fit the height of the embel-
lishment. The pivot height is set in the temporary embroidery
settings menu.