44
Stitching off
15. Adjustment of needle threader
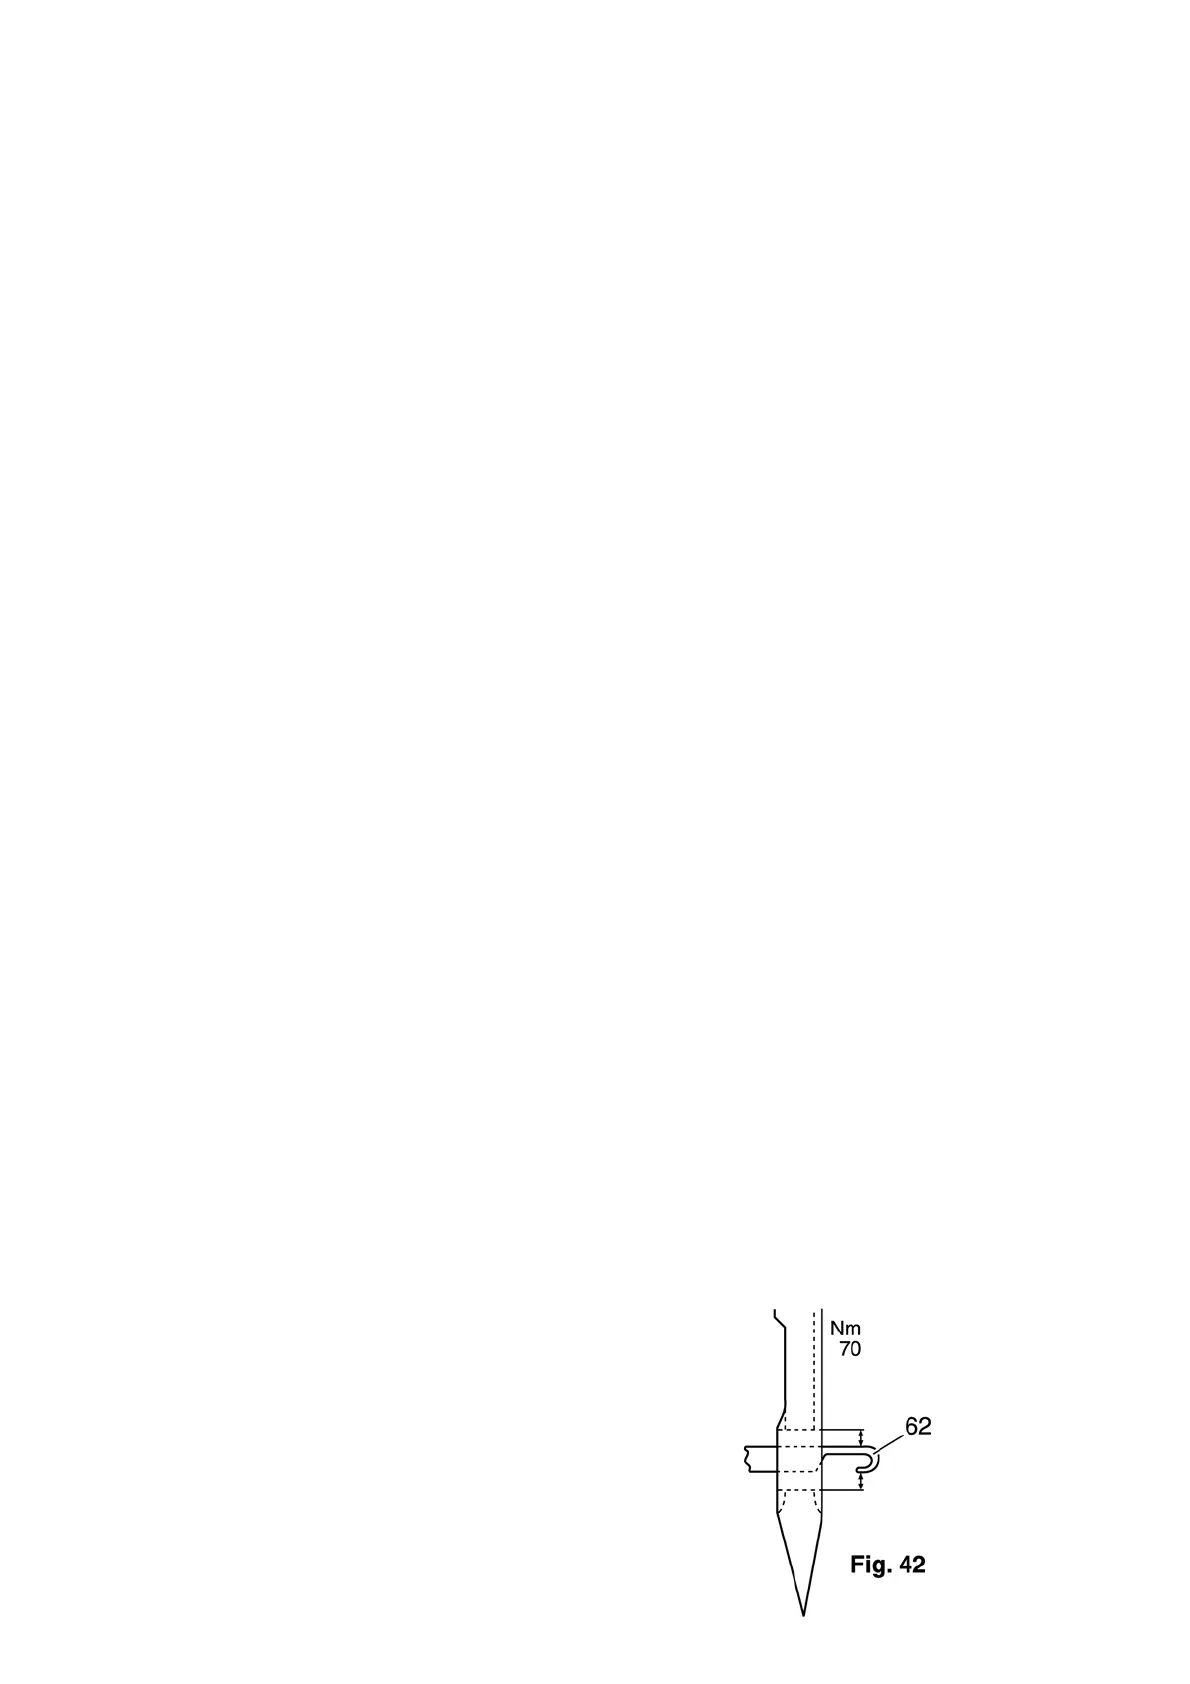
Requirement:
With the threader key pushed fully down, prong 62 must pass through in the center between the top and
bottom edge of the needle eye of a needle size Nm 70 (fig. 42).
Check:
● Insert a new needle system 130/705 H, size Nm 70.
● Switch on the machine (stitch program 01).
● Set the machine at top needle position by briefly pressing the foot control.
● Push threader key 63 fully down.
● Carry out a visual and functional test.
Height adjustment:
● Loosen the screw on the face cover and remove face cover.
● Press threader key 63 fully down and hold it in this position (fig. 44).
● Loosen allen screw 66 by only a 1/4 of a turn (fig. 43).
● Push the complete threader bar frame 67 either upwards or downwards until prong 62 has the same
clearance to the top and bottom edge of the needle eye (fig. 42).
● Tighten allen screw 66 in this position (fig. 43).
Cross-check 1:
● Using threader key 63, move the needle threader up and down.
Whilst doing so, carry out a visual check of the prong height.
● When the threader key is pushed down, pin 64 must pass completely through the diagonal guide slot
and rest on the upper end.
Lateral adjustment:
● Using threader key 63, place threader prong 62 at the front in the needle eye.
● Loosen screw 65 by only 1/8 of a turn (fig. 44).
● Push the threader bar frame either to the left or right until the prong is in the exact middle of the
needle eye.
● Tighten screw 65.
Cross-check 2:
● Activate threader key 63.
Whilst doing so, carry out a visual check of the lateral position
of the prong.