69
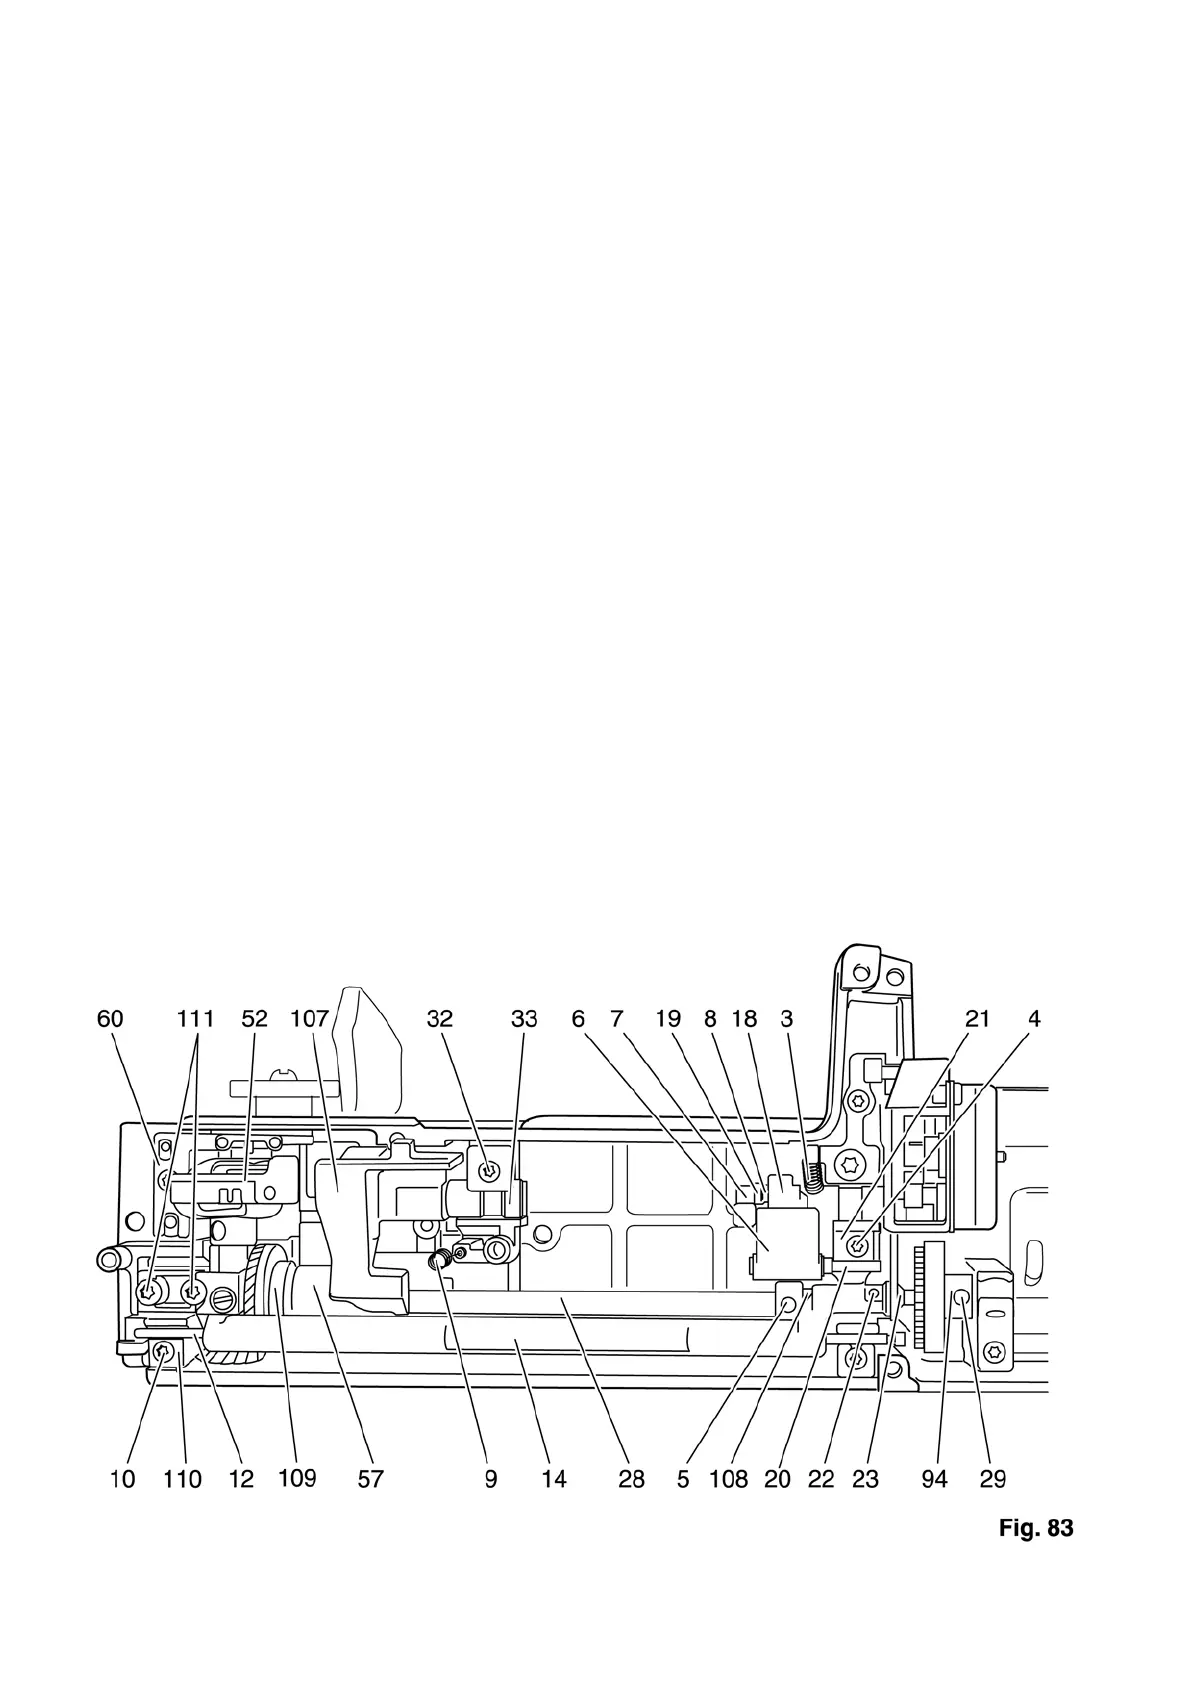
● Attach spring 9.
● Set the base plate against the machine.
● Mount both connection plugs 3 and 4 on the circuit board.
Now the following adjustments are to be carried out:
● Section 3: Timing of the feed motion
● Section 4: Adjustment of feed dog height
● Section 5: Adjustment of synchronizer
● Section 11: Adjustment of hook-to-needle clearance
● Section 12: Hook timing
● Section 13: Adjustment of needle bar height
● Section 14: Adjustment of bobbin case position finger
● Install cable.
● Insert the buttonhole sensor.
● Attach the free-arm cover and secure with both fastening screws 5.
● Bring the feed dog lowering mechanism to its normal working position.
● Engage both feed regulators 6.
● Attach the cable clip.
● Secure the base plate with the three fastening screws to the housing.
Now the following adjustments are to be checked or carried out:
● Section 17: Adjustment of bobbin thread tension
● Section 18: Adjustment of needle thread tension
● After a running-in time of approx. 10 min. - Section 21: Adjustment of equal forward and reverse stitch
length.
● Use testing appliance ABB Metrawatt M 5013 to carry out an electrical safety test according to
VDE 0701.