Mechanical Instructions
EN 14 Q522.2HE LA4.
2010-Jun-30
4.2 Service Positions
For easy servicing of this set, there are a few possibilities
created:
• The buffers from the packaging.
• Foam bars (created for Service).
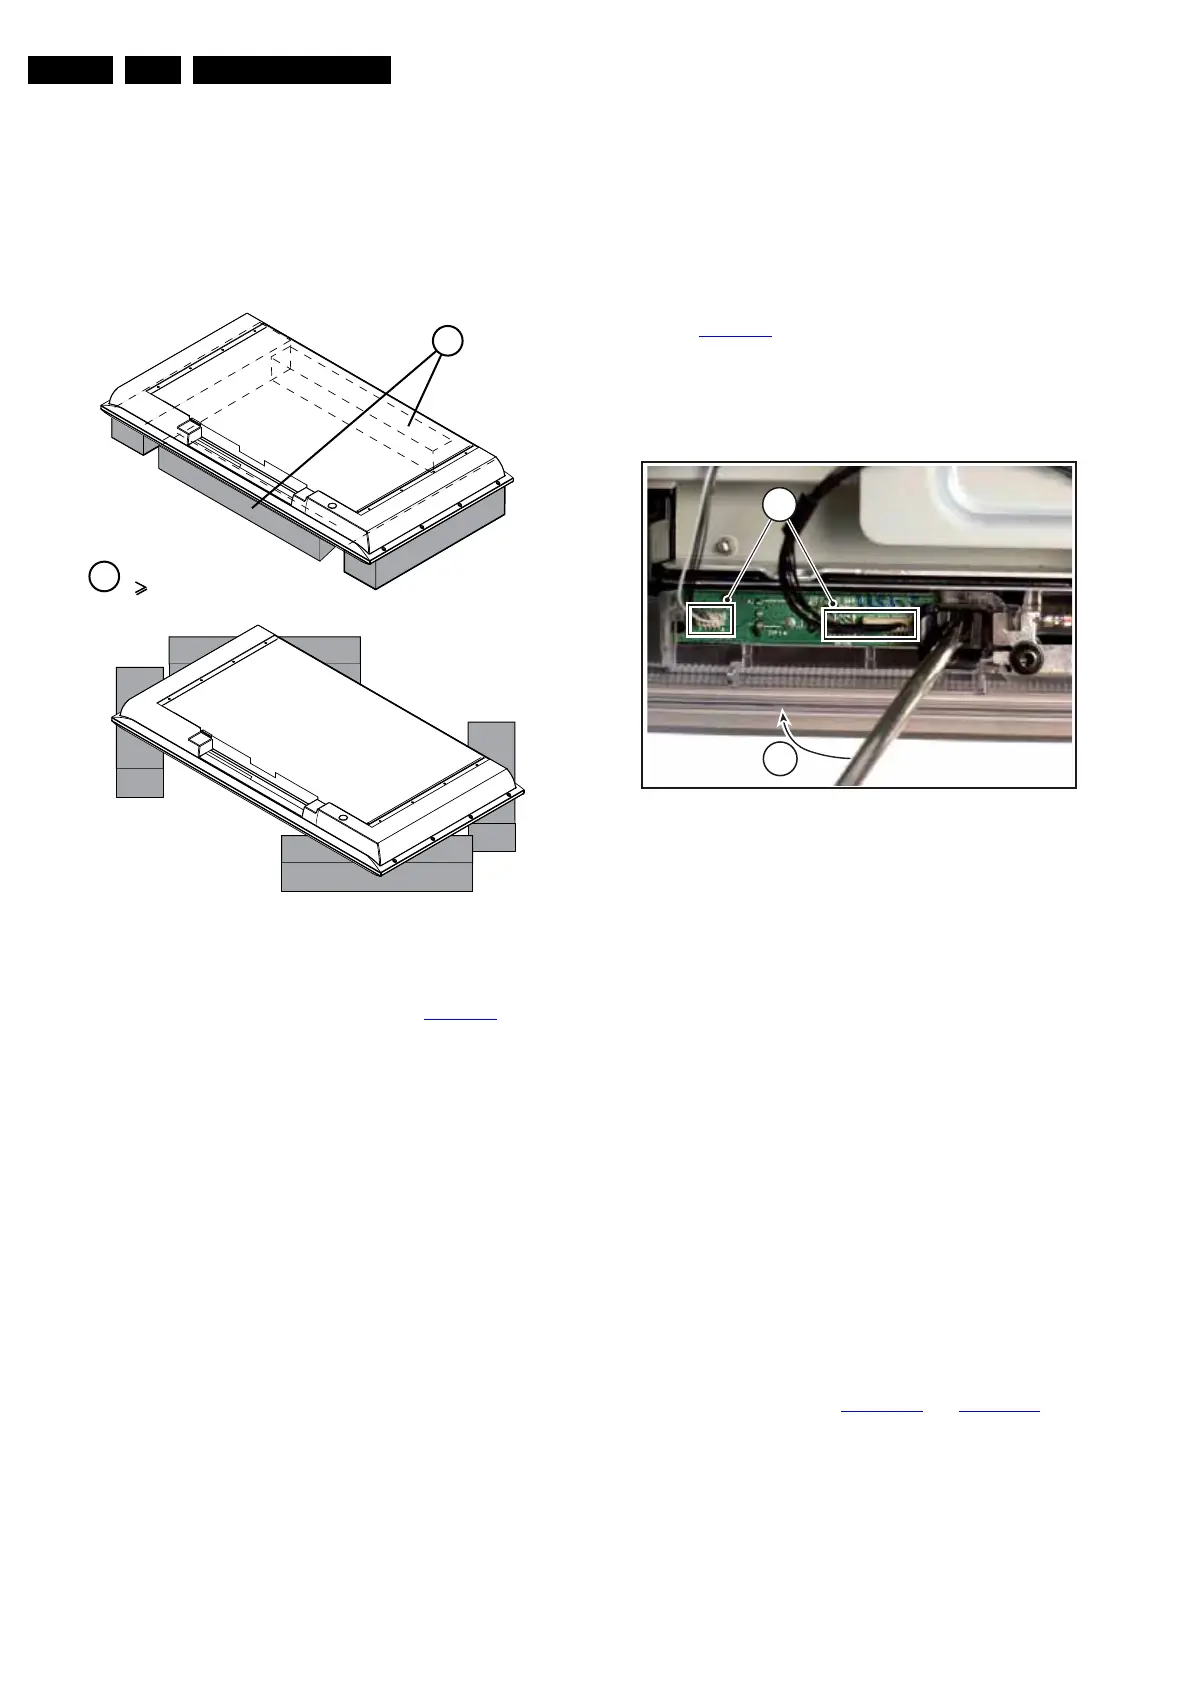
4.2.1 Foam Bars
Figure 4-8 Foam bars
The foam bars (order code 3122 785 90580 for two pieces) can
be used for all types and sizes of Flat TVs. See Figure 4-8
for
details. Sets with a display of 42" and larger, require four foam
bars [1]. Ensure that the foam bars are always supporting the
cabinet and never only the display.
Caution: Failure to follow these guidelines can seriously
damage the display!
By laying the TV face down on the (ESD protective) foam bars,
a stable situation is created to perform measurements and
alignments. By placing a mirror under the TV, the screen can
be monitored.
4.3 Assy/Panel Removal ME8 Styling
Following instructions apply to the 26HFL5850D/10 (with
Integrated Card Slot).
4.3.1 Rear Cover
Warning: Disconnect the mains power cord before removing
the rear cover.
Note: it is not necessary to remove the stand while removing
the rear cover.
1. Remove all screws of the rear cover.
2. Lift the rear cover from the TV. Make sure that wires and
flat coils are not damaged while lifting the rear cover from
the set.
4.3.2 Speakers
The speakers are located in the backcover. The spring clips
that ensure the electrical connection of the speakers to the
SSB should be removed first. The entire speakerbox can be
removed by removing the screws that hold the box.
When defective, replace the whole unit.
4.3.3 IR & LED Board
Refer to Figure 4-9
for details.
1. Unplug connectors [1].
2. Use a flat screw driver to release the clip by pushing in the
indicated direction [2].
3. Lift the board and take it out.
When defective, replace the whole unit.
Figure 4-9 IR & LED Board
4.3.4 Clock unit
1. Remove the screws.
2. Lift the board out by pulling the wire.
3. Disconnect the connector.
When defective, replace the whole unit.
4.3.5 Key Board Control Panel
1. Remove the screws on top and bottom of the panel.
2. Unplug the key board connector.
When defective, replace the whole unit.
4.3.6 Main Supply Panel
1. Unplug all connectors.
2. Remove the fixation screws.
3. Take the board out.
When defective, replace the whole unit.
4.3.7 Small Signal Board (SSB)
Caution: It is mandatory to remount screws at their original
position during re-assembly. Failure to do so may result in
damaging the SSB. Refer to Figure 4-10
and Figure 4-11 for
details.
1. Unplug the LVDS connector.
Caution: be careful, as this is a very fragile connector!
2. Unplug all other connectors.
3. Remove all screws that hold the board.
4. The SSB can now be taken out of the set, together with the
side cover.
5. To remove the side cover, remove the screws and pull the
cover sidewards from the SSB.
10000_018_090121.eps
090121
1
Required for sets
42"
1





 To Next Page