Two Smart Cards
Some Digital TV operators can provide a second CI+ module
(CAM) and smart card. A second CAM and smart card is
needed when you want to watch one channel while recording
another channel from the same TV operator.
If you can watch the same amount of channels with each card,
both cards have identical viewing rights. If you can watch less
channels with one of the cards, the cards have non-identical
viewing rights.
If your smart cards have identical viewing rights, it does not
matter which card you put in which slot. If one of the cards has
more viewing rights than the other one, insert the card with the
most viewing rights in the slot
COMMON INTERFACE 1
. Insert
the card with less rights in
COMMON INTERFACE 2
.
Insert the smart cards into the CAM modules. See the
instruction you received from the operator.
To insert the CAM in the TV…
1 - Look on the CAM for the correct method of insertion.
Incorrect insertion can damage the CAM and TV.
2 - While looking at the back of the TV, with the front of the
CAM facing towards you, gently insert the CAM into the slot.
3 - Push the CAM in as far as it will go. Leave it in the slot
permanently.
When you switch on the TV, it may take a few minutes before
the CAM is activated. If a CAM is inserted and subscription fees
are paid (subscription methods can differ), you can watch the
scrambled channels supported by the CAM smart card.
The CAM and smart card are exclusively for your TV. If you
remove the CAM, you will no longer be able to watch the
scrambled channels supported by the CAM.
Passwords or PIN codes
For some CAMs, you must enter a PIN code to watch its
channels. When you set the PIN code for the CAM, we
recommend you to use the same code you are using to unlock
the TV.
To set the PIN code for the CAM…
1 - Press
SOURCES
.
2 - Click on the channel type you are using the CAM
for.
Antenna TV
,
Cable TV
or
Satellite TV
.
3 - Press
OPTIONS
and click
Common Interface
.
4 - Click on the TV operator of the CAM. The following screens
come from the TV operator. Look up the PIN code setting.
4.4
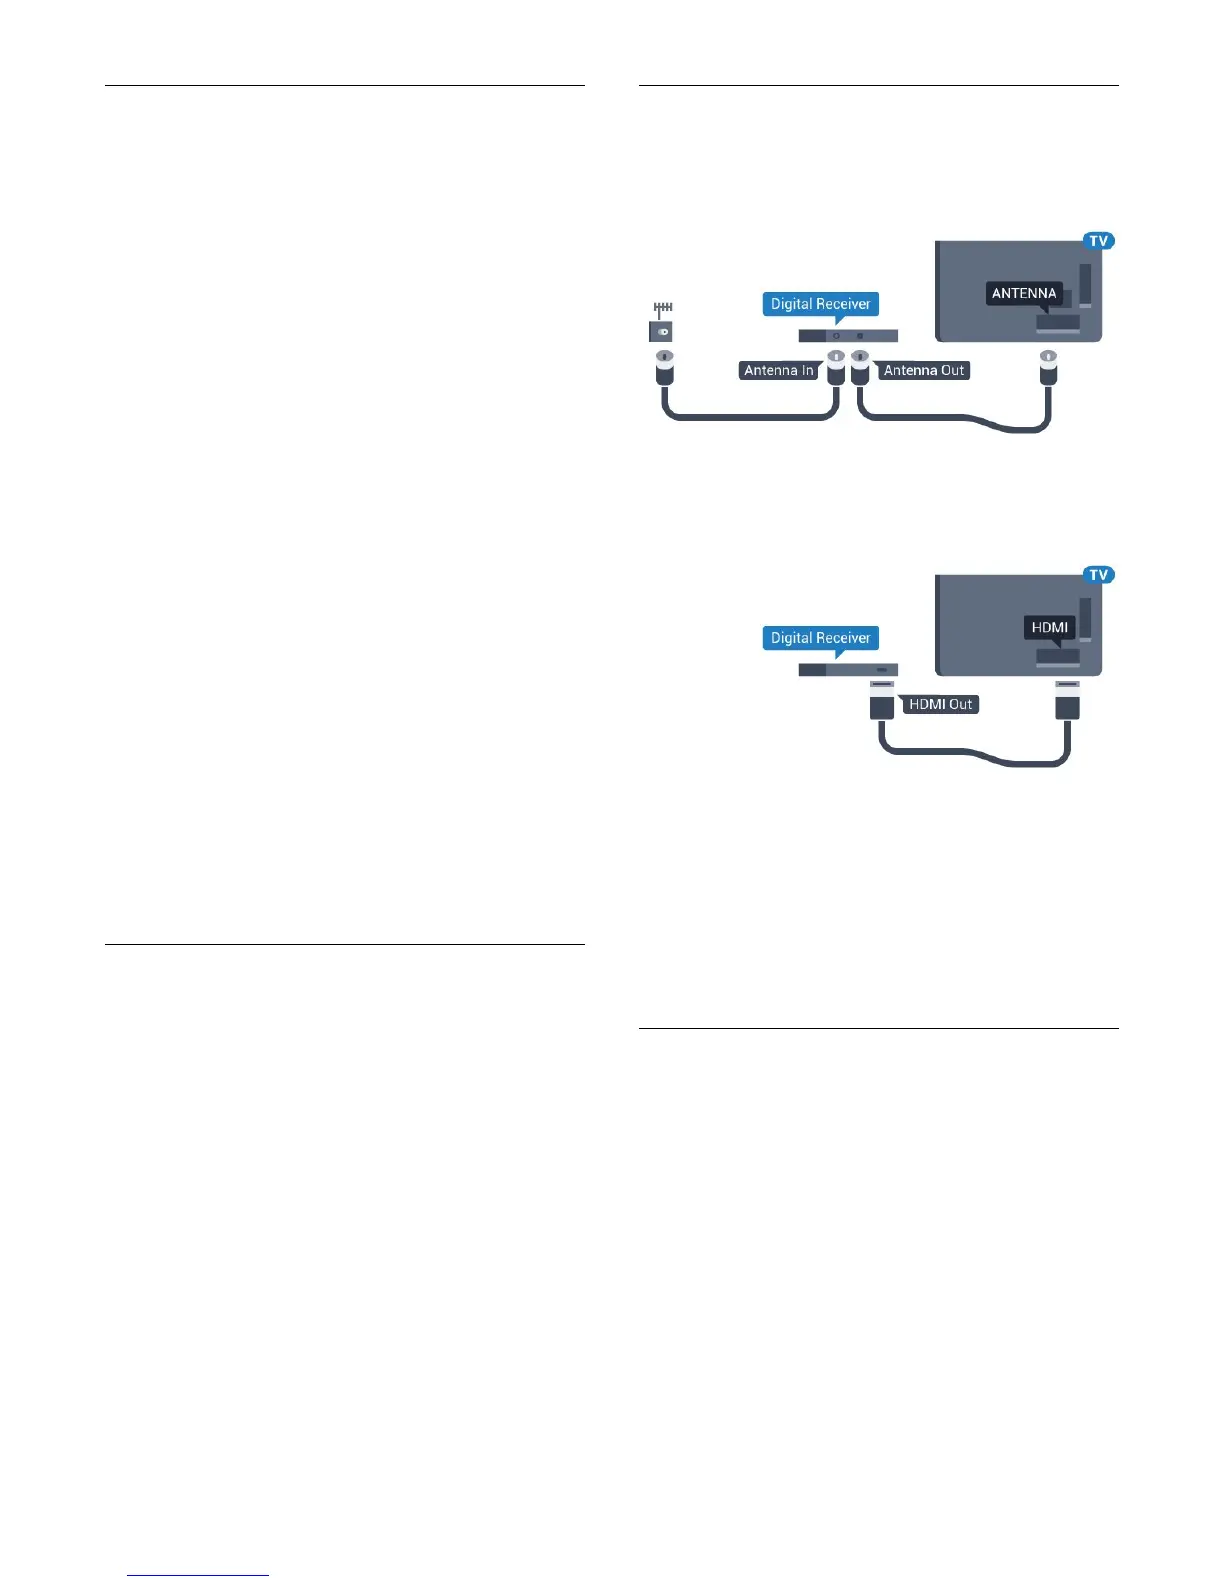
Set-Top Box - STB
Use 2 antenna cables to connect the antenna to the Set-top box
(a digital receiver) and the TV.
Next to the antenna connections, add an HDMI cable to
connect the Set-top box to the TV.
Alternatively, you can use a SCART cable if the Set-top box has
no HDMI connection.
Switch Off Timer
Switch off this automatic timer, if you only use the remote
control of the Set-top box. Switch this timer off to prevent the
TV from switching off automatically after a 4 hour period
without a key press on the remote control of the TV.
In
Help
, press the colour key
Keywords
and look up
Switch
Off Timer
for more information.
4.5
Satellite Receiver
Connect the dish antenna cable to the Satellite receiver.
Next to the antenna connection, add an HDMI cable to connect
the device to the TV.
Alternatively, you can use a SCART cable if the device has no
HDMI connection.
14