10
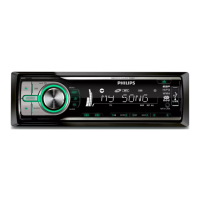
Connection: for cars with ISO
connectors
Caution
Ensure that all loose leads are insulated with
electrical tape.
1 Pull out the ISO connectors from car
dashboard and connect them to the
bigger end of the supplied standard
connector.
2 Connect the other end of the supplied
standard connector to the unit.
3 &RQQHFWWKHDQWHQQDDQGDPSOLÀHUDV
illustrated, if applicable. You can connect
WKHFDUDXGLRWRWKHDPSOLÀHUWKURXJK
RCA-TO-RCA cables (not supplied).
Note on the power supply lead (yellow)
When you connect other devices to this
apparatus, ensure that the rating of the
car circuit is higher than the total fuse
value of all the connected devices.
Notes on speaker connection
Never connect speaker wires to the
metal body or chassis of the car.
Never connect speaker wires with stripes
to one another.
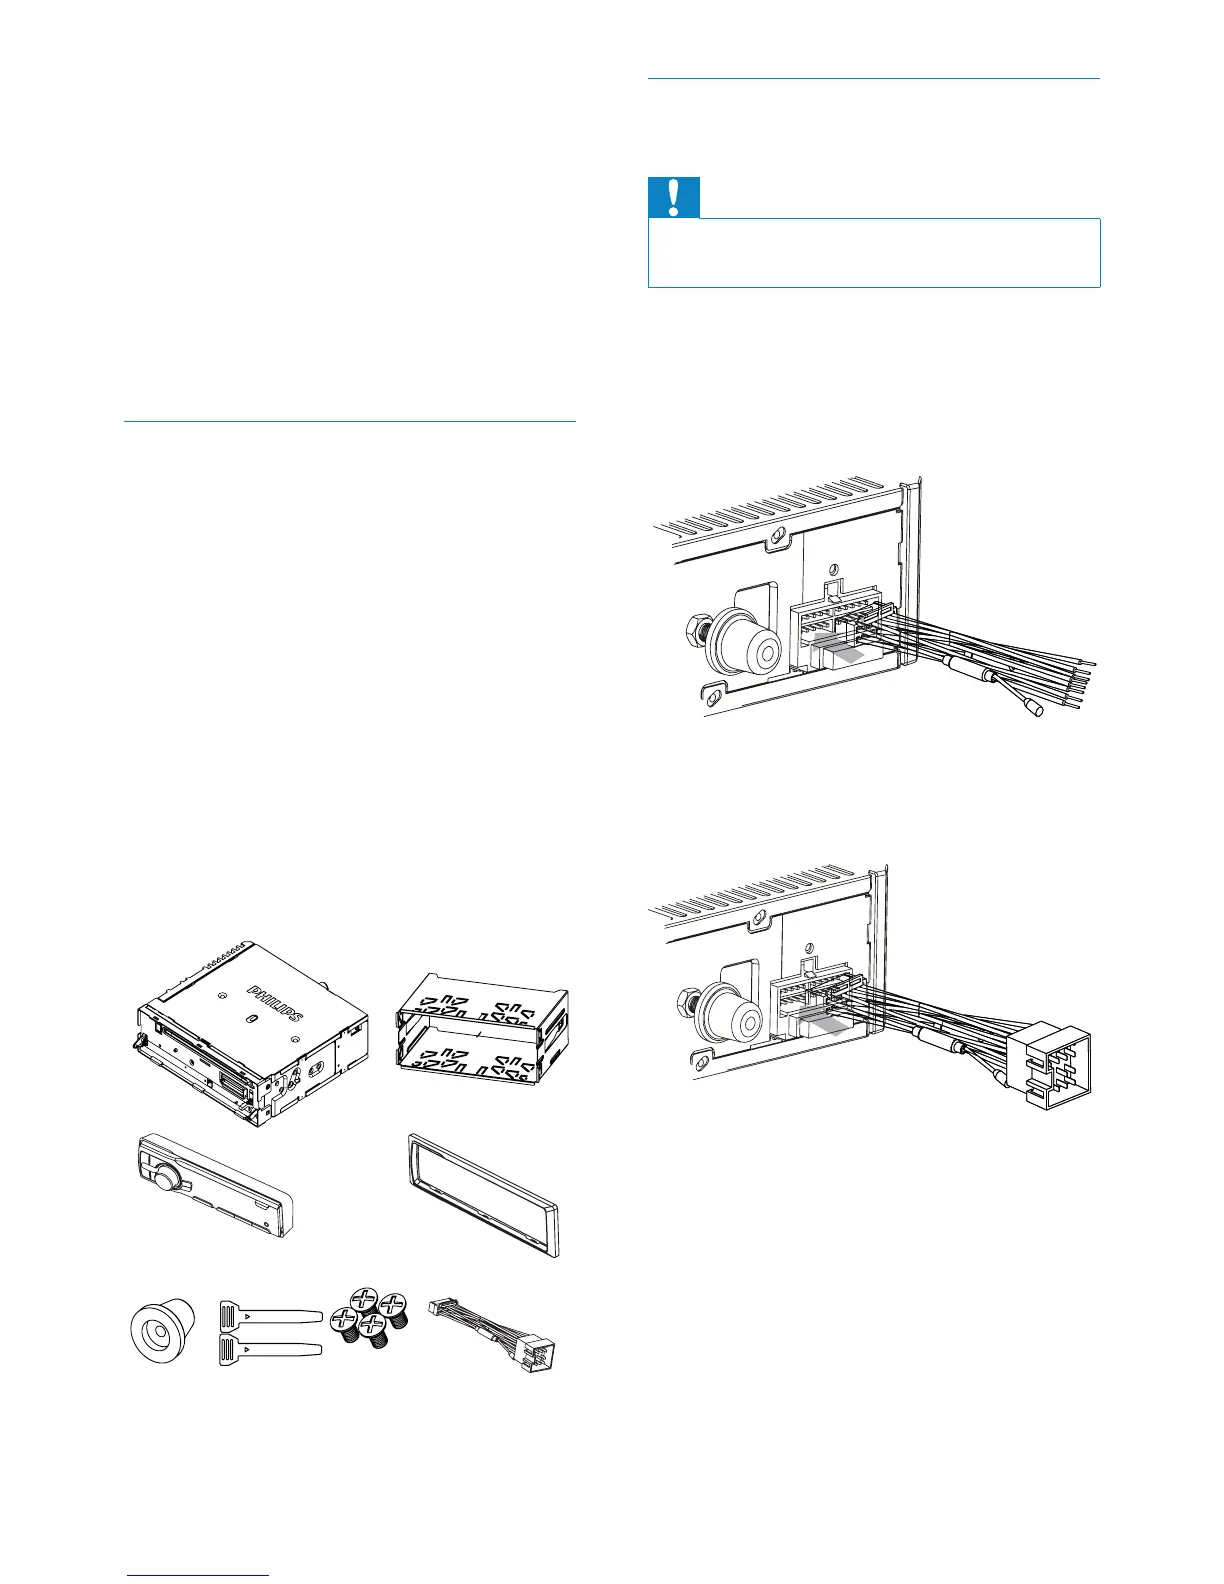
Overview of parts
These are the supplied parts needed to
connect and install this unit.
a In-car audio system
b Sleeve
c Front panel
d Trim plate
e Rubber cushion
f Disassembly tools
g Screws (4 pieces)
h ISO connector
ab
c
efgh
d
EN