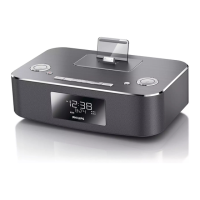
10
3 Press SET TIME to confirm.
» [24H] or [12H] begins to blink.
4 Press / or / to select the 12/24
hour format.
5 Press SET TIME to confirm.
The hour digits begin to blink. »
6 Repeat steps 4-5 to set the hour, minute,
year, month, and day.
Note
If clock is not manually set, when iPod/iPhone/iPad •
is connected, the unit synchronizes time from the
iPod/iPhone/iPad automatically.
Tip
The accuracy of the transmitted time depends on the •
DAB+ station or the docked iPod/iPhone/iPad that
transmits the time signal.
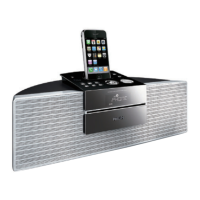
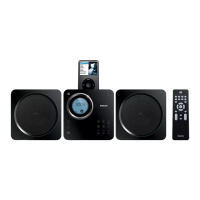
Turn on
Press POWER.
The unit switches to the last selected »
source.
Tip
To select a source, press • SOURCE repeatedly or the
source selection buttons on the remote control.
Switch to standby mode
Press POWER again to switch the unit to
standby mode.
The time and date (if set) appear on »
the display panel.
Connect power
Caution
Risk of product damage! Ensure that the power •
voltage corresponds to the voltage printed on the
back or underside of the unit.
Risk of electric shock! When you unplug the power
•
adapter, always pull the plug from the socket. Never
pull the cord.
Before connecting the power adapter, ensure that
•
you have completed all other connections.
Use the supplied power adapter only.
•
Note
The type plate is located on the bottom of the main •
unit.
Connect the power adapter to:
the • DC IN socket at the back of the
unit.
the wall socket.•
Set time and date
1 In standby mode, press and hold SET
TIME for 2 seconds.
» [SYNC ON] is displayed and [ON]
begins to blink.
2 Press / or / repeatedly to select
ON or OFF.
» [ON]: The unit synchronizes time
from the DAB+ station.
» [OFF]: The time synchronization with
DAB+ station is deactivated.
EN