4
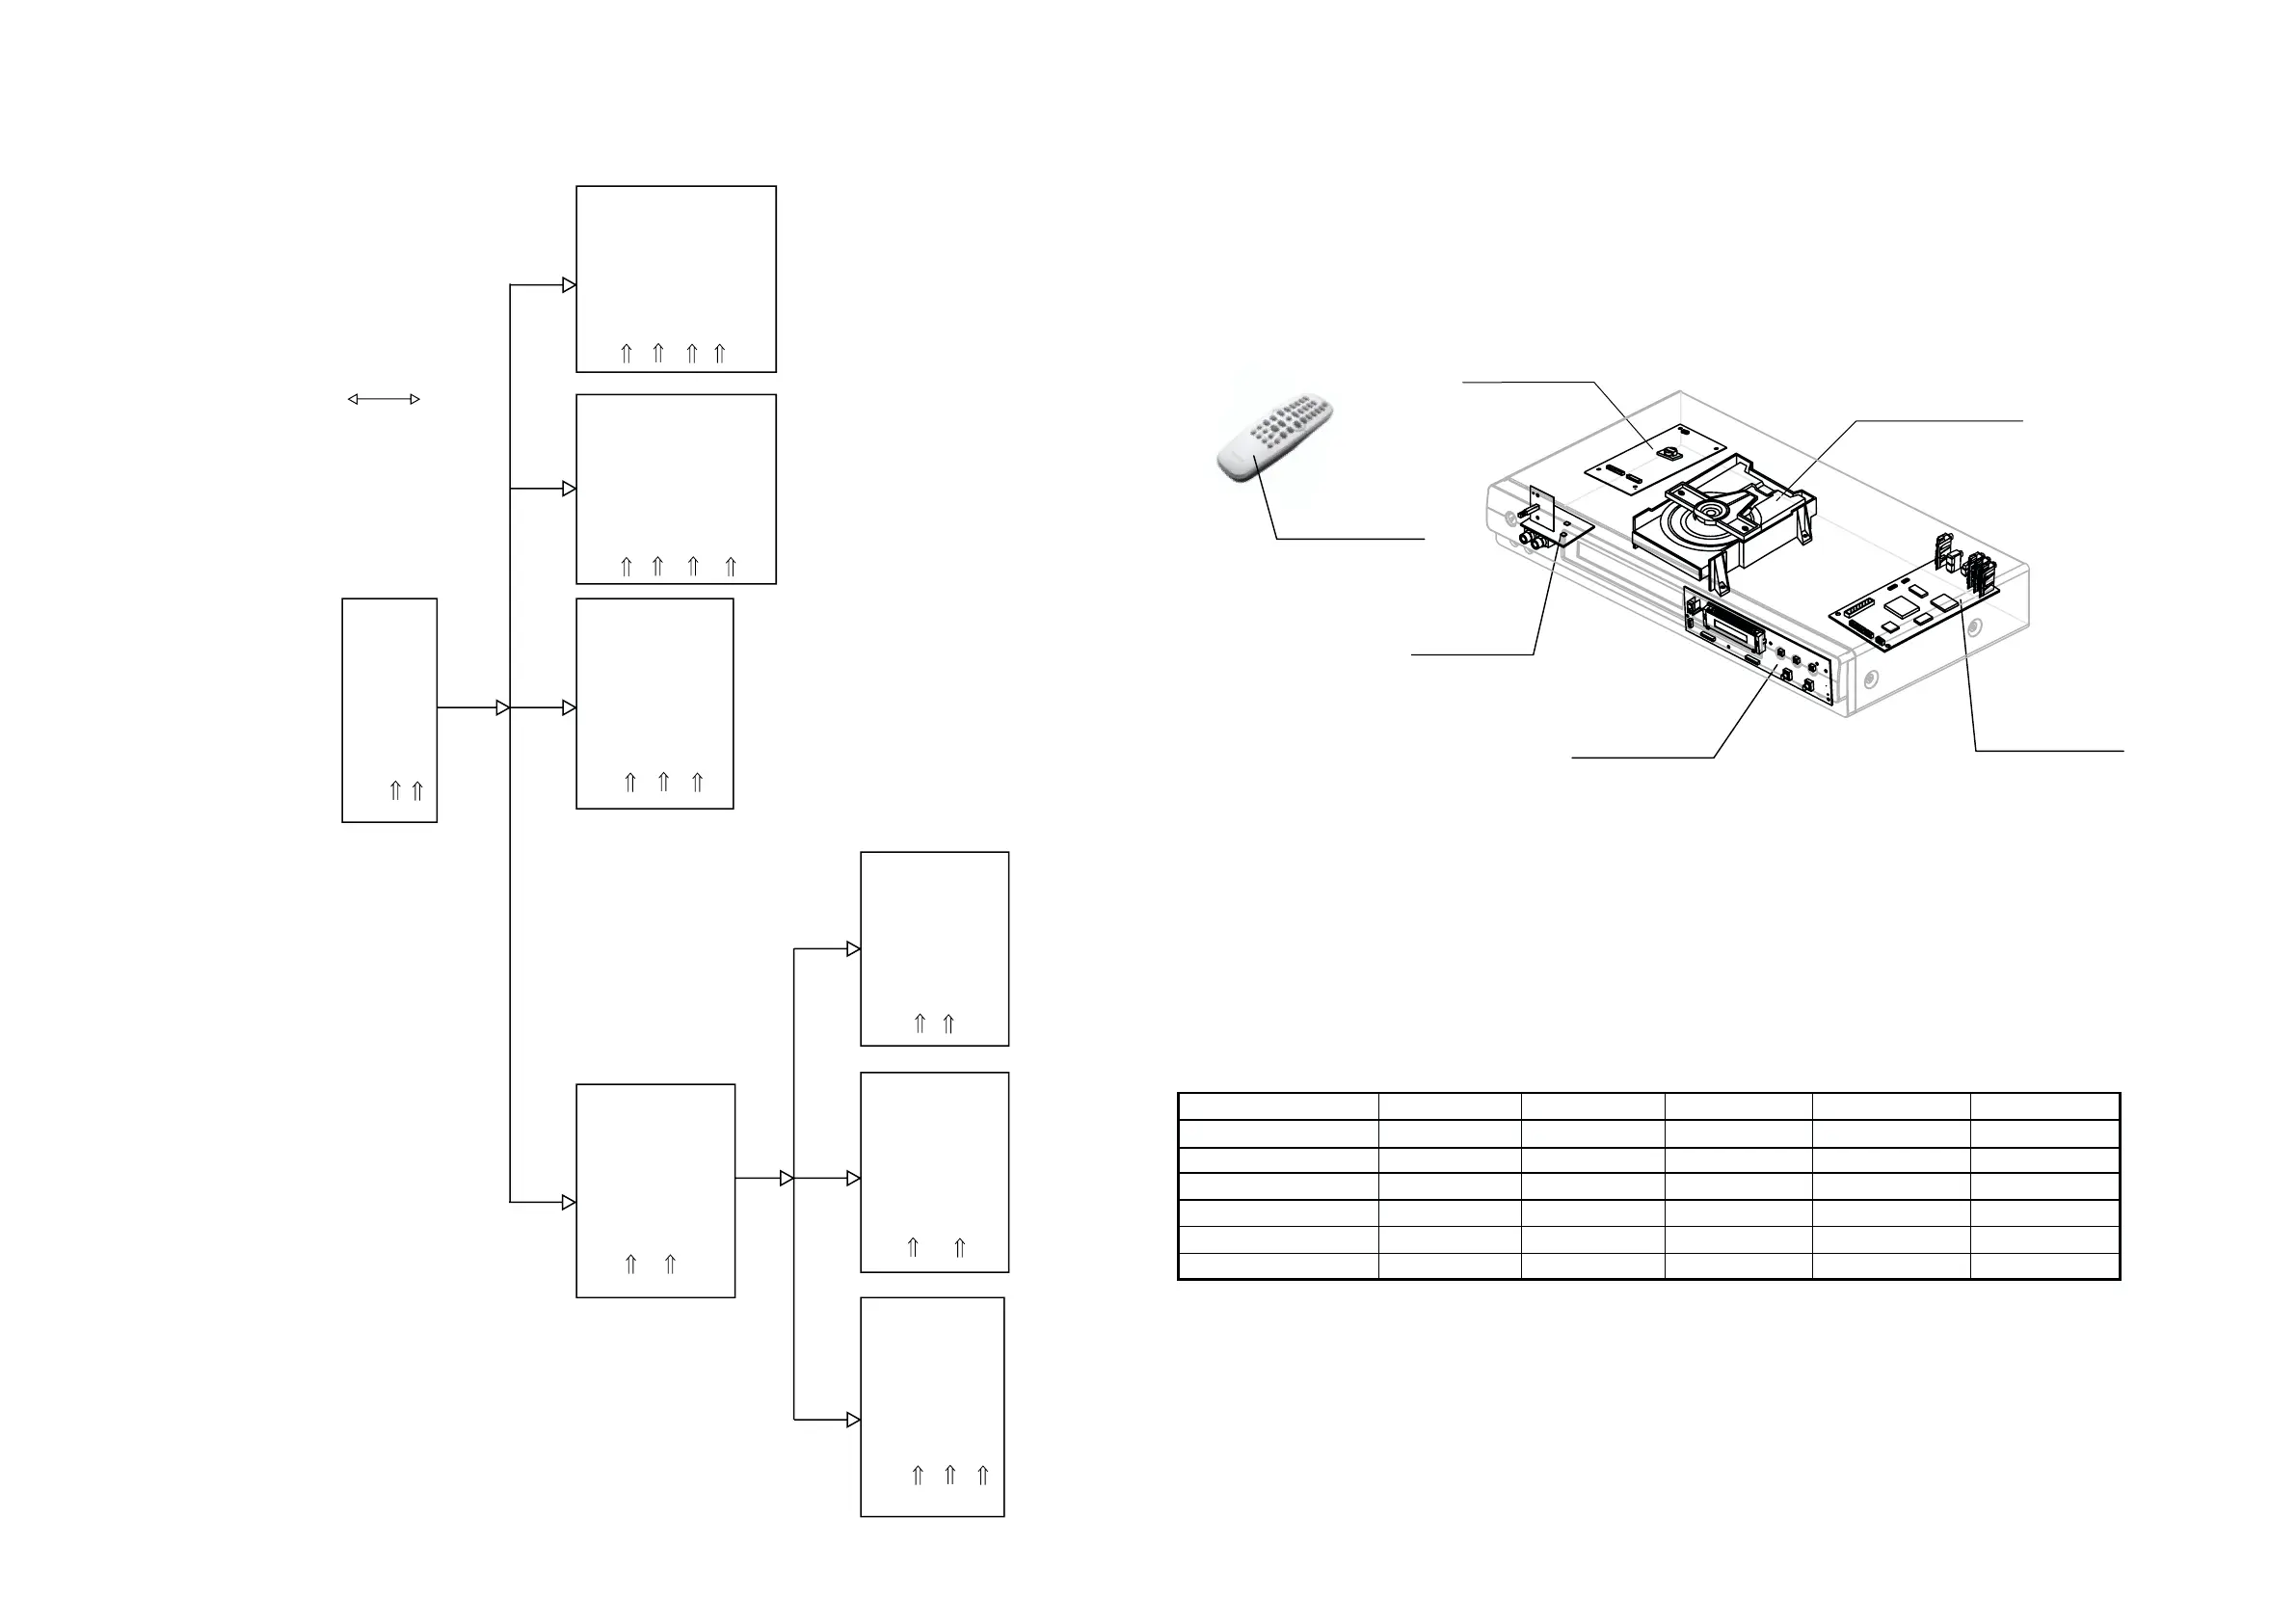
5. Dismantling instructions and exploded view
DISMANTLING INSTRUCTIONS DVD616K/031/691/751/782/931
See exploded view for item numbers
Cover 232
Remove 7 screws 228, 233
Lift cover at rearside to remove
Front assy 200
Unlock front from frame by
releasing successively snaps
Place front assy in front of
the set (service position)
Display board 1004
Remove 6 screws 211,212
(board to front)
Demount board
Remove volume knob
by pulling it forward
Remove 2 screws 209
(board to front), pay attention
to the earth spring 261
Demount board
MIC board 1005
Switch assy
Remove 2 screws 211
Demount switch assy
Loader module 1003
Remove 4 screws 215
(loader to bracket)
Demount loader module
Remove connections to
MPEG and PSU board
Remove 2 screws 221
(MPEG board to frame)
Remove 5 screws 227
(MPEG board to back plate)
Demount board
Remove flex connections to
MPEG board
Remove 3 screws 222
(PSU board to frame)
Release snap of 1 spacer
226 (board to frame)
Demount board
Remove flex connections to
PSU board
MPEG board 1002
PSU board 1001
Mounting
Demounting
PCB LOCATION DVD616K/
031/691/751/782/931
5. Dismantling instructions and exploded view
1001
Power board
1002
MPEG board
Remote Control
1005
MIC board
1004
Front board
1003
Loader module
PARTS 12NC LIST
DVD616k/031 DVD616K/691 DVD616K/751
1001 PSU board
3141 018 02930
1002 MPEG board
3141 018 02810
1003 Loader module
3141 018 02660
1004 Front board
1005 Front board
3141 018 02560
Remote control
3141 017 90161
DVD616K/782
DVD616K/931
3141 018 02550
3141 018 02930
3141 018 02780
3141 018 02660
3141 018 02560
3141 017 90161
3141 018 02550
3141 018 02930
3141 018 02790
3141 018 02660
3141 018 02560
3141 017 90161
3141 018 02550
3141 018 02930
3141 018 02800
3141 018 02660
3141 018 02560
3141 017 90161
3141 018 02550
3141 018 02930
3141 018 02770
3141 018 02660
3141 018 02560
3141 017 90171
3141 018 02550