2-2
PHILIPS MEDICAL SYSTEMS
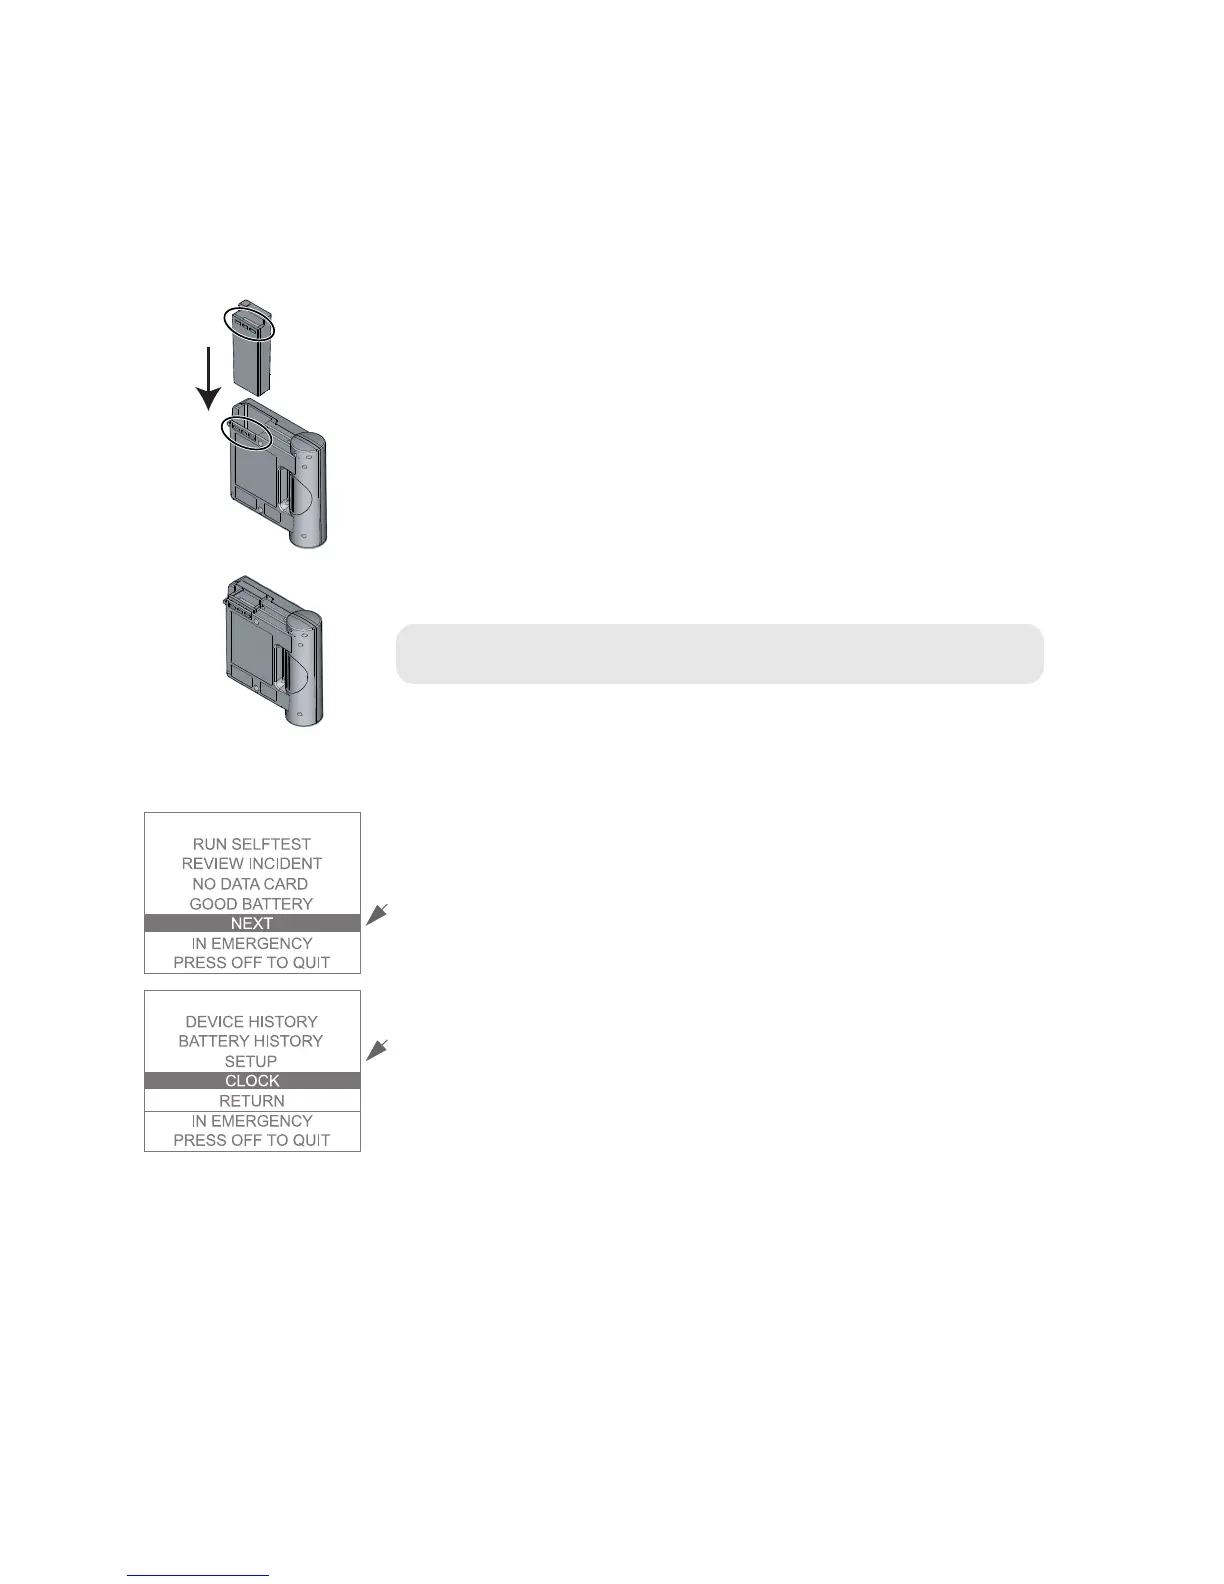
INSTALLING THE BATTERY AND SETTING THE CLOCK
The HeartStart FR2+ Defibrillator is shipped with a standard, long-life battery.
The battery is enclosed in a gray plastic case with a yellow latch at one end,
designed to hold the battery in place when it is correctly installed. (The optional
FR2+ rechargeable battery case is blue, and it also has a yellow latch. Except
where otherwise noted, the following information applies to both battery
types.) To install the battery:
1. Hold the battery by the latch end and slide it into the battery compartment
at the top of the HeartStart FR2+.
2. Slide the battery all the way into the opening, until the latch clicks into
place.
CAUTION:Follow all instructions supplied with the battery. Install the
battery before the install-by date shown on the battery.
When the battery is installed, the FR2+ automatically turns on. The Status
Indicator displays a flashing black hourglass. The Shock button light and the
indicator light for the defibrillator pads connector socket turn on briefly. The
display screen brings up the main menu.
It is recommended that you set the FR2+’s internal clock to the correct date and
local time at this point.
1. Within 10 seconds of installing the battery, press the lower Option button
to move the highlight bar on the displayed main menu to
NEXT.
2. Press the upper Option button to select
NEXT to bring up the second menu
screen.
3. Press the lower Option button to move the highlight bar to
CLOCK.
4. Press the upper Option button to bring up the CLOCK menu.
5. To receive clock settings from another FR2+, see directions provided in
Chapter 6. To manually set the time and date, follow the remaining steps.
6. Press the lower Option button to move the highlight bar to the date or
time field to be changed.
7. Using the upper Option button, scroll through the available settings to the
desired value.