3 - 1
CONNECTION AND CONTROLS
IMPORTANT!
– The type plate is located at the rear of
the system.
–The voltage selector located at the
rear of this system is preset at
220V-240V from the factory. For
countries that operate at 110V-127V,
please adjust to 110V-127V before you
switch on the system.
– Before connecting the AC power cord
on the rear of the subwoofer to the wall
outlet, ensure that all other connections
have been made.
–Never make or change any
connections with the power switched on.
– High voltage! Do not open. You run the
risk of getting an electric shock.
– The machine does not contain any
user-serviceable parts.
– Modification of the product could
result in hazardous radiation of EMC or
other unsafe operation.
AC CORD
CONNECT TO SUB WOOFER
R
L
SPEAKERS 6
Ω
Y/Pb/Pr OUT
A/V OUT
AUDIO
IN
S-VIDEO
IN
VIDEO IN
TV IN
AUDIO
IN
S-VIDEO
IN
VIDEO IN
TV IN
AC power
cord
Speaker
(right)
Speaker
(left)
FM wire antenna
MW loop antenna
To avoid overheating of the system, a safety
circuit has been built in. Therefore, your
system may switch to Standby mode
automatically under extreme conditions. If
this happens, let the system cool down
before reusing it
(not available for all versions).
Note:
– Before installation is finished, it is not
recommended to remove the protective plastic film
attached to the surface of the front panel to avoid
any scratch caused during installation.
Subwoofer
A/V cord
Step 2: Antennas Connection
Connect the supplied MW loop antenna and FM
antenna to the respective terminals. Adjust the
position of the antenna for optimal reception.
MW Antenna
●
Position the antenna as far as possible from a TV,
VCR or other radiation source.
FM Antenna
1
2
● For better FM stereo reception, connect an
outdoor FM antenna to the FM ANTENNA
terminal.
Step 1: Connecting speakers
AC CORD
CONNECT TO SUB WOOFER
R
L
SPEAKERS 6
Ω
Y/Pb/Pr OUT
A/V OUT
1
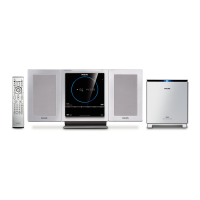
Place the main set with the front side facing
down on a flat and firm surface.
2 Connect the two front speaker cables to the
SPEAKERS (6
Ω
)
terminals: right speaker to
"R" and left speaker to "L".
3
Remove the detachable cover at the left bottom
of the main set to expose the CONNECT TO
SUB WOOFER terminal.
4 Connect the CONNECT TO SUB
WOOFER terminal of the main set to the
CONNECT TO MAIN SET terminal of the
subwoofer with the supplied 15-pin D-Sub cable
by matching the pins. Fix the two screws on the
connectors to ensure firm connection.
5 Mount the detachable cover back until hearing a
click.
Notes:
– Ensure that the speaker cables are correctly
connected. Improper connections may damage the
system due to short-circuit.
–For optimal sound performance, use the
supplied speakers.
– Do not connect speakers with an impedance
lower than the speakers supplied. Please refer to
the SPECIFICATIONS section of this manual.
– The delivery-attached 15-pin D-Sub cable is
intended for use with this system only. Never try it
on any other devices (e.g., do not use it in
connection of your PC).