2. Monitor installation
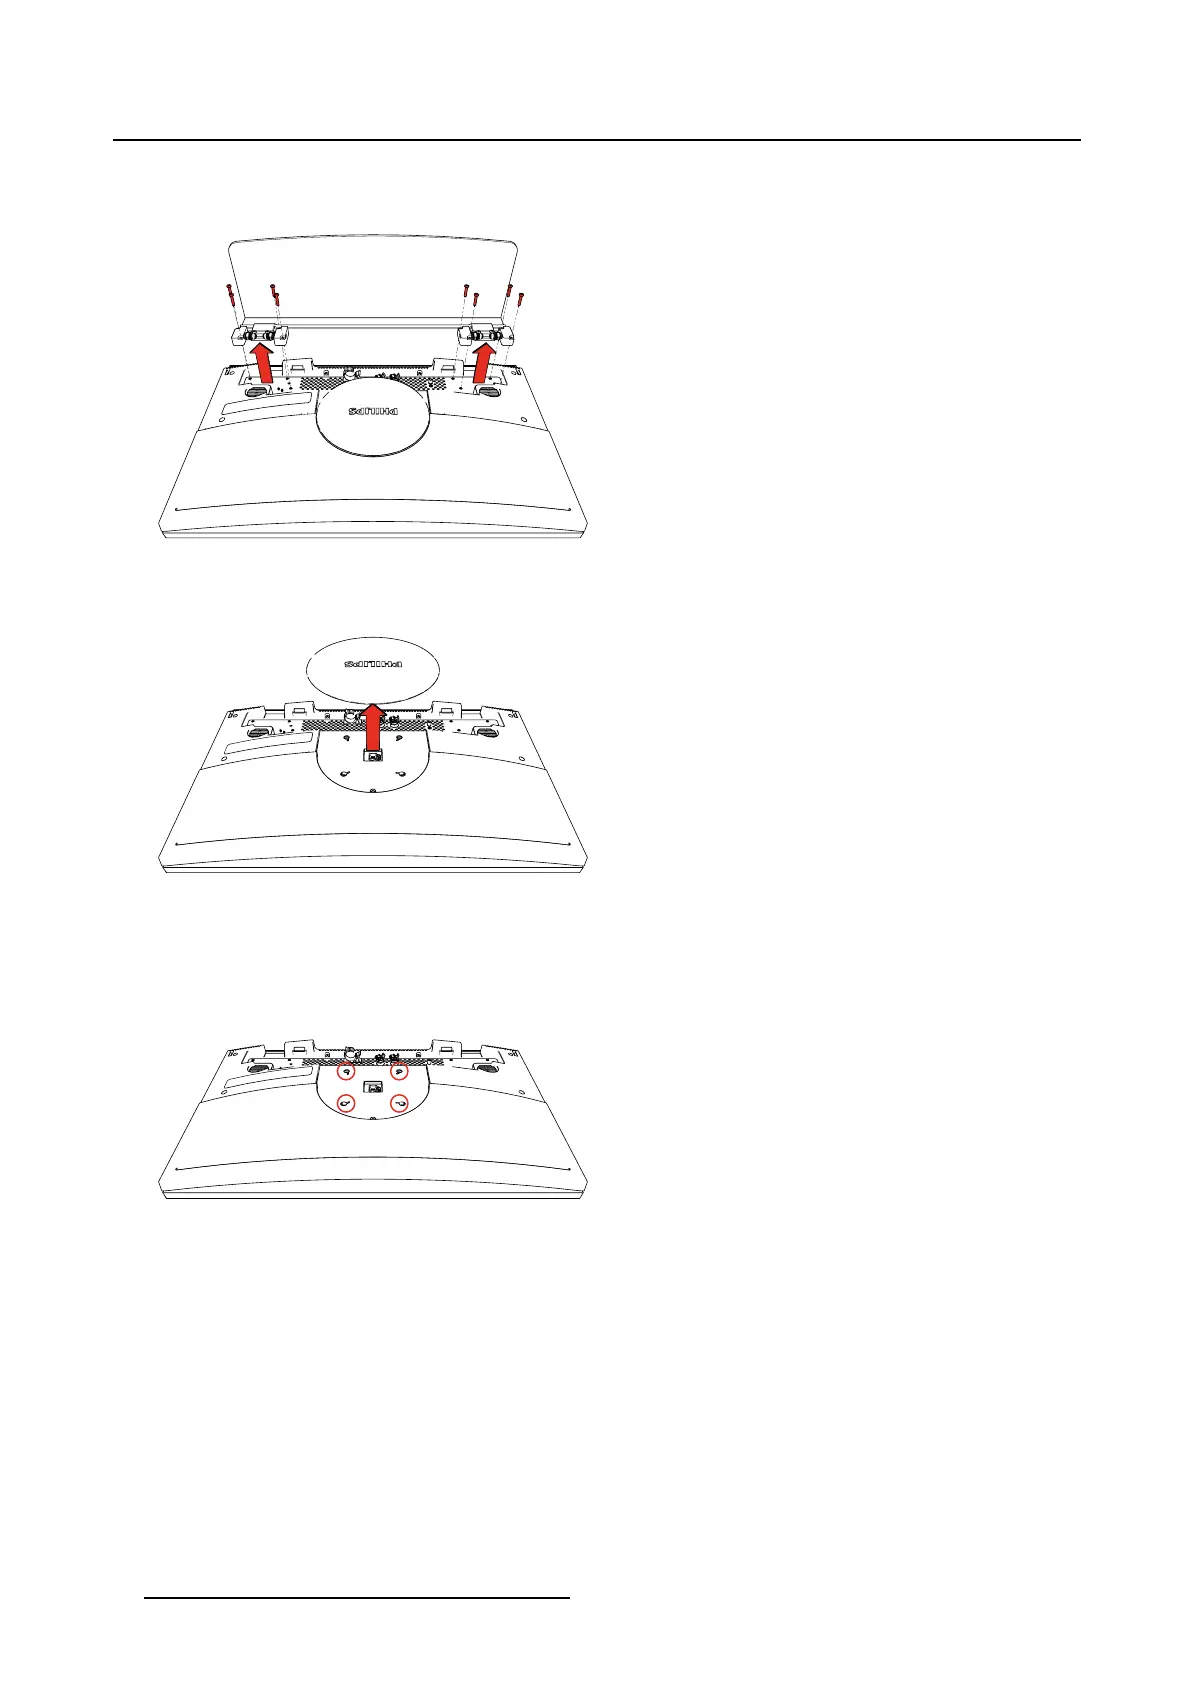
2. Unscrew the 8 fixation screws fixing the stand to the panel, then remove the stand from the panel.
Tip: Store the fixation screws at a known place for possible future use.
Image 2-7
3. Pull off the illuminating circle disc from the panel to get access to the VESA mounting holes.
Tip: Store the disc at a known place for possible future use.
Image 2-8
4. Attach the monitor in landscape position to a 100 mm VESA mounting bracket. Mounting in portrait
position is not supported.
Caution: The 4 screws should be selected according to the thickness of the VESA plate. Please con-
sider that the maximum length of the available thread for the screws inside the monitor is 6
mm and that the unthreaded distance to the outer surface of the plastic back cover is 7.8 mm.
Image 2-9
8 K5902097 (451920611672) PS27QHDCR 22/05/2015





 To Next Page