EasyManua.ls Logo

Philips VR540/07 User Manual

Philips VR540/07
16 pages
To Next Page IconTo Next Page
Page #1 background imageLoading...
Page #1 background image
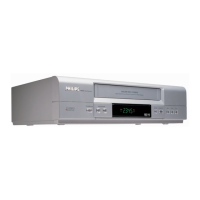
This video recorder is used for the recording and playback of VHS videocassettes.
Cassettes with the VHS-C label (VHS cassettes for camcorders) may only be used
with a suitable adapter.
We hope you enjoy your new video recorder.
EN
Thank you for buying a Philips video recorder. This video recorder is one of the most sophisticated
and easy-to-use video recorders (VCR) on the market. Please take the time to read this operating
manual before using your video recorder. It contains important information and notes regarding opera-
tion. The video recorder should
not be turned on immediately after transportation from a cold to a
hot area or vice versa, or in conditions of extreme humidity. Wait at least three hours after transport-
ing the device. The video recorder needs this time in order to become acclimatised to its new environ-
ment (temperature, air humidity, etc.).
VR540/07
3103 166 33741
0VMN03354/HE471BD*****
PAL
Important notes regarding operation
Danger: High voltage!
Do not remove the top cover as there is
a risk of an electrical shock!
The video recorder does not contain any
components that can be repaired by the
customer. Please leave all maintenance
work for qualified personnel.
As soon as the video recorder is connected
to the power supply, there are some compo-
nents that are in constant operation. To
switch off the video recorder completely you
must disconnect it from the power supply.
Make sure that air can circulate freely
through the ventilation slots on the video
recorder. Do not place the device on an
unsteady base.
Make sure that no objects or liquids enter
the video recorder. Do not place vases or
the like on the video recorder. If liquid is
spilt into it, immediately disconnect the
video recorder from the power supply and
call After-sales Service for advice.
Do not place any combustible objects on
the device (candles, etc.).
Make sure that children do not place any
foreign objects within the openings or venti-
lation slots.
These operating instructions have been
printed on non-polluting paper.
Deposit old batteries at the appropriate col-
lection points.
Please make use of the facilities available in
your country for disposing of the packaging
of the video recorder in a way that helps to
protect the environment.
This electronic device contains many mate-
rials that can be recycled. Please enquire
about the possibilities for recycling your old
device.
So that you can identify your machine for service
questions or in the event of theft, enter the serial
number here. The serial number (PROD.NO.) is
printed on the type plate fixed at the back of the
device.
This product complies with the requirements of
Directive 73/23/EEC +89/336/EEC +93/68 EEC.
Interference
The Department of Trade and industry operates
a radio Investigation Service to help TV licence
holders improve reception of BBC and ITC pro-
grammers where these are being spoilt by inter-
ference.
If your dealer cannot help, ask at a Main Post
Office for the booklet ‘How to improve television
and Radio Reception’.
MODELNO. VR540/07
PROD. NO. ...........................
!
!
!
!
"
"
"
1
HE471BD(EN).QX3 03.2.22 5:35 PM Page 1
Question and Answer IconNeed help?

Do you have a question about the Philips VR540/07 and is the answer not in the manual?

Philips VR540/07 Specifications

General IconGeneral
BrandPhilips
ModelVR540/07
CategoryVCR
LanguageEnglish

Summary

Important notes regarding operation

General Safety Warnings

Essential safety precautions for operating the video recorder, including high voltage warnings and keeping openings clear.

Environmental Precautions

Guidelines for responsible disposal of batteries, packaging, and the electronic device for environmental protection.

Product Information

Details on identifying the machine for service, including model and production numbers.

Interference

Radio Interference Service

Information on seeking assistance for improving TV reception affected by interference.

Specifications

Supplied accessories

Connecting the video recorder

UK Plug and Wiring Instructions

Guidance on fuse replacement for UK plugs and connecting the power cord wires correctly.

Remote Control Setup

Instructions for inserting batteries into the remote control to prepare it for operation.

Connecting to TV via Scart Cable

Recommendation and explanation of using a scart cable for connecting the video recorder to a TV.

Connecting with a scart cable

Scart Connection Procedure

Step-by-step guide for connecting the video recorder to the TV using a scart cable.

Scart Socket Configuration and Troubleshooting

Advice on selecting the correct scart socket and troubleshooting 'empty screen' issues.

Connecting without a scart cable

Aerial Connection Procedure

Instructions for connecting the video recorder to the TV using an aerial cable.

Aerial Connection Troubleshooting

Guidance for resolving issues like no language setting picture or incorrect channel tuning.

Connecting additional devices

Installing your video recorder

Initial Setup and Automatic Channel Search

Guides through preparation, aiming the remote, connecting devices, and the automatic channel search process.

Connecting Satellite Receiver and Decoder

Information on connecting external devices like satellite receivers and decoders.

Decoder Allocation Procedure

Steps to allocate a connected decoder to a specific TV channel for viewing encoded programs.

Manual TV channel search

Manual Channel Search Procedure

Detailed steps for manually searching and storing TV channels that were not found automatically.

Special Channels and Troubleshooting

Explanation of special channels and advice for when TV stations cannot be found.

Using the satellite receiver

Follow TV (Automatic TV channels sorting)

Automatic Channel Sorting Procedure

Steps to synchronize the video recorder's channel order with that of the TV set.

Troubleshooting TV Channel Sorting

Guidance for issues when the TV set cannot switch to the programmed channel number.

Sorting and clearing TV channels manually

Manual Channel Sorting Procedure

Instructions for manually reordering or deleting saved TV channels based on preference or reception quality.

Automatic Tuning

Automatic Tuning Procedure

Steps to re-scan and save all available TV channels, useful after moving or provider changes.

Setting the clock

Clock and Date Setting Procedure

Manual steps to set or correct the time and date displayed on the video recorder.

Setting the RF out channel

RF Output Channel Configuration

Instructions to change the RF output channel to avoid signal interference with TV reception.

Playback

Playing Standard VHS Cassettes

Basic operations for playing VHS cassettes, including features and NTSC playback compatibility.

Tape Position and Counter Information

Understanding tape position display, counter reset, and troubleshooting counter issues.

Searching and Still/Slow Motion Playback

How to search for tape positions and use still picture or slow-motion playback modes.

Playback Search Functions

Tape Position Search (Forward/Rewind)

Steps to fast-forward or rewind the tape to find specific positions without picture.

Index Search Function

Using index marks to quickly locate previously recorded segments on the tape.

Manual recording

Recording Overview and Methods

General information on manual recording, including options with and without automatic switch-off.

Recording Safety and Assembly

Preventing accidental erasure of recordings and lining up recordings for seamless edits.

Selecting the recording speed (SP or LP)

Recording Speed Options

Guide to selecting recording speeds (SP, LP, AUTO) to manage tape duration and quality.

Automatic controlled recording from a satellite receiver (RECORD LINK)

Record Link Setup

Instructions to automatically start recordings from a satellite receiver via scart cable.

Direct Record

Direct Record Functionality

Explanation and steps for recording the current TV channel instantly, even when the VCR is off.

Switching 'Direct Record' on or off

Programming a recording (TIMER)

Timer Recording Overview

General information on setting up automatic recordings for specific dates and times.

Timer Recording Setup

Step-by-step guide for programming single, daily, or weekly recordings.

Checking or deleting programmed recordings

Timer List and Deletion

How to check the programmed recording list and cancel specific timer entries.

Changing a programmed recording (TIMER)

Modifying Timer Recordings

Instructions for editing existing programmed recordings, including changing parameters or correcting input.

Problems and solutions for programmed recordings

Other Functions

Status Display Control

Options to switch the on-screen status display on or off during operation.

Blue Background Setting

Control over the blue background display for weak signals, muting sound.

Automatic switch-off

Auto Standby Function

Enabling or disabling the automatic switch-off feature to conserve power.

Selecting the sound channel

Sound Channel Selection

How to select desired sound channels for stereo, Hi-Fi, or bilingual broadcasts.

Clock Display

VCR Display Control

Options to switch the VCR's clock display on or off to reduce distraction or power consumption.

Before you call an engineer

Troubleshooting Common Issues

Guidance for problems like no response to buttons, no picture, poor quality, or recording failures.

Factory Settings Reset

Procedure to reset the video recorder to its default factory settings, clearing stored data.

Remote Control and Cassette Issues

Solutions for a non-working remote control or a jammed cassette.

Related product manuals