EasyManua.ls Logo

Philips VR700/02 User Manual

Philips VR700/02
36 pages
To Next Page IconTo Next Page
Page #1 background imageLoading...
Page #1 background image
1. HOW TO CONNECT YOUR VIDEO RECORDER 4.........
How to connect your video recorder to the TV set 4.....
Connecting with a scart cable without ’Easy
Link/NexTView’ 5...................................
Connecting without a scart cable 6...................
Connecting a decoder or other equipment 6............
2. INSTALLING YOUR VIDEO RECORDER 7...............
Initial installation 7..................................
Allocating a decoder 7..............................
Manual TV channel search 8.........................
Satellite receiver 8..................................
Special installation functions 9.......................
Automatic TV Channel Allocation (FOLLOW TV) 9.......
Automatic TV channel search (Autoinstall) 10..........
Monitor function 10.................................
Sorting and clearing TV channels manually 10..........
Setting the time and date 11..........................
3. IMPORTANT NOTES FOR OPERATION 12..............
General information 12..............................
Saving energy 12...................................
Emergency interrupt 12..............................
The symbols on your video recorder display 12.........
Summary of user guide 13...........................
User guide (OSD) 13.................................
4. PLAYBACK FUNCTIONS 14..........................
Playing a cassette 14................................
Playing NTSC cassettes 14...........................
Tape position indication 14...........................
Searching for tape position with the picture (picture
search) 14.........................................
Still picture/Slow motion 14..........................
The JOG/SHUTTLE functions on the video recorder 15...
Searching for tape position without the picture (wind
and rewind) 15.....................................
Instant View 15.....................................
Automatic search for a tape position (index search) 15..
Selecting the picture setting (SMART PICTURE) 15......
Picture interference 16..............................
Cleaning the video heads 16.........................
5. MANUAL RECORDING 17............................
Recording without automatic switch-off 17............
Recording with automatic switch-off (OTR
one-touch-recording) 17.............................
Protecting your recordings 17........................
Auto-assembling 17.................................
Selecting the recording speed (SP or LP) 18............
Automatic recording from a satellite receiver (SAT
RECORDING) 18....................................
Switching on ’Direct Record’ 19......................
6. PROGRAMMED RECORDING (TIMER) 20...............
’VPS’ (Video Programming System) and ’PDC’
(Programme Delivery Control) (UK) 20.................
Programming a recording (with ’VIDEO Plus+’) 20.......
Programming a recording (without ’VIDEO Plus+’) 21....
How to check or change a programmed recording
(TIMER) 23.........................................
How to clear a programmed recording (TIMER) 23......
’NexTView Link’ 23..................................
7. ADDITIONAL FUNCTIONS 24.........................
Changing the TV system 24..........................
Child lock 24.......................................
Switching the ’on-screen display’ (OSD) on or off 25....
Switching to 16:9 wide screen picture 25..............
Switching the remote control command 26.............
Continuous playback 26.............................
Automatic switch-off (tuner mode) 27.................
Reducing picture disturbance (’optimizing the
modulator’) 28......................................
Switching off the modulator 28.......................
Using your video recorder remote control with your
TV set 29..........................................
Manual audio control 29.............................
Recording audio only 29.............................
Selecting the sound track 30.........................
8. Before you call an engineer 31.......................
9. GLOSSARY 32......................................
Technical terms used 32.............................
CONTENTS
3

Table of Contents

Question and Answer IconNeed help?

Do you have a question about the Philips VR700/02 and is the answer not in the manual?

Philips VR700/02 Specifications

General IconGeneral
TypeVCR
Recording SystemVHS
Playback SystemVHS
Video FormatPAL
Number of Heads4
TV TunerYes
Remote ControlYes
Playback FormatsVHS
Recording FormatsVHS
TunerAnalog
ConnectionsSCART
InputsSCART
OutputsSCART

Summary

Remote Control Operation

Remote Control Button Functions

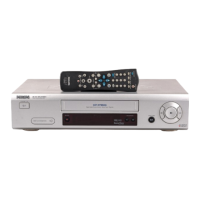
Details the functions of various buttons on the video recorder's remote control.

Video Recorder Physical Layout

Front Panel Connections and Controls

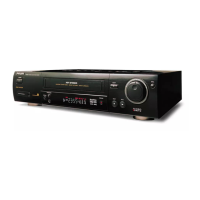
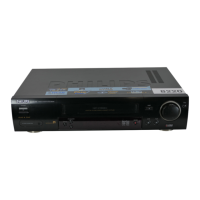
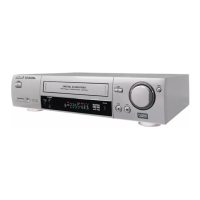
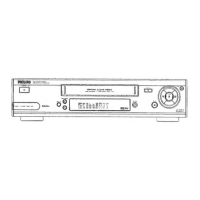
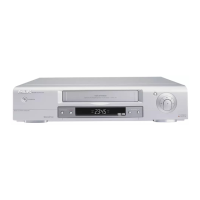
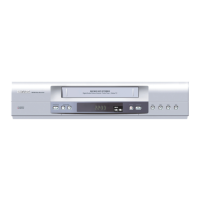
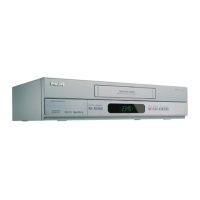
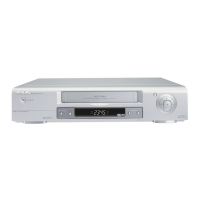
Describes AV input/output sockets and controls located on the front of the video recorder.

Rear Panel Connections

Details AV, SCART, Aerial, and mains sockets on the back of the video recorder.

Safety and General Setup

Safety Instructions and Warnings

Provides crucial safety precautions and warnings for operating the video recorder.

Technical Specifications and Accessories

Lists technical data, measurements, power consumption, and included accessories.

Special Video Recorder Functions

Picture Quality Enhancement Features

Explains features like Crystal Clear Video, Natural Colour, and Smart Picture.

Advanced Features and Connectivity

Covers Plug & Play, Multibrand TV control, Automatic Satellite Recording, and Direct Record.

1. How to Connect Your Video Recorder

Connecting to TV via Scart Cable

Step-by-step guide for connecting the recorder to a TV using a scart cable with Easy Link/NexTView.

Scart Connection Without Easy Link

Scart Connection Without Easy Link/NexTView

Instructions for scart connection when Easy Link/NexTView is not available.

Alternative Connection Methods

Connecting Without a Scart Cable

Guide for connecting the video recorder to a TV without using a scart cable.

Connecting External Equipment

Details on connecting decoders, satellite receivers, or HiFi systems via SCART or audio sockets.

2. Installing Your Video Recorder

Initial Installation Procedure

Steps for initial setup, remote control, and automatic channel search.

Decoder Setup and Allocation

How to connect and automatically activate a decoder for TV programs.

Channel Search and Setup

Manual TV Channel Search

Manually tuning TV channels when automatic search fails.

Satellite Receiver Integration

Instructions for receiving channels from a satellite receiver via SCART.

Advanced Installation Functions

Automatic TV Channel Allocation (Follow TV)

Synchronizes video recorder channels with TV channels via scart cable.

Channel Management and Monitoring

Automatic TV Channel Search (Autoinstall)

Automatic scanning and storage of available TV channels.

Manual Channel Sorting and Deletion

Assigning programme numbers and deleting unwanted TV channels.

Monitor Function for Picture Switching

Switching between TV and video recorder picture signals.

Time and Date Configuration

Setting the Clock and Date

Manual adjustment of the video recorder's time and date.

3. Important Notes for Operation

General Operating Guidelines

Basic information on switching on/off, standby mode, and power supply.

Energy Saving Features

How to put the video recorder into standby to conserve energy.

Understanding Display Symbols

Interpretation of symbols appearing on the video recorder's display.

User Guide and OSD Menu Navigation

OSD Menu Structure and Operation

Guide to navigating the On-Screen Display (OSD) menu and its primary functions.

4. Playback Functions

Basic Playback and NTSC Cassette Play

Playing standard VHS cassettes and NTSC format tapes.

Tape Position and Search Features

Using the counter, picture search, and slow-motion playback.

Advanced Playback Controls

Jog/Shuttle and Rewind/Wind Search

Utilizing Jog/Shuttle dial and rewind/wind picture search.

Index Search and Smart Picture Settings

Searching recordings by index and adjusting picture settings.

Playback Troubleshooting and Maintenance

Resolving Picture Interference

Steps to resolve tracking issues and picture interference.

Video Head Cleaning Procedure

Instructions for cleaning video heads to improve playback quality.

5. Manual Recording

Manual Recording Methods

Recording without automatic switch-off and OTR one-touch recording.

Recording Protection and Auto-assembly

Protecting recordings and utilizing the auto-assembly function.

Recording Speed and Satellite Recording

Selecting Recording Speed (SP/LP)

Adjusting recording speed for standard or long play.

Automatic Satellite Recording (SAT RECORDING)

Setting up automatic recordings controlled by a satellite receiver.

Direct Record Function

Enabling Direct Record

Automatically recording TV programs when the recorder is switched off.

6. Programmed Recording (Timer)

Programming Recording with VIDEO Plus+

Using the VIDEO Plus+ system for easy programmed recording.

Timer Recording Management

Manual Timer Programming

Manual timer programming for recording specific programs without VIDEO Plus+.

Checking and Clearing Timer Recordings

How to check, change, or delete programmed timer recordings.

NexTView Link Setup

Programming TV programs via the TV set using NexTView Link.

7. Additional Functions

Changing TV System Settings

Adjusting the automatic TV system switch-over for playback compatibility.

Child Lock Operation

Activating and using the child lock to prevent unauthorized use.

Display and Wide Screen Settings

On-Screen Display (OSD) Control

Controlling the display of operating information on the TV screen.

16:9 Wide Screen Picture Setup

Enabling 16:9 wide screen format for compatible recordings.

Remote Control and Playback Modes

Remote Control Command Switching

Changing remote control commands for multiple video recorders.

Continuous Playback Configuration

Setting up automatic, repeating playback of cassettes.

Standby and Demo Functionality

Automatic Switch-Off (Tuner Mode)

Setting the recorder to automatically switch to standby after inactivity.

Managing the DEMO Function

Controlling the demonstration mode that displays menus on the TV screen.

Picture and Modulator Settings

Reducing Picture Disturbance

Optimizing the modulator to reduce picture interference.

Switching Off the Modulator

Disabling the built-in modulator to clear picture or sound interference.

Remote Control and Audio Features

Using Remote Control with TV

Transmitting TV commands from the video recorder's remote control.

Manual Audio Control and Recording

Adjusting audio recording levels manually and recording audio-only.

Sound Track Selection

Selecting the Required Sound Track

Choosing between STEREO, MONO, or MIXED sound tracks for multilingual broadcasts.

8. Before You Call an Engineer

Troubleshooting Common Issues

Resolving problems like no response, no picture, poor quality, or recording failures.

9. Glossary

Technical Terms Definitions

Definitions of technical terms used throughout the video recorder manual.

Related product manuals