GB4
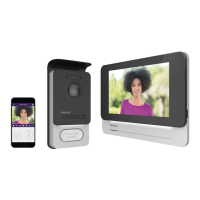
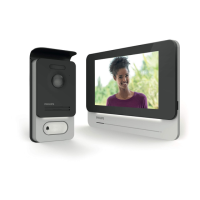
WelcomeEye Connect 2 / Touch / V4
Terminal block
connecting the wires
Programming switch
RFID reset button
Loudspeaker volume
settings
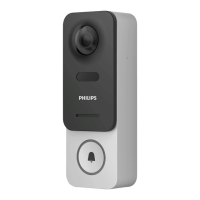
DES 9901 VDP
5 1 0 0 6 3
1
2
3
4
5
6
1 2
7
8
1
2
1
2
DES 9901 VDP
5 1 0 0 6 3
Made in P.R.C
IP44
20V 110mA
RFID 125kHz
Avidsen
19 avenue Marcel Dassault
37200 TOURS
FRANCE
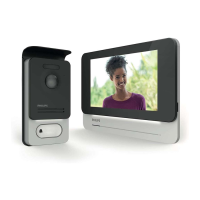
DES 9901 VDP
5 1 0 0 6 3
1
2
3
4
5
6
1 2
7
8
1
2
1
2
DES 9901 VDP
5 1 0 0 6 3
Made in P.R.C
IP44
20V 110mA
RFID 125kHz
Avidsen
19 avenue Marcel Dassault
37200 TOURS
FRANCE
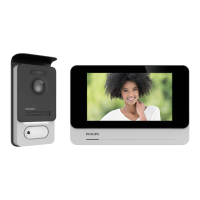
DES 9901 VDP
5 1 0 0 6 3
1
2
3
4
5
6
1 2
7
8
1
2
1
2
DES 9901 VDP
5 1 0 0 6 3
Made in P.R.C
IP44
20V 110mA
RFID 125kHz
Avidsen
19 avenue Marcel Dassault
37200 TOURS
FRANCE
Notes:
-
When someone presses the call button, the inside monitor rings and the video is displayed.
- To change the nameplate label, remove the front cover and unclip the plastic cap behind
the label.
5. PRODUCT INSTALLATION
Important notes and advice:
- To make the most of your intercom panel, we recommend conguring it (RFID, for 1 or 2
families, 1 or 2 intercoms, loudspeaker volume) before nal installation. To do this, you will
need to connect it on a table, to ensure that the settings have been congured correctly.
- If you test your product before installing it, ensure that you do not test it with the intercom
panel and the monitor in the same room to avoid the videophone emitting a shrill noise
(feedback).
Do not expose the camera lens to direct sunlight or a reective surface.
- Do not expose the intercom panel to any source of light at night as this will inhibit
activation of the twilight sensor.
- We recommend running the cables through a protective sheath to protect them against
breakage and bad weather.
- For the WelcomeEye Connect version, to take full advantage of the WiFi function of your
monitor, we advise you to check that your WiFi network is accessible where it is installed.
1. Wiring
In order to avoid the risk of interference and malfunction, do not pass the wire for your
videophone through the same sheath as the electrical wires.
Warning: Do not under any circumstances double wires to increase the wire size.
a. Connecting the videophone (monitor, intercom panel and camera)
Wires to be used: 2 wires 0.75 mm
2
up to 80 m long or 2 wires 1.5 mm
2
up to 120
m long.
- The wires must be in one piece. No wago or domino connector systems are to be used
 Loading...